Mobile App - Android
User Guide#
Application Start and Permissions#
The application can be run on Android devices by selecting it in the list of applications.

Application icon
Upon the first start of the application, user permissions will be requested, which are required to correctly run the application.
-
Location services
-
to assign location data to photos
-
to distinguish between various types of location data or signals on the device
-
to use the path tracking feature
-
-
Camera and Video
- to use the device camera for the snapshot capturing feature
-
Make and manage calls
- to assign data of the mobile network or the WIFI network to captured snapshots as input to geotagged information
In the case that any of mentioned permissions is not allowed by the user, the application is not able to work properly. Thus, the dialog requesting such permissions is shown to the user (Fig. 1). A user is able to invoke the Android system permissions dialog again by clicking the “Confirm Permissions“ button. If these dialogs have been banned by the user, there is still the possibility to set permissions in the System settings before the application start. This procedure may vary on different Android devices and system versions.
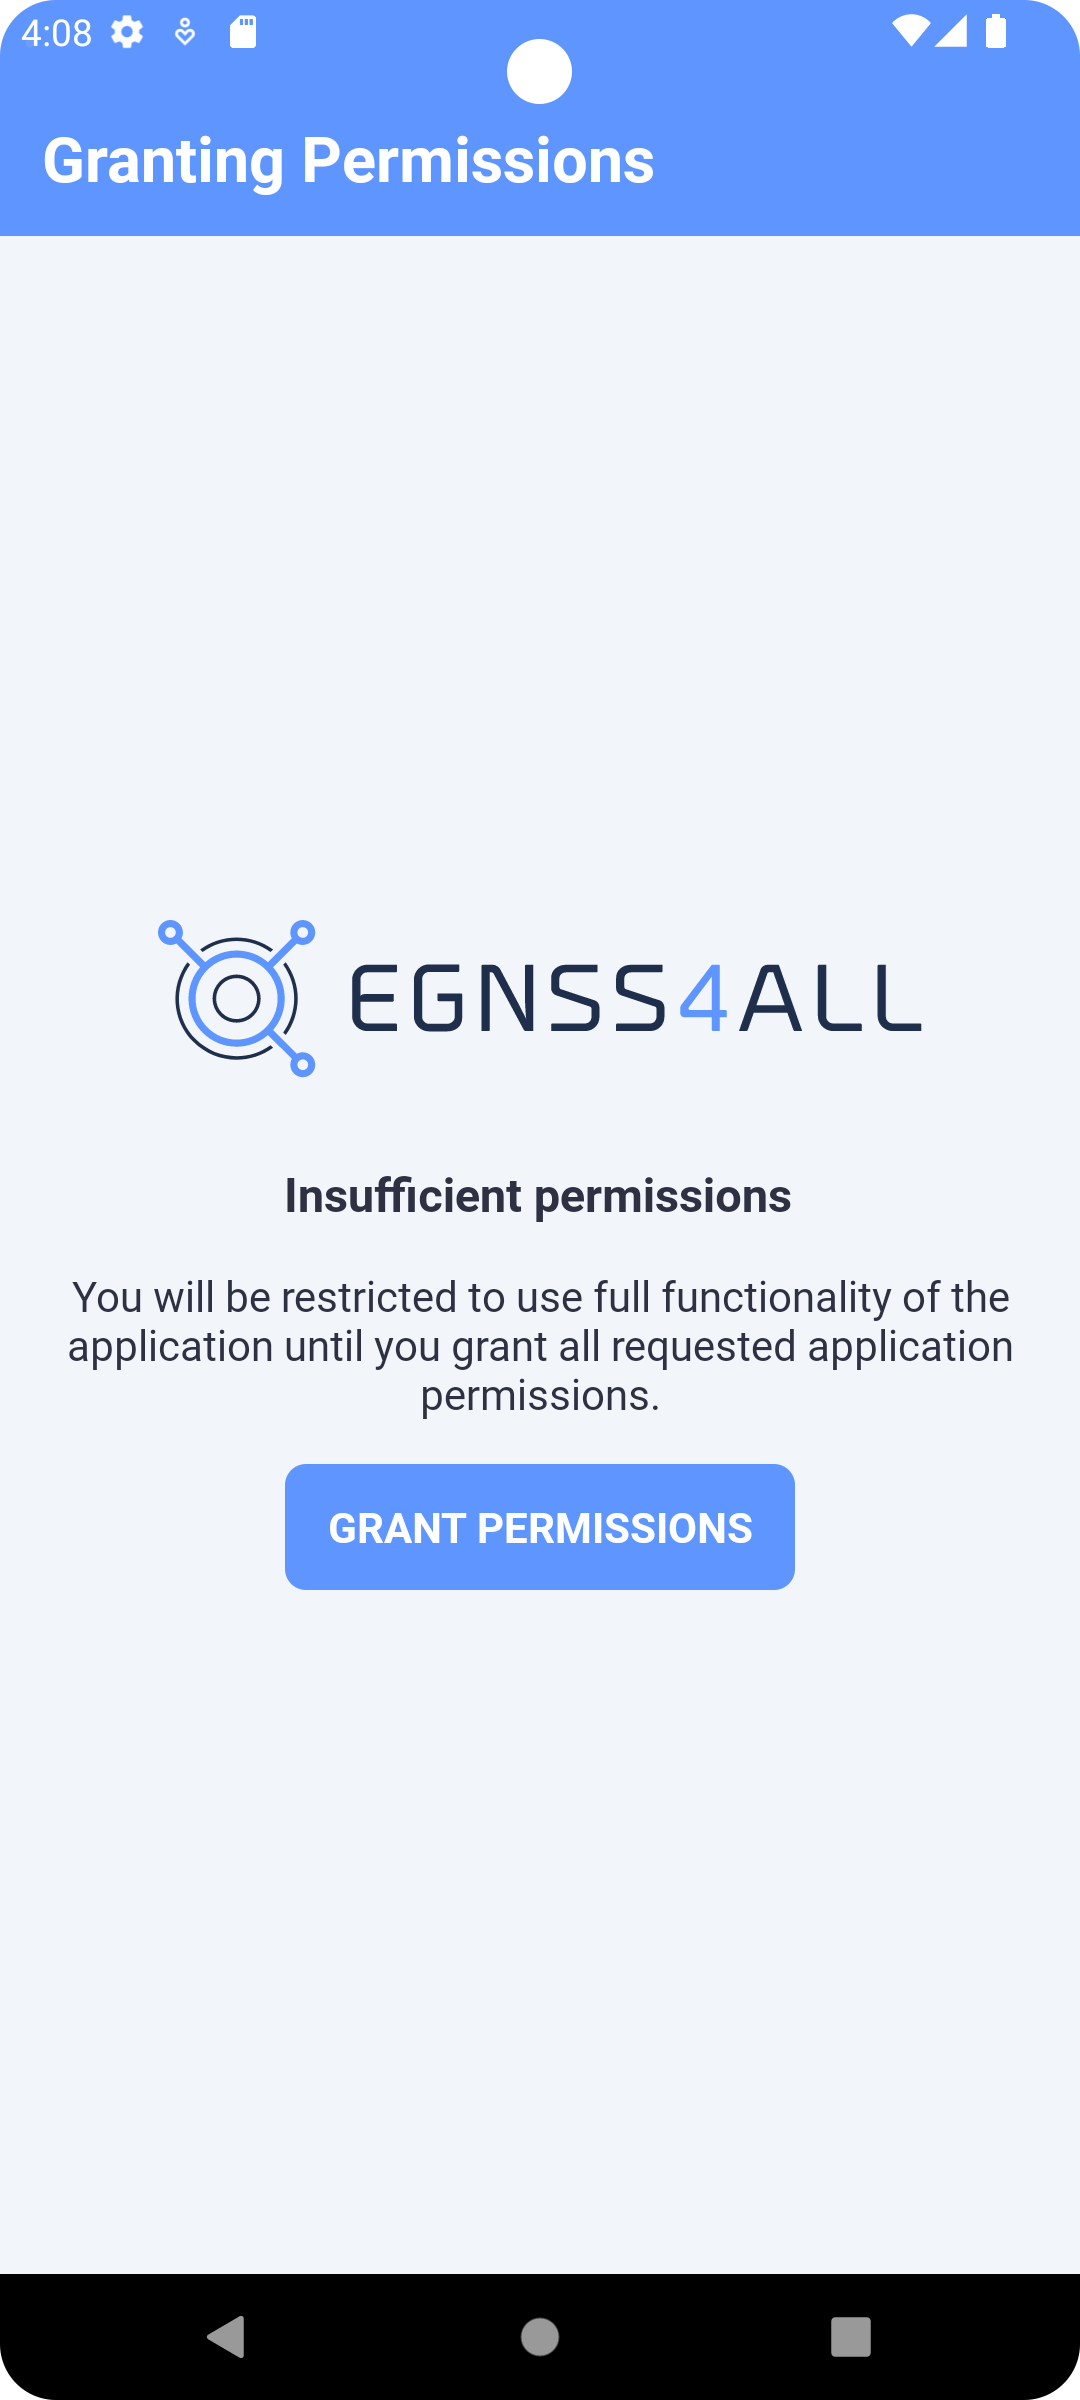
Fig. 1 Permissions request
Login#
After the first launch of the application and granting all the necessary permissions to the application, the user will be presented with a login screen (Fig. 2), where the assigned login and password will need to be filled out.
Click the Sign In button to complete the login.

Fig. 2 Login screen
The Select Server button allows you to choose the backoffice server to use. It is possible to use the default one or your own.
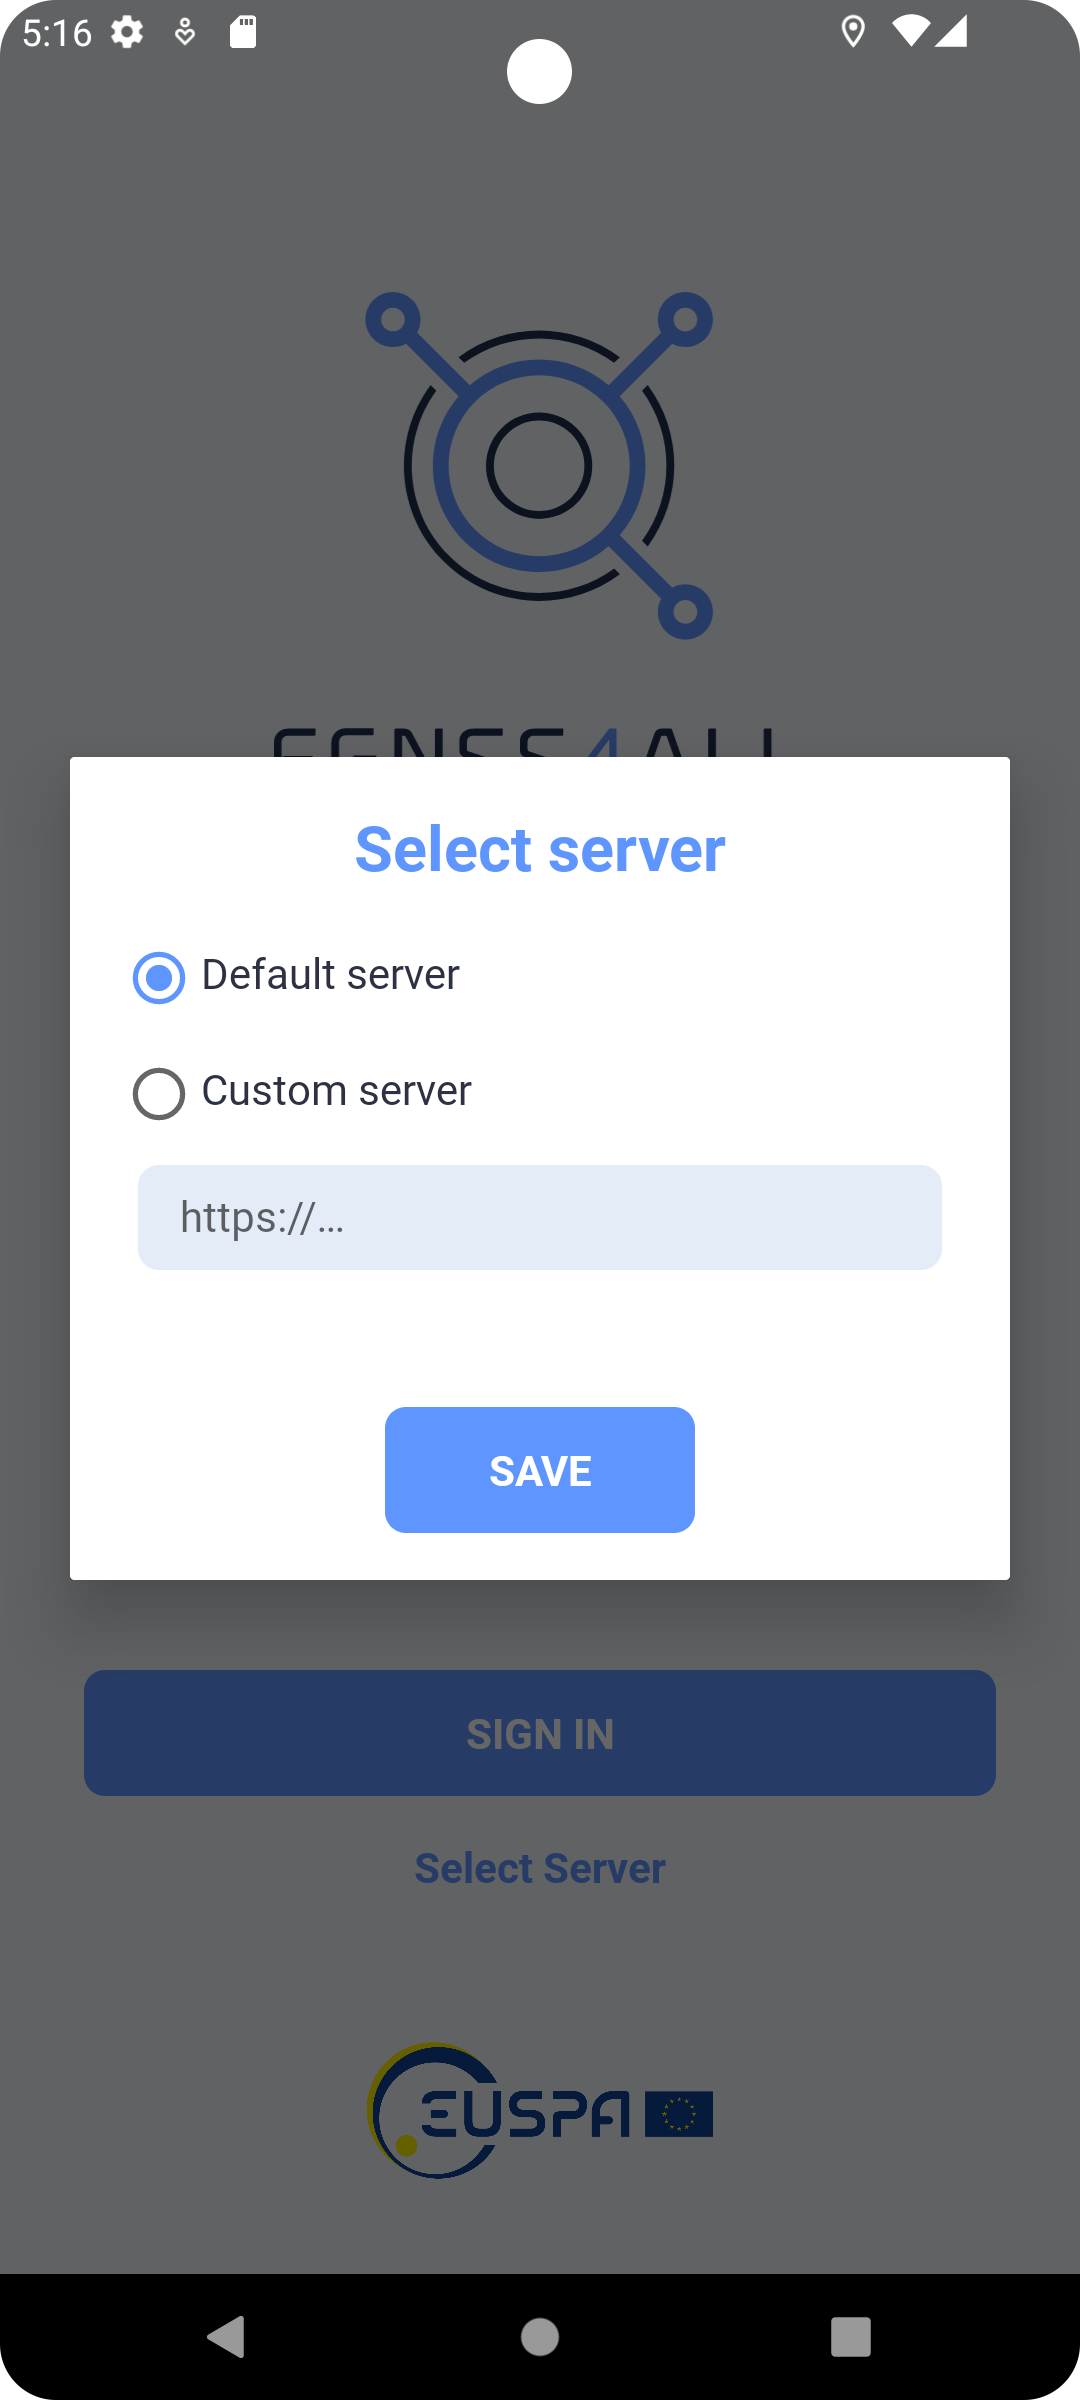
Fig. 3 Select Server
To successfully log in, all data most be entered correctly and the device should be connected to the Internet at the time of login. The login details will be remembered for future uses of the app. Re-login will be required only after explicit logout of the user. After each login, the synchronization process (Main screen) starts automatically.
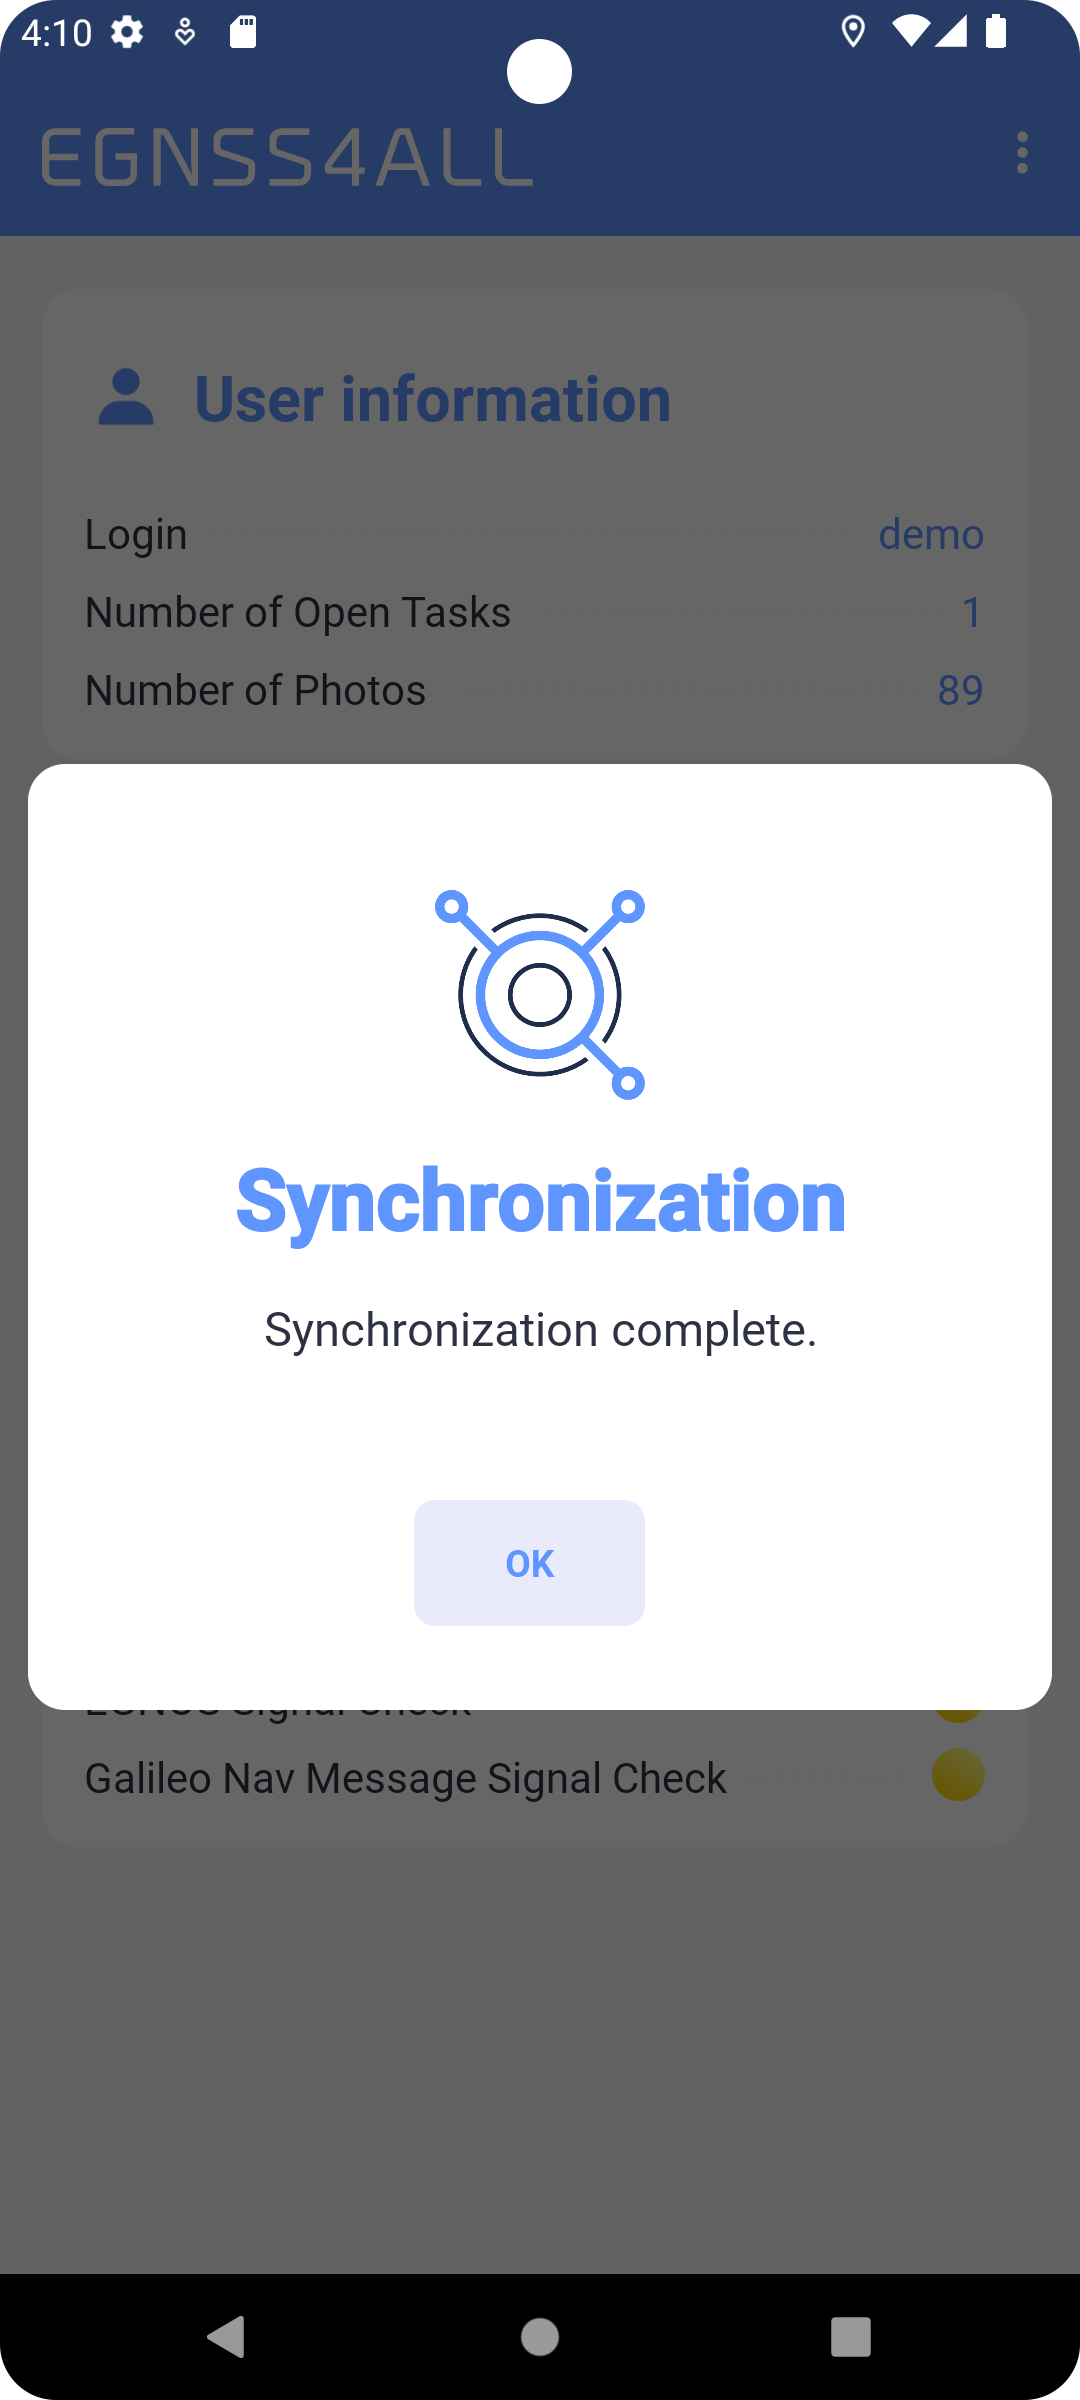
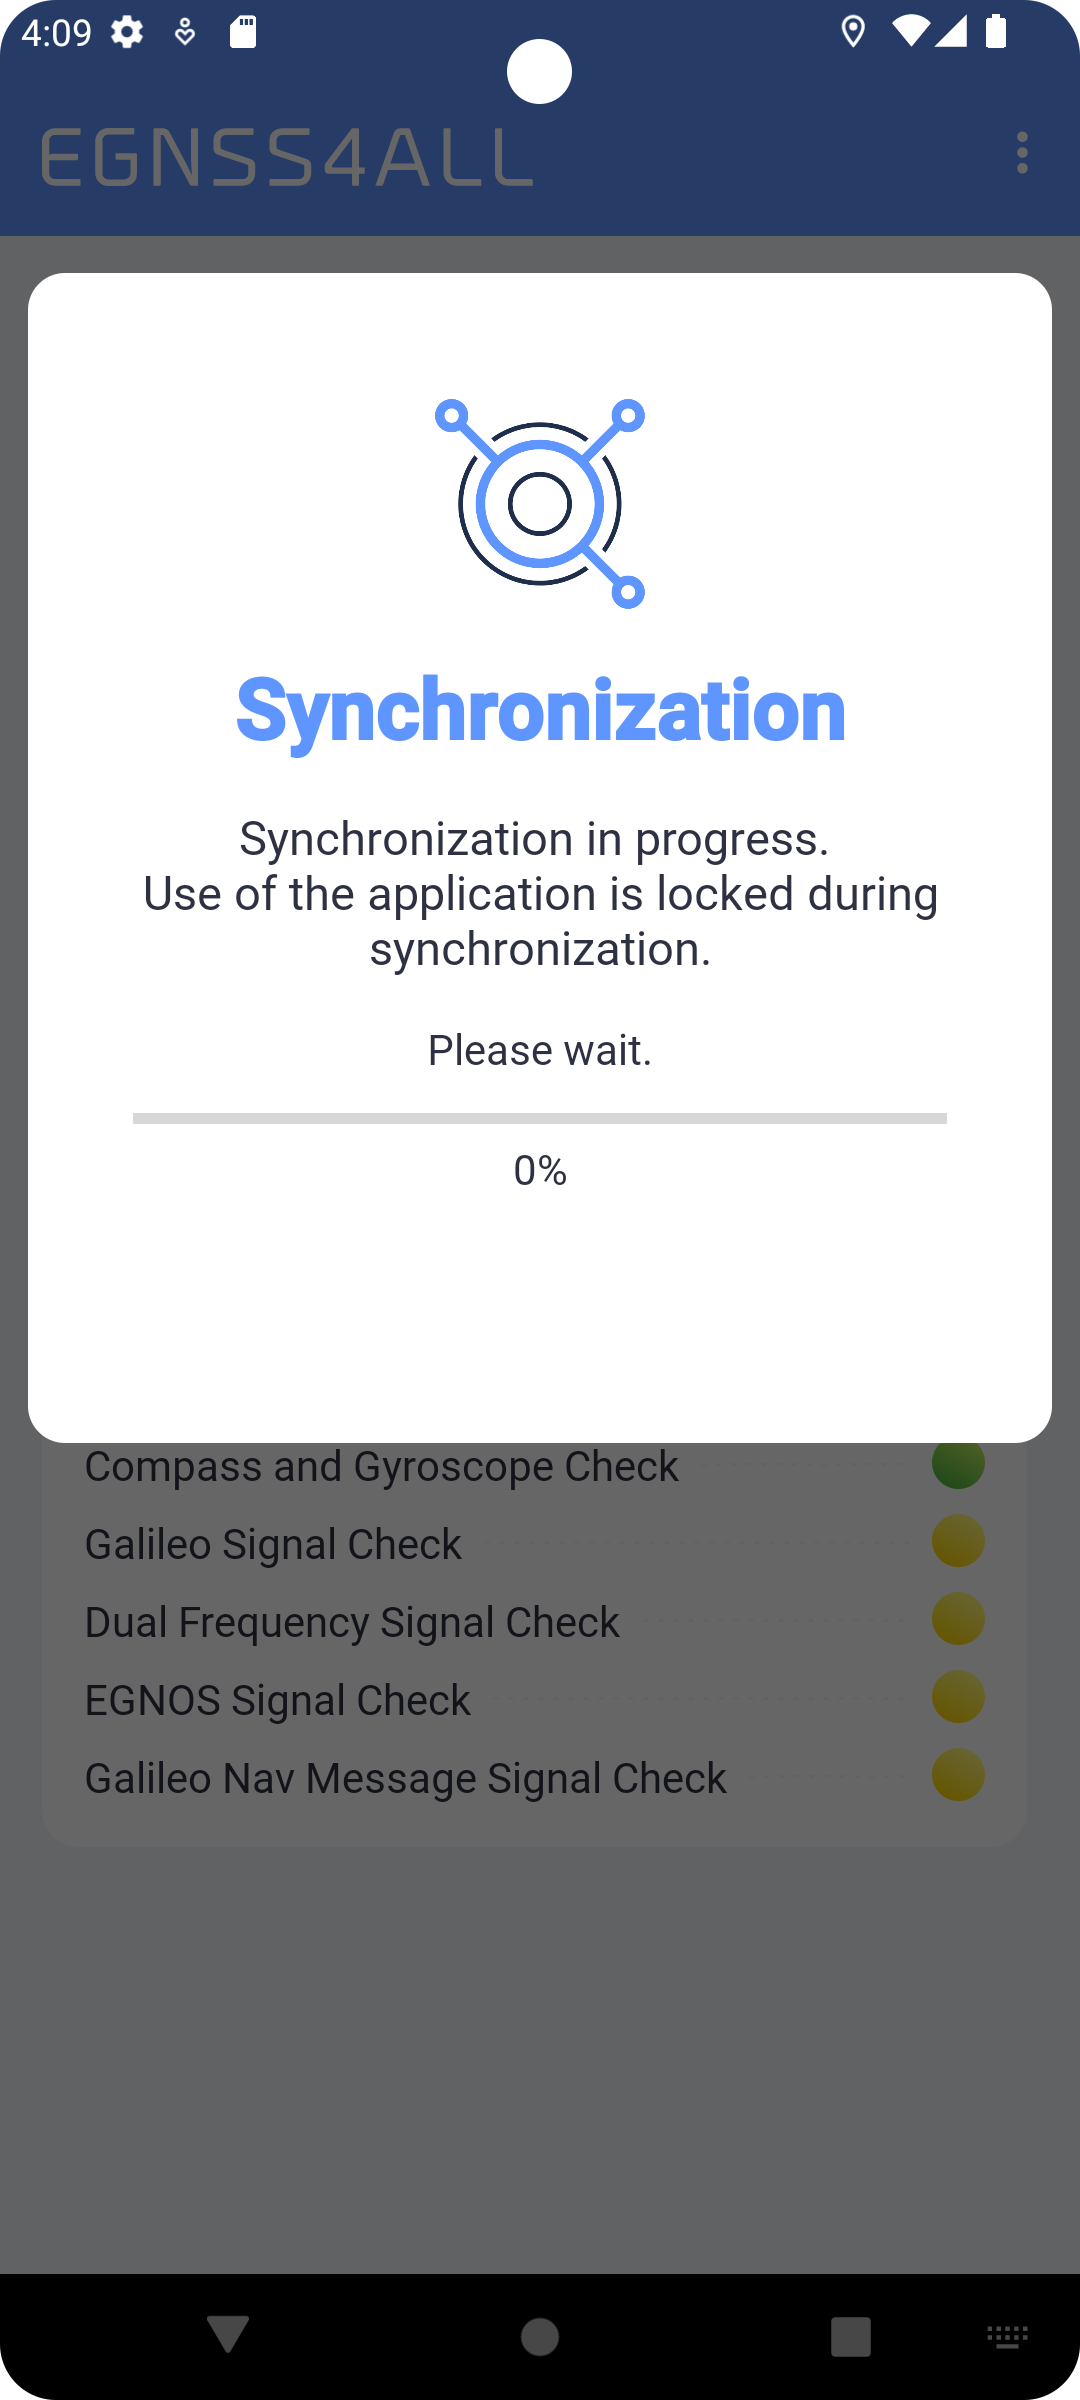
Fig. 4 Synchronization
The synchronization process allows you to align information between backoffice server and apps
Main Screen#
In the upper section of the Main screen, the “Logged in user” field can be found, which provides information about the currently logged in user.
The attributes of the host device are displayed in the middle of the “Basic Information” section. Traffic lights are displayed next to some of the attributes. Their detailed description is given in the sidebar and can also be found in the About screen.
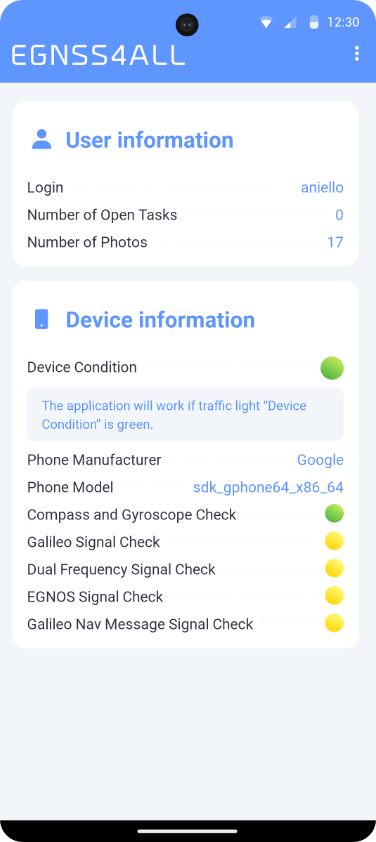
Fig. 5 Main screen
Traffic Lights#
Device capabilities show the current ability of the device to receive location data. Green indicates the active ability of the phone to determine its current location. Red means an inability to determine your current position. If this is the case, location services on the device may be disabled. Other attributes use the green or yellow color. Green indicates that the device has that particular property. Yellow indicates that the device does not have the given property or has not yet been able to verify the given availability and may change to green over time. Other items representing the individual properties of the device, which are listed below, can only be green or yellow. Each yellow item may change to green over time. The opposite statement does not apply, and the green item will remain green forever.
### User functions
To navigate between the different application modules, a main menu opens when you click on the three dots in the upper right corner of the screen. The context menu has the following options:
-
Synchronize
-
Starts the process of synchronizing data with the server. You cannot use the application during synchronization and you must be connected to the internet.
Task Overview
- Displays the task list screen
Unassigned Photos
- Displays the list of standalone photos, which are not assigned to the specific task
Map
- Changes the screen to the map view with all taken photos
Path Tracking
- Changes the screen to the map view for taking new paths or viewing paths that have already been taken
Settings
- Allows the user to change the settings
GNSS Raw Data
- Displays an overview of currently received GNSS data
About
- Shows basic information about the application
Log out
- User log out, reverts to the login screen
Task List#
In the task overview (Fig. 5), user tasks are listed by name, status, number of captured images, creation date and due date. By clicking on a specific task, a screen with details and options to edit is displayed.
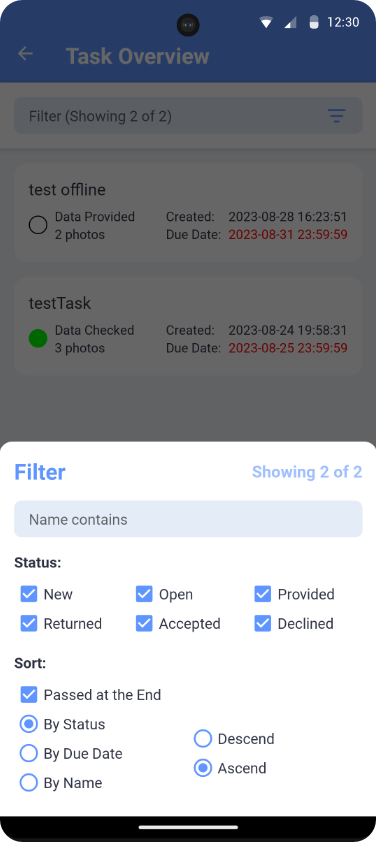
Fig. 6 Task list
The go-up filter (by tapping the Filter bar at the top of the screen) restricts the task list by task name and status. In the filter, you can also set the sorting of images in the list according to the options offered. When the Expired option is selected, the sort is divided into two depending on whether the due date has passed or not. The sorted list of tasks will be displayed for each group independently. The group of tasks with expired due dates (Due date marked in red in each item in the list) will be included at the end.
The filter settings are retained even after the application is closed.
Tasks can be set in following states, which also determine their editability:
Description |
Editable |
|
|
New |
YES |
|
Open A new task, which has been already displayed by the user. The user is aware of the task. |
YES |
|
Returned |
YES |
|
Data provided The task which was completed and sent by the user to the PA |
NO |
|
Data confirmed (approved task) The completed task has been approved. |
NO |
|
Data checked (rejected) The completed task has been rejected. |
NO |
|
Closed The task has been closed is not active. |
NO |
To ensure that all tasks are current, the user must manually start the synchronization process (M).
Task detail#
The task detail (Fig. 6) shows the data attributes of the task, including all captured images. Depending on the status of the task, the task can either be edited or viewed.
-
The upper section lists the basic data attributes of the task.
-
The Instructions section shows the description needed to complete the task given by an authorized staff member of the Paying Agency (PA).
-
The Reason for return section describes the reason for the Paying Agency (PA) why the task was returned for a new performance.
-
The Note section is completed by the user as part of completing the task before it is submitted.
-
The photo section shows thumbnails of photos taken. The user takes photos by clicking the
 , which enters the camera mode for shooting (Camera Mode). Tap to
delete the currently displayed photo
, which enters the camera mode for shooting (Camera Mode). Tap to
delete the currently displayed photo
 .
. -
The Map button shows all photos of the task in the map view.
-
Use the buttons Previous and Next to move between photo previews.
A photo cannot be deleted if it has been already sent to the server, even if the task is in an editable state.
Click the SEND button to send the message. After successful submission, the task can no longer be edited. If an error occurs during sending process, for example if the Internet connection was not strong enough at the time of sending, the task will be locked. In the locked state, the task is non-editable and the user can only retry its successful submission, or remove this locked state by starting the synchronization process.

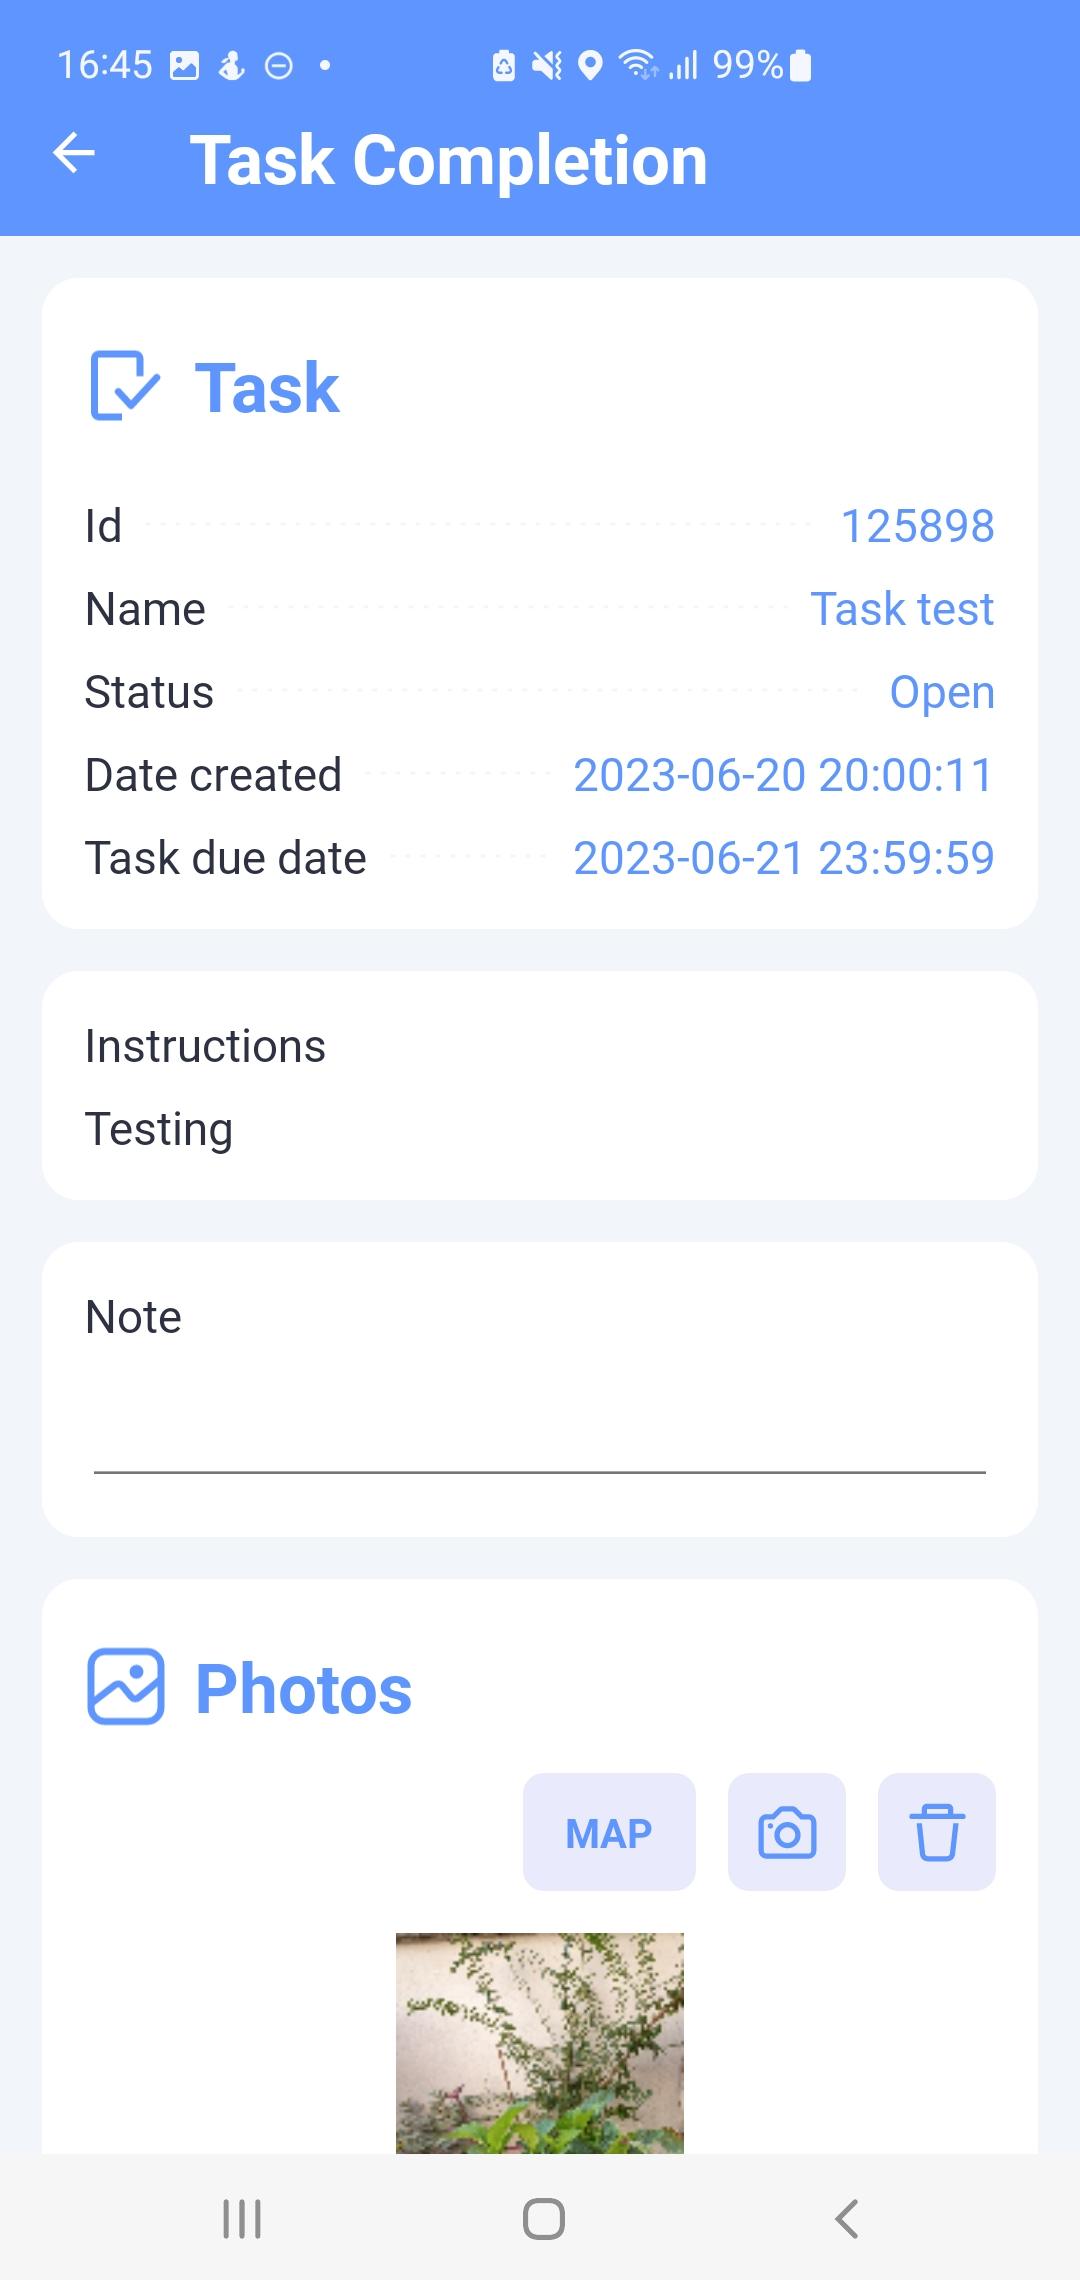
Fig. 7 Task edit
Clicking on the photo preview will open a window with its detail (Fig.
7). The basic attributes of the photo are displayed in the upper left
corner. In this view, you can switch views between all photos of the
task using the buttons
![]() and
and
![]() , or by swiping your finger on the photo to the right or left. The
screen Detail supports displaying in portrait or in landscape mode. If
possible, the photo can also be deleted from this view with the
, or by swiping your finger on the photo to the right or left. The
screen Detail supports displaying in portrait or in landscape mode. If
possible, the photo can also be deleted from this view with the
![]()
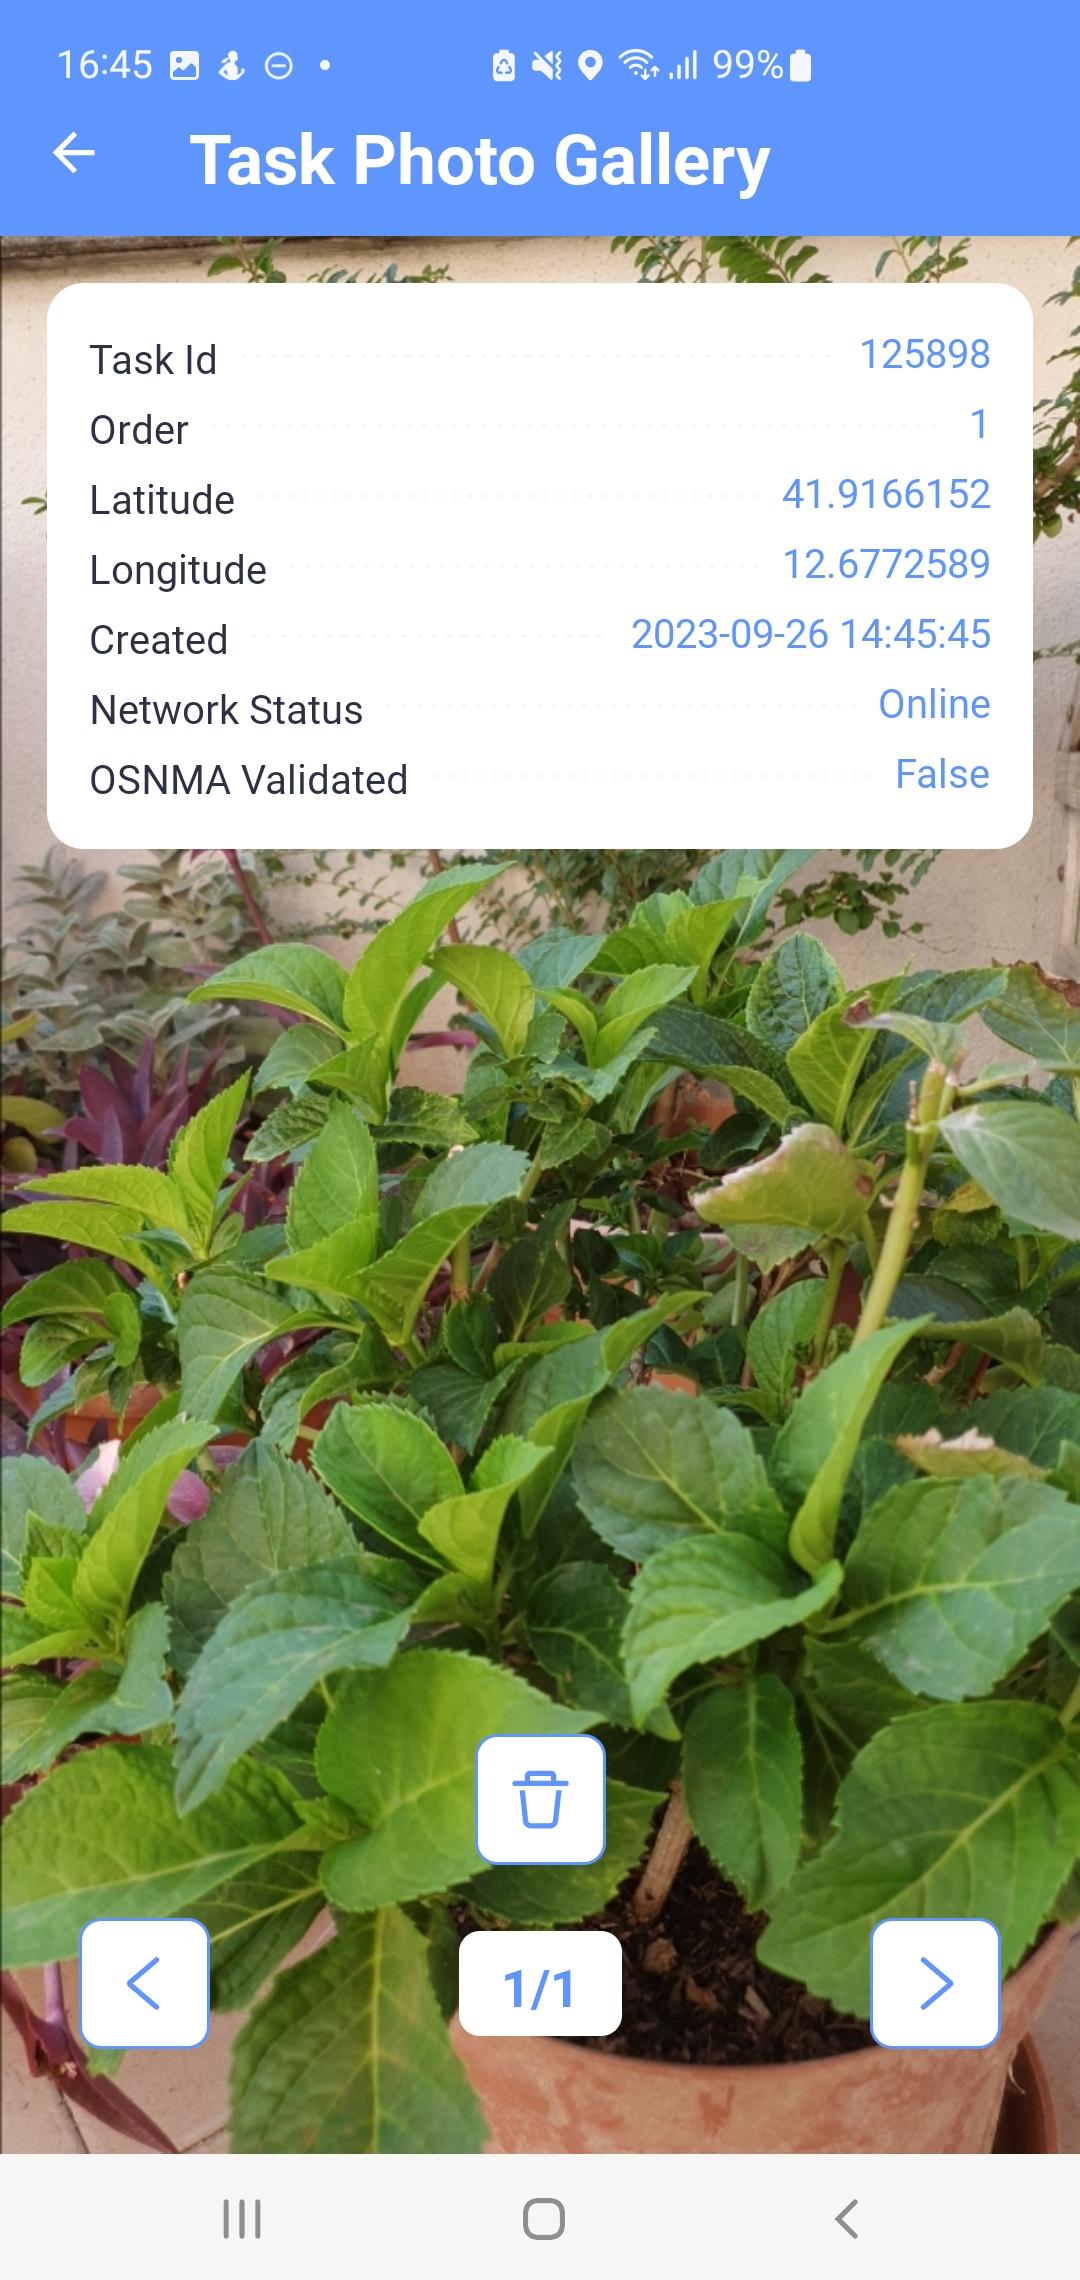
Fig. 8 Photo detail
Standalone Snapshots#
Screen showing photos in the list (Fig. 8) taken separately outside the task. In each list item, on the left is a preview of the photo and on the right a list of basic metadata.
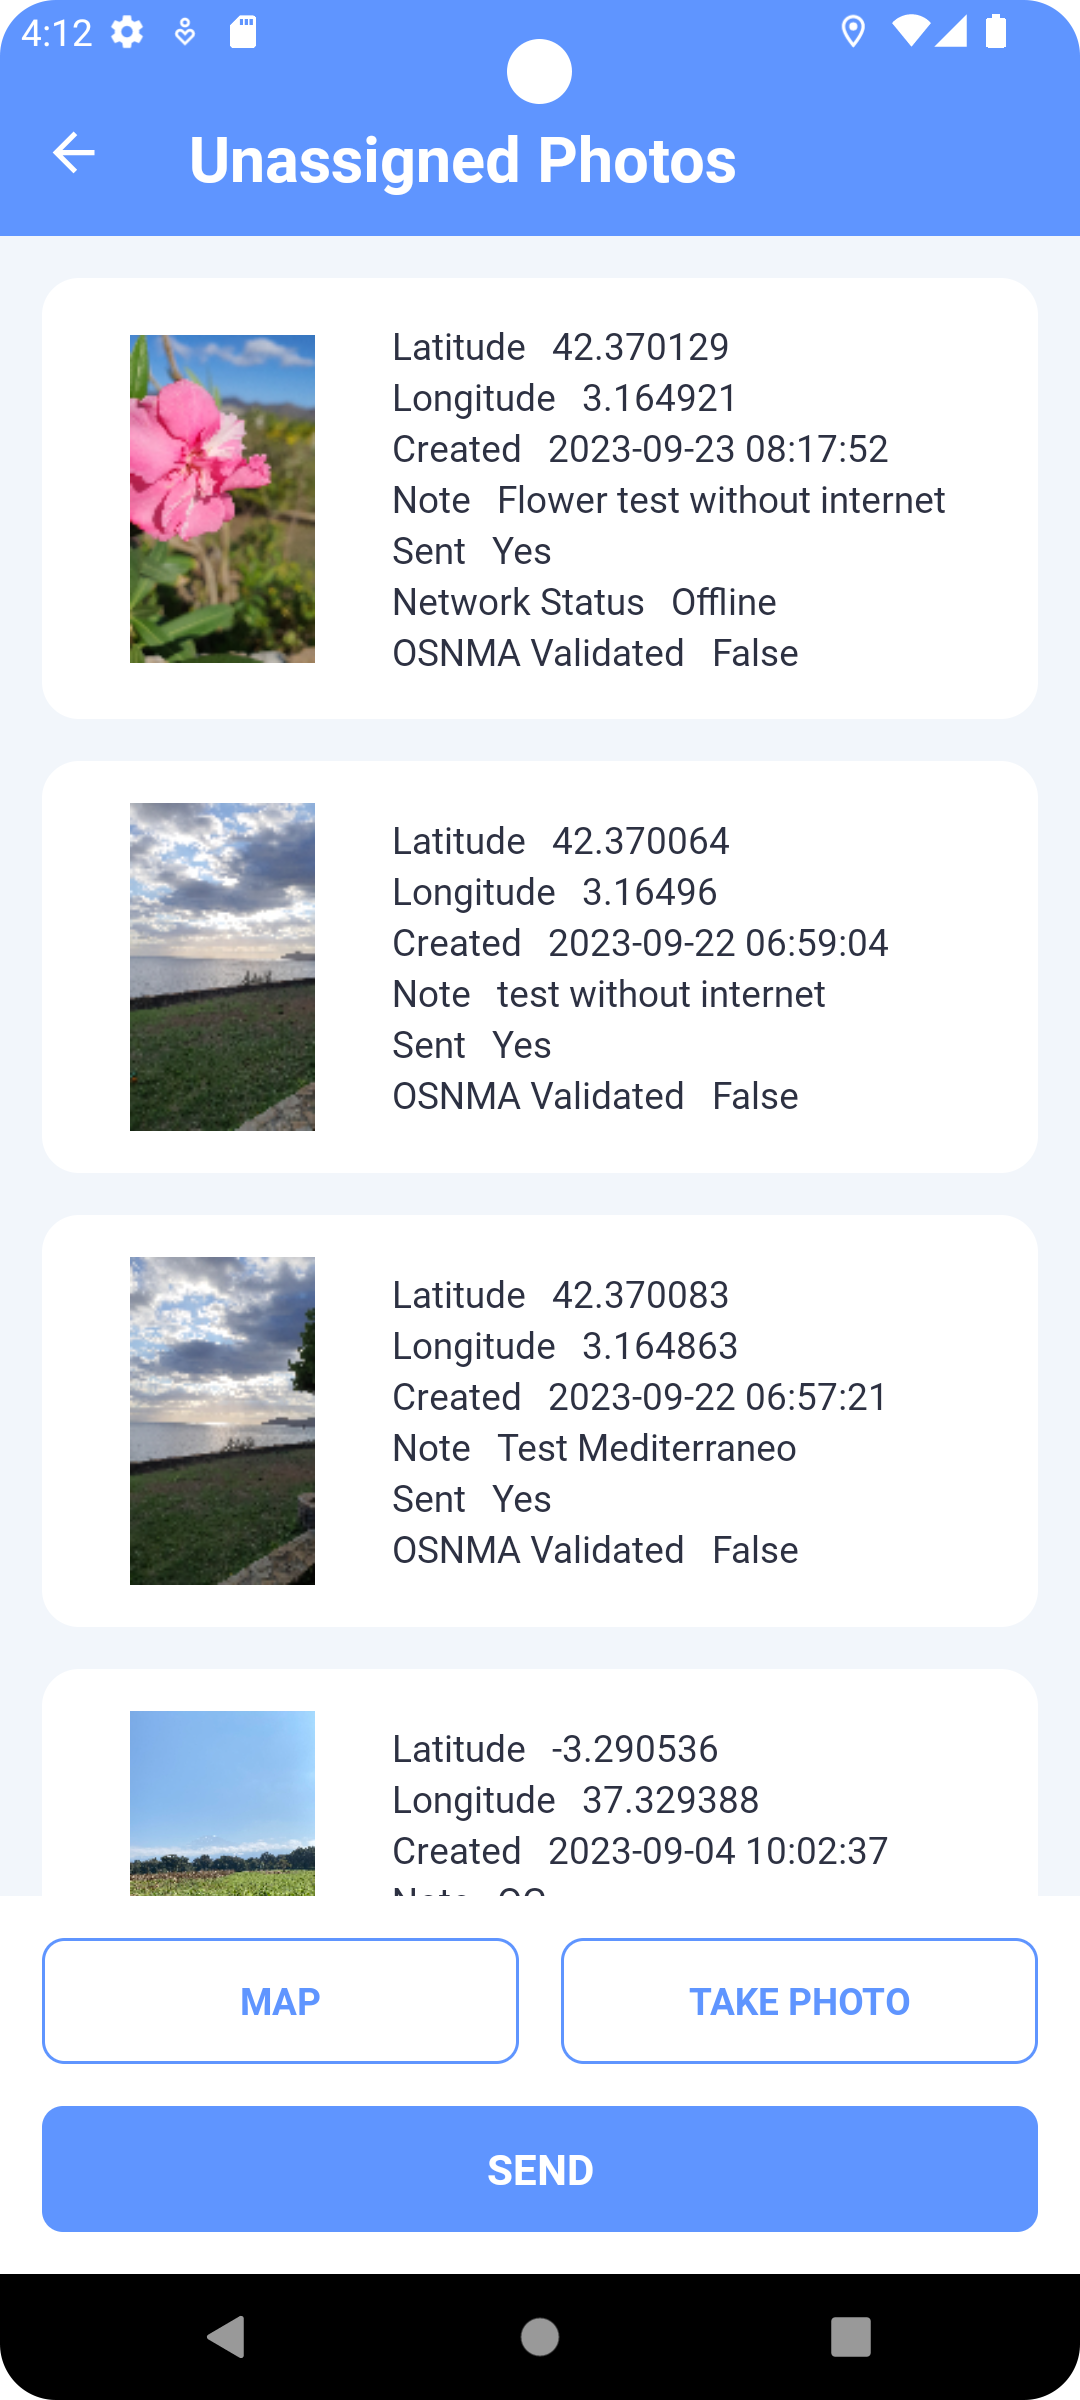
Fig. 9 Overview of standalone photos
From this screen, new photos are taken by touching of a button TAKE PHOTO, which enters the user to take camera mode (Camera Mode). Click the SEND button to send all newly taken unsent photos in the list. The MAP button shows all these photos in the map view.
Clicking on a photo item in the list opens its detail (Fig. 9), where the editing is performed using the buttons at the bottom of the screen.
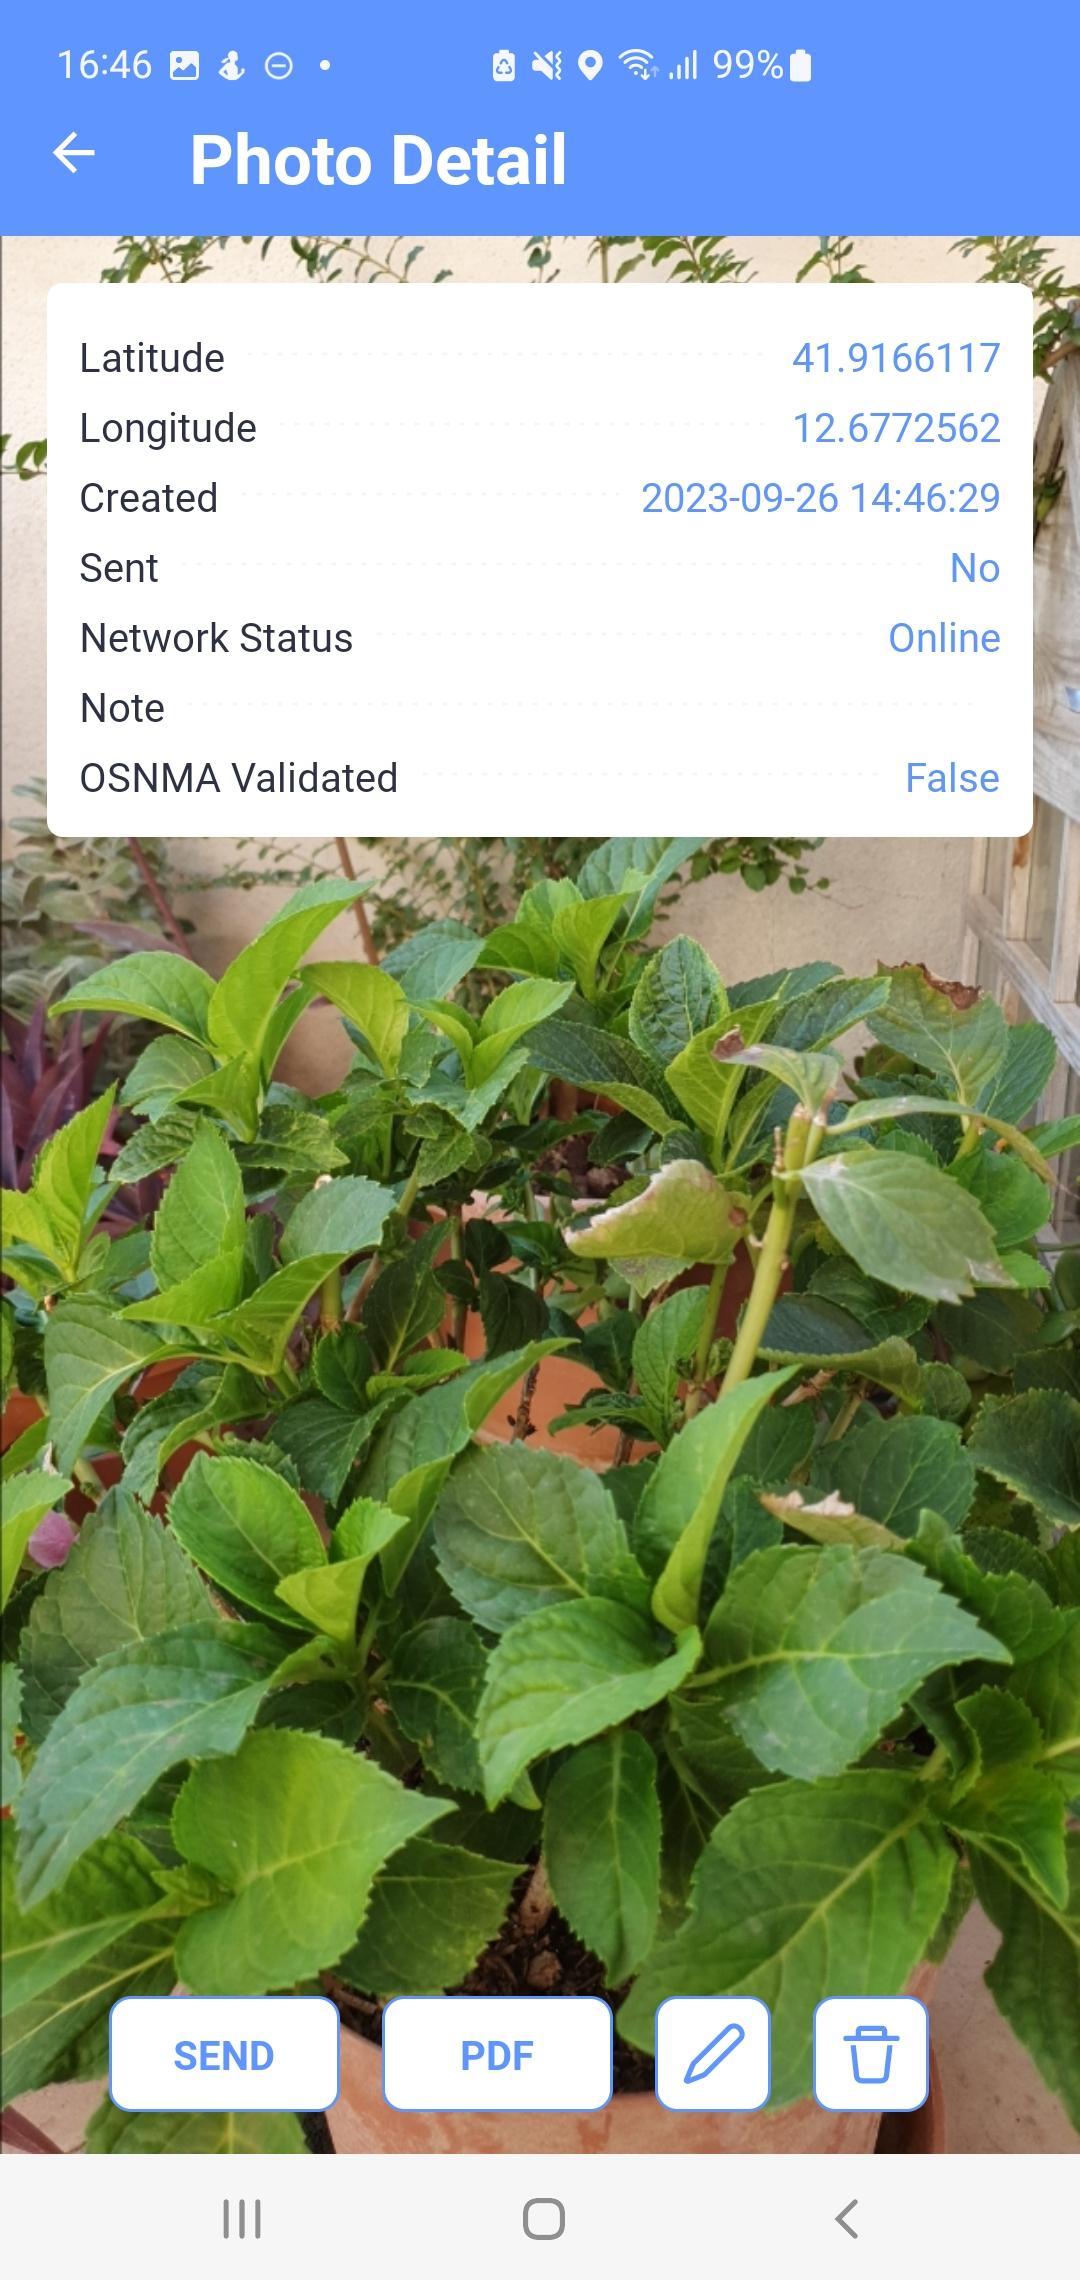
Fig. 10 Detail of a standalone photo
-
 opens a dialog for editing a note on a specific photo.
 -
 deletes the displayed photo.
 -
SEND button uploads the displayed photo to the server.
After sending, the photo becomes non-editable. If an error occurs during uploading, the photo will be set to locked mode. The same rules apply to this mode as for submitting a task.
Camera Mode#
A camera screen interface is used to take a single photo or a photo for a task (Fig. 10).
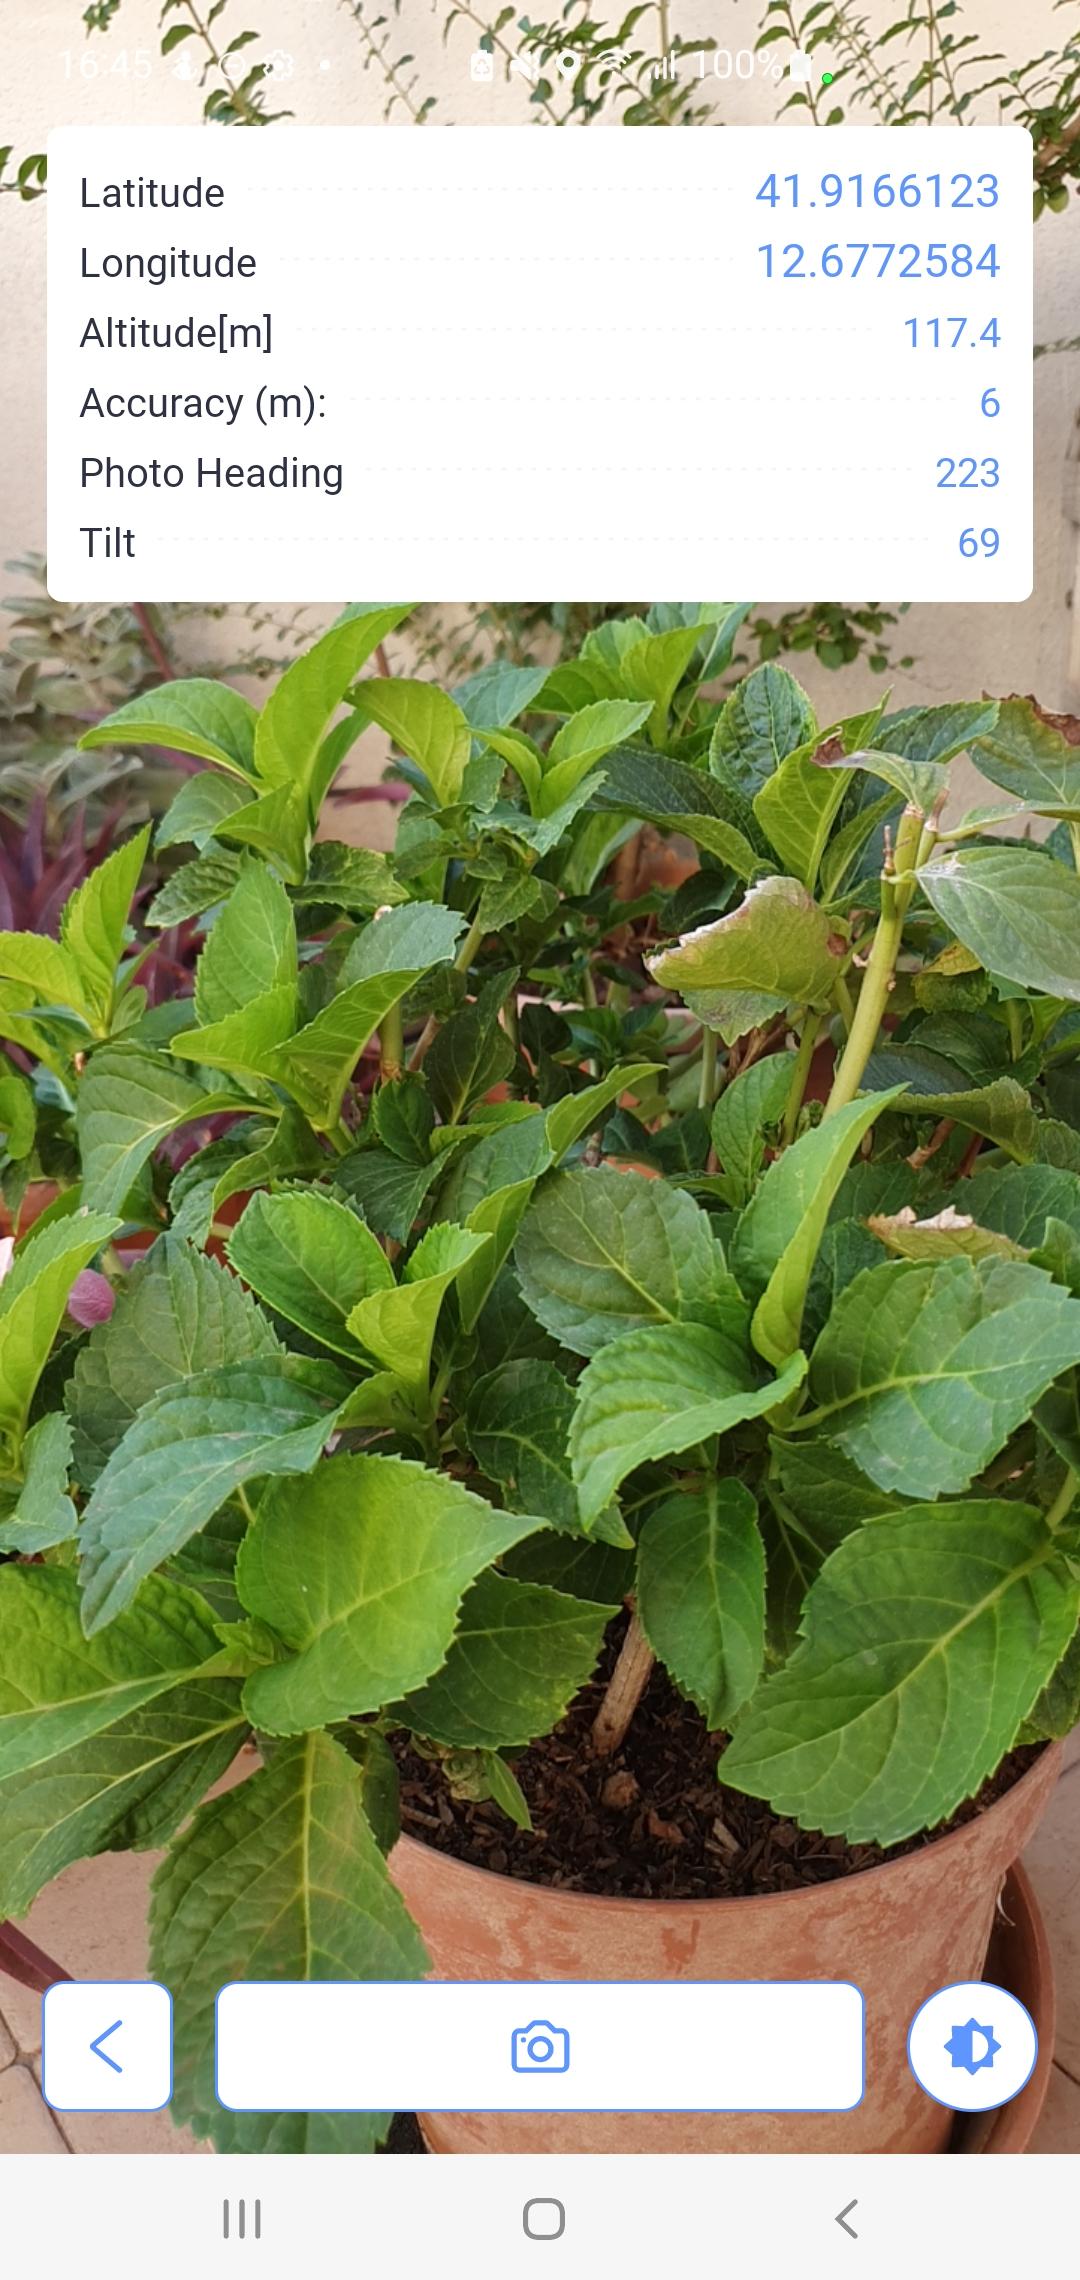
Fig. 11 Camera mode screen
The basic location data is displayed in the upper left corner:
-
Latitude indicates the latitude in degrees.
-
Longitude indicates longitude in degrees.
-
Altitude indicates the height above the reference surface of the WGS 84 ellipsoid.
-
Accuracy is an estimate of horizontal accuracy as the radius of reliability.
-
Image azimuth indicates the azimuth of the horizon the camera captures.
-
The angle expresses, in degrees, the tilt of the vertical axis of the screen to project on the horizontal surface of the earth.
If shooting with position center of gravity calculation is enabled in the settings, a window with data on the currently calculated position center of gravity is also displayed:
-
Latitude indicates the latitude of the center of gravity in degrees.
-
Longitude indicates the longitude of the center of gravity in degrees.
-
Samples indicates the current number of processed samples to the total number specified in the application settings.
If manual brightness correction is enabled in the settings, this
![]() is available . Click this button to display a slider to adjust the
darkening or lightening of the image, as needed. The setting of this
correction is retained even after the application is closed. Clicking in
the middle area of this bar resets the brightness lock. If the camera
does not respond to a change in brightness and the image is too dark or
too bright, the camera hardware is not compatible with this application.
In this case, it may help to turn off manual correction in the
application settings (Settings).
is available . Click this button to display a slider to adjust the
darkening or lightening of the image, as needed. The setting of this
correction is retained even after the application is closed. Clicking in
the middle area of this bar resets the brightness lock. If the camera
does not respond to a change in brightness and the image is too dark or
too bright, the camera hardware is not compatible with this application.
In this case, it may help to turn off manual correction in the
application settings (Settings).
The camera supports both portrait and landscape shooting.
The photo is taken by tapping the camera
![]() , or by pressing the hardware button on the device defined in the
application settings (Settings). Then the auto shutter will release
with a countdown of approximately 5 seconds. The following conditions
must be met to take a photo:
, or by pressing the hardware button on the device defined in the
application settings (Settings). Then the auto shutter will release
with a countdown of approximately 5 seconds. The following conditions
must be met to take a photo:
-
The device must have a sufficiently good reception of location data.
-
The user must not move and must stand still.
In addition, if center-of-gravity photography is permitted:
-
The center of gravity of the position must already be calculated or a predetermined number of samples must be collected for its calculation.
If any of these conditions are not met, a warning message will be displayed, shooting will not be enabled and the shooting button will not be available. If any of these conditions are violated during auto shutter release, the image will also be rejected.
Click the button
![]() to close the Camera mode and return to the previous screen.
to close the Camera mode and return to the previous screen.
Map#
The map is divided into two modes, one (photo mode) showing a group of photos of the logged in user (from sets of individual photos or photos within tasks), the other (path tracking mode) shows the currently recorded or already recorded paths.
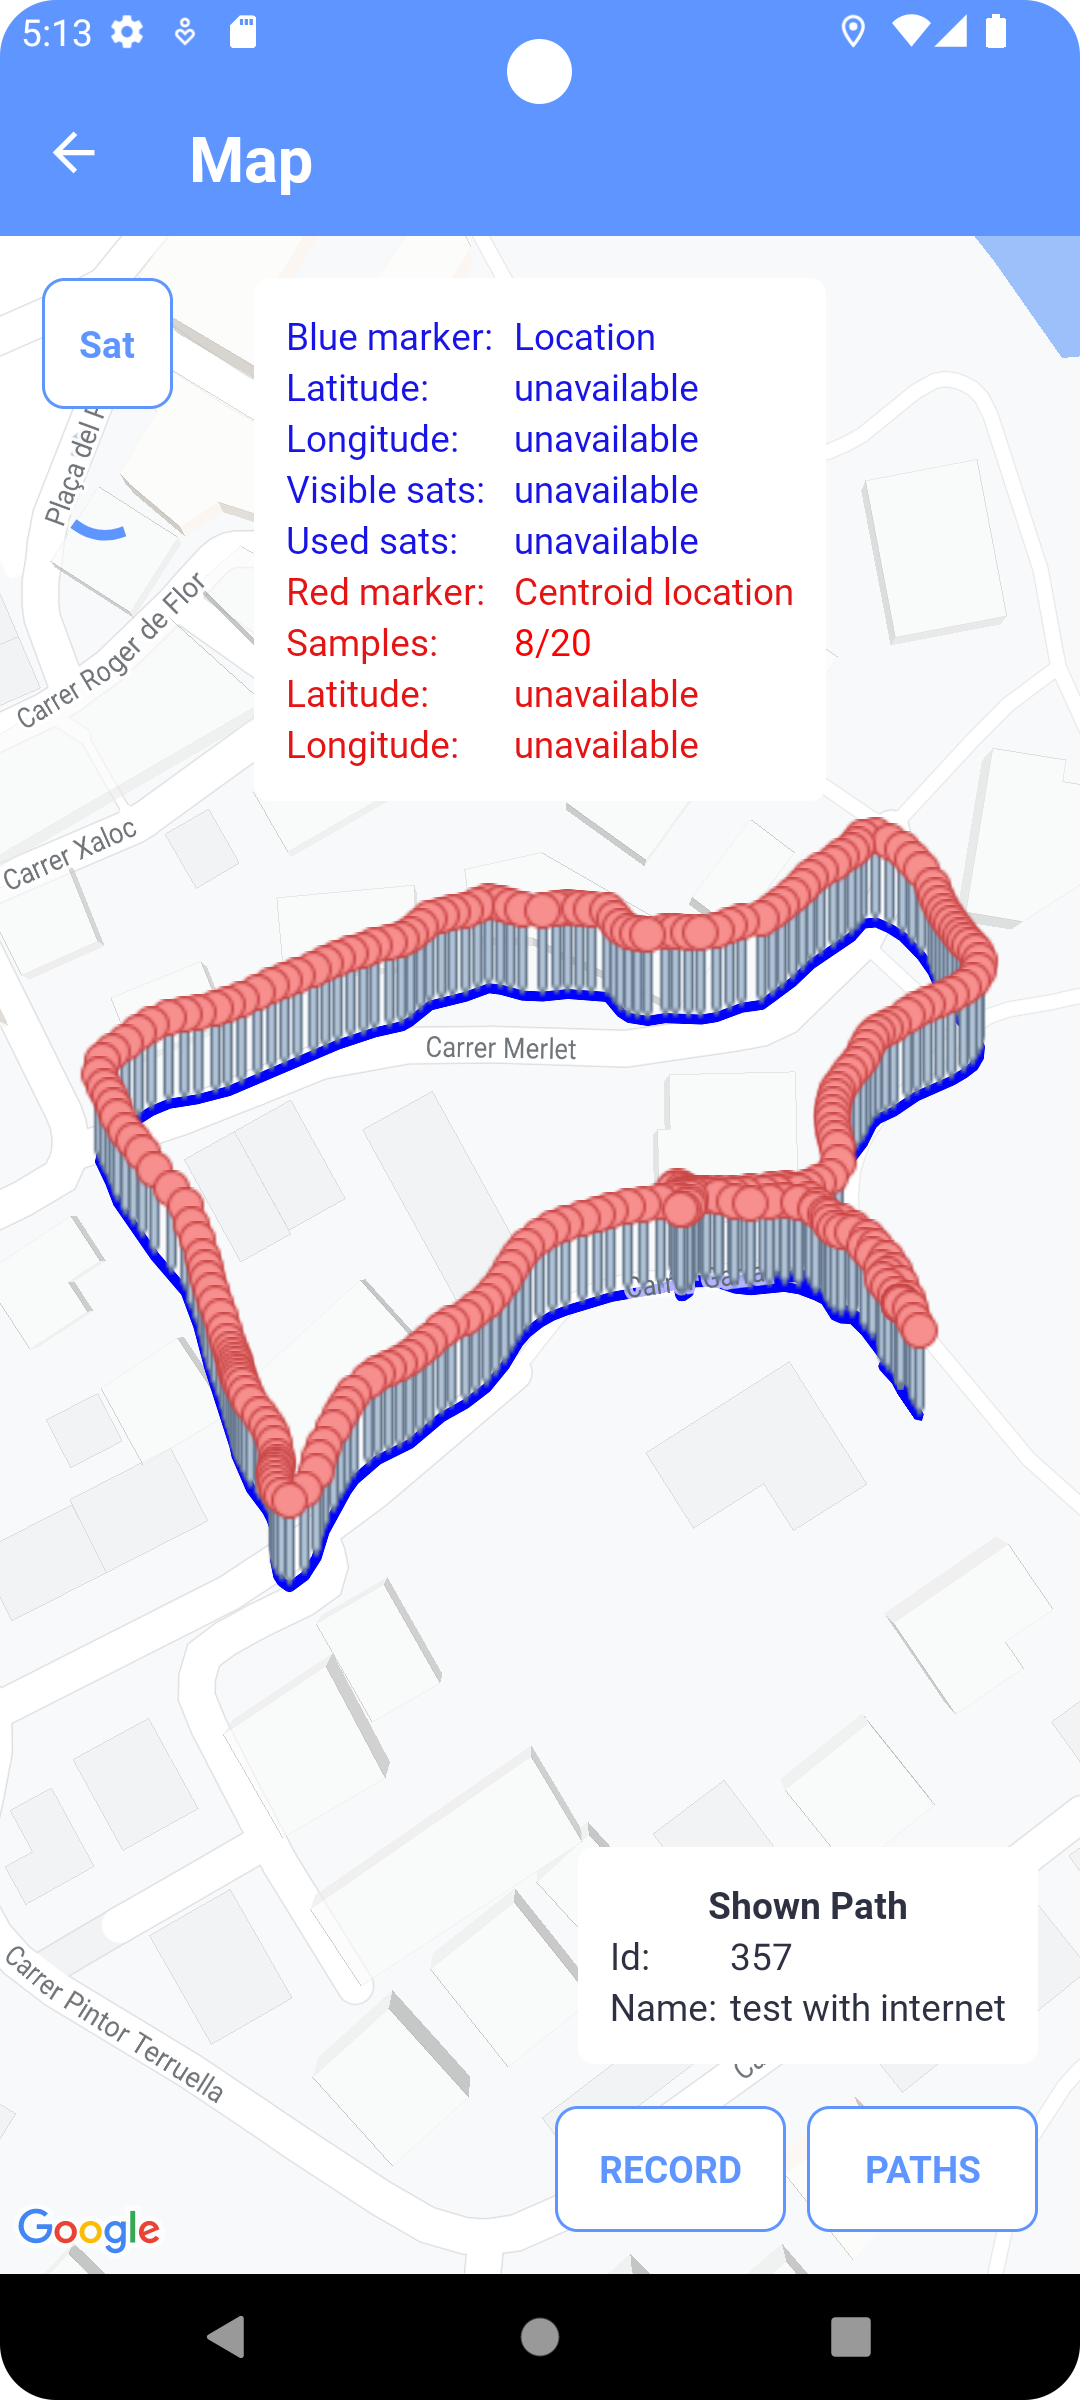
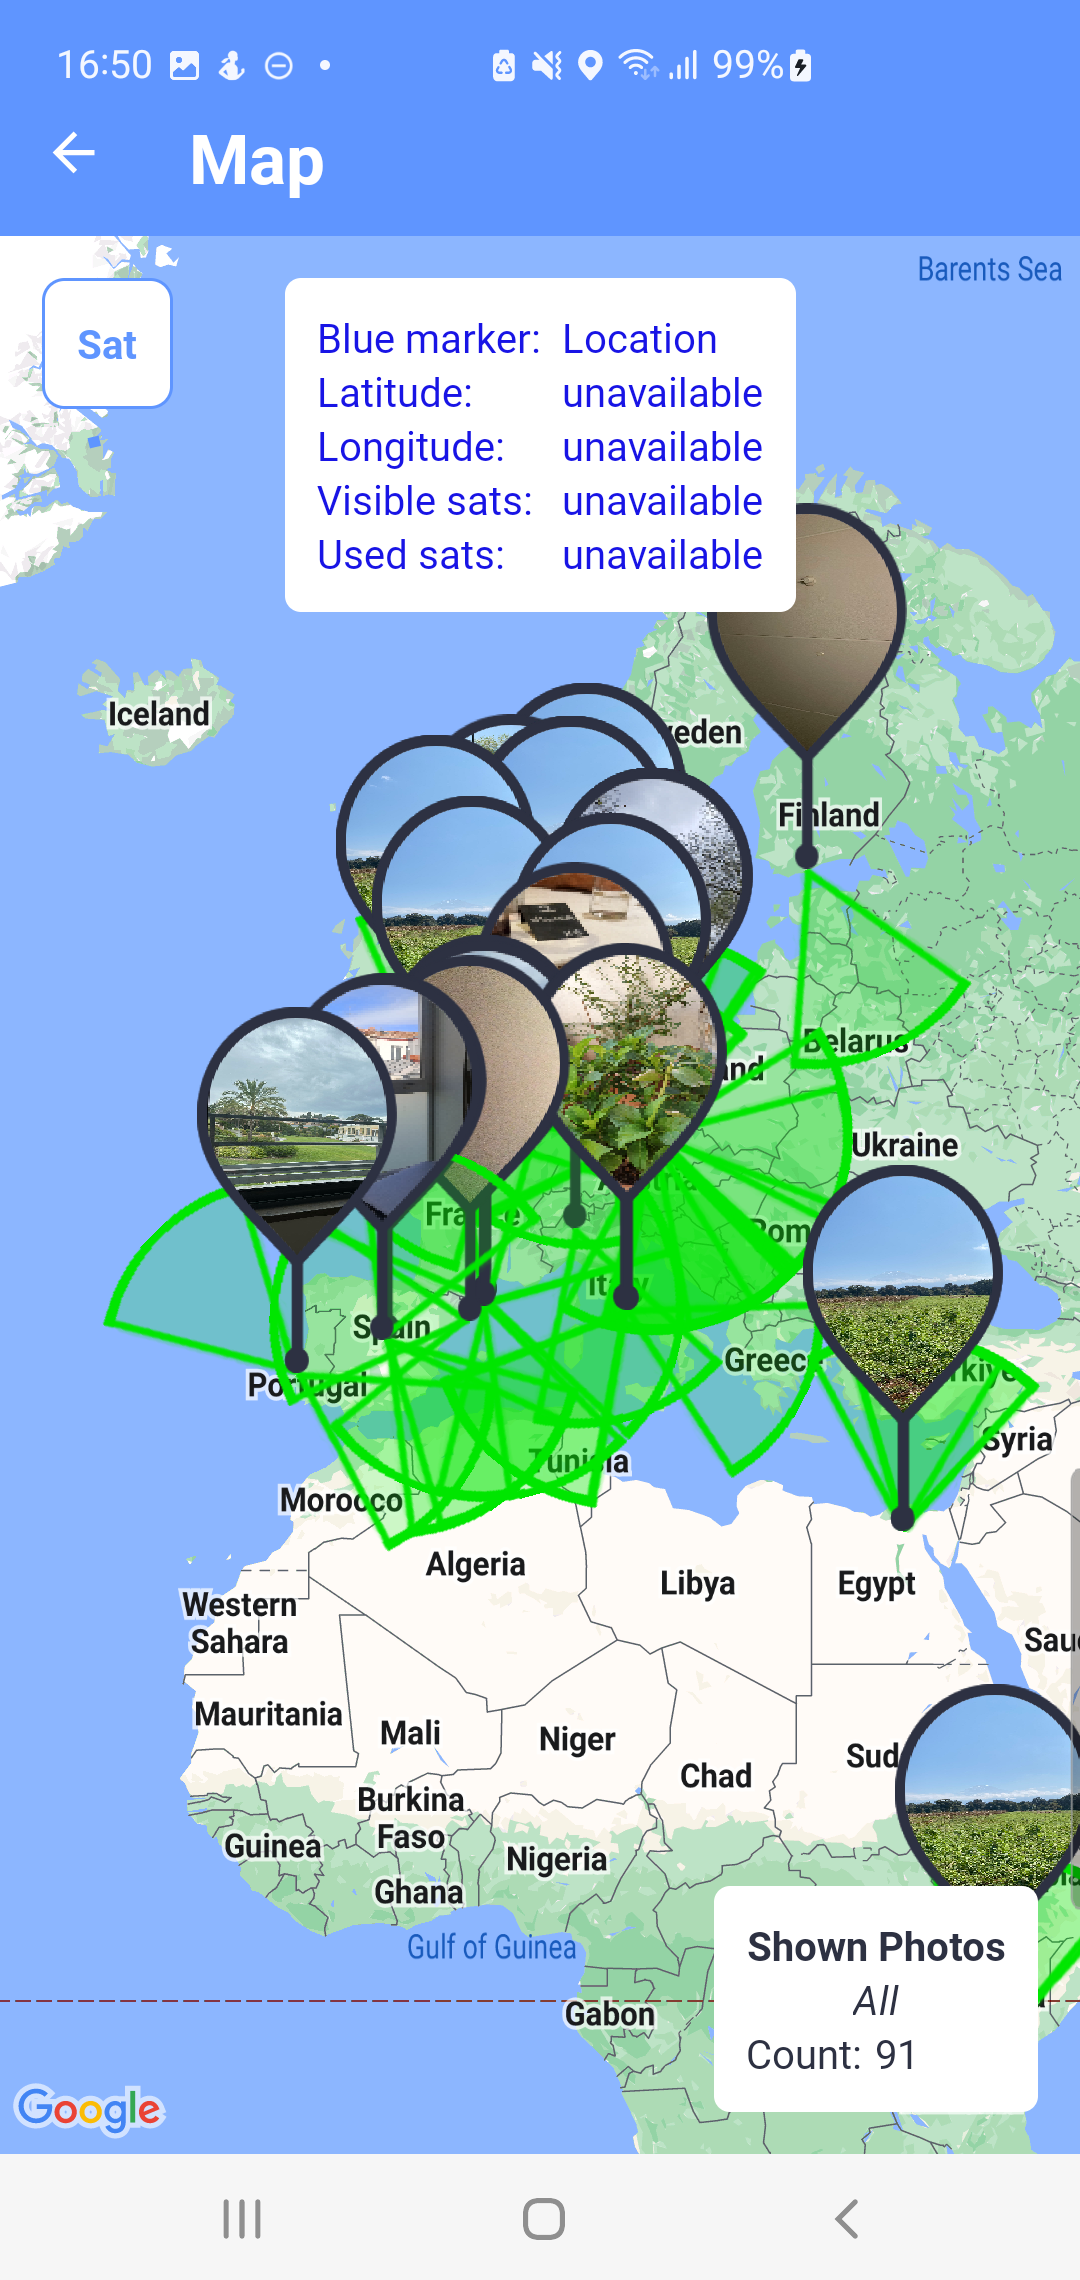
Fig. 12
The map photos and tracked paths If location data is available, the current position will be marked on the map in the form of a blue dot
![]() , which can be navigated on the map by tapping the
, which can be navigated on the map by tapping the
![]()
Button
![]() /
/
![]() switches the map view to a satellite or a map view.
switches the map view to a satellite or a map view.
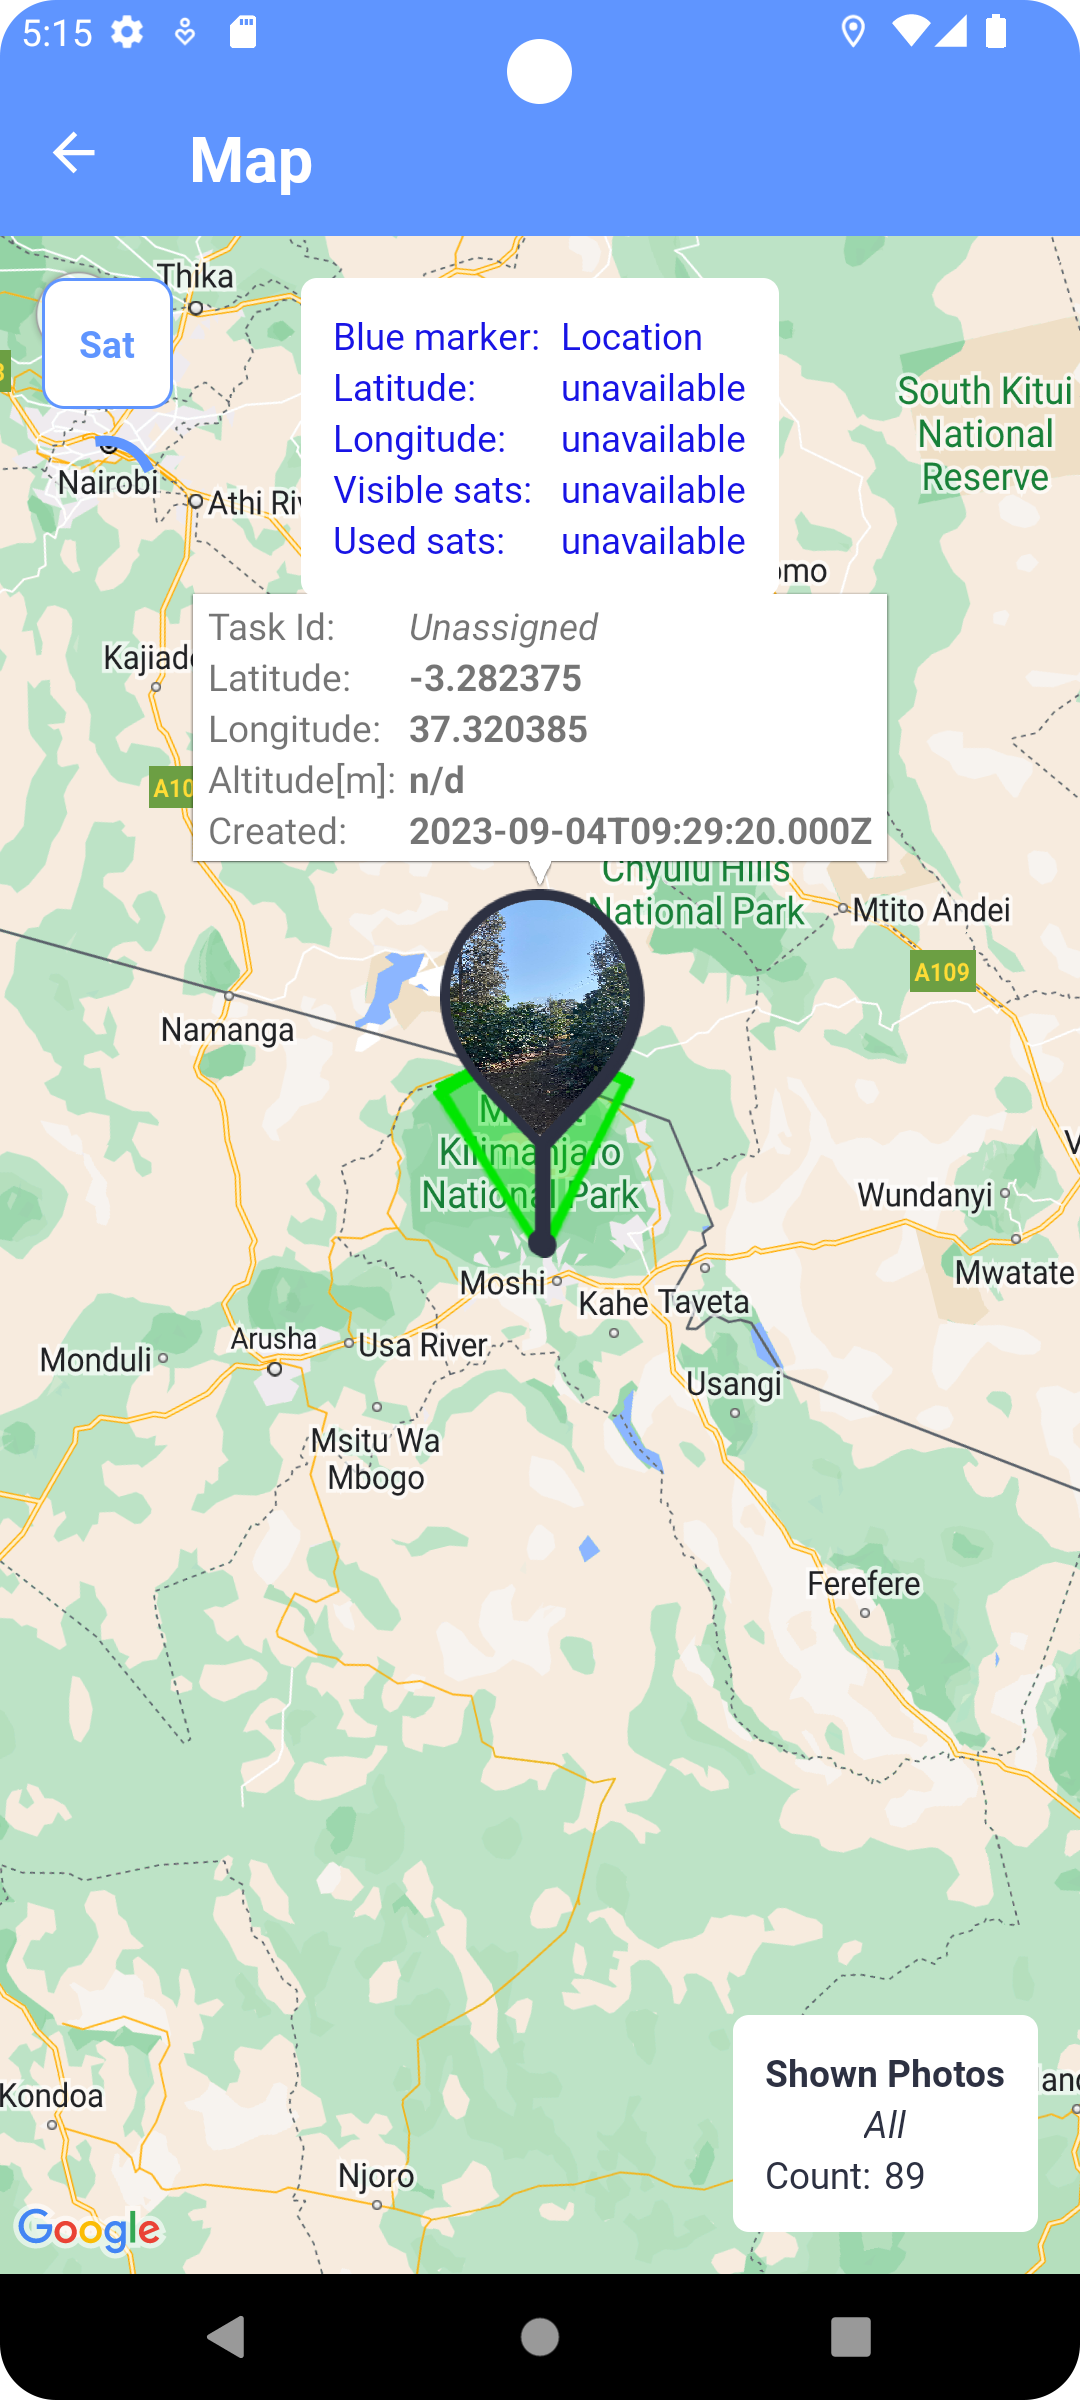
Fig. 13 Preview of the photo on the map
If the map is in path tracking mode, the current position calculated
from GNSS as the center of gravity of the positions is also displayed.
This location is indicated by a red dot ![]()
This position is always updated after the collection of all samples
necessary for the calculation of the center of gravity, the number of which is defined in the application settings (Settings) by the
parameter Number of samples for the center of gravity. Samples for
calculating this position are taken from GGA sentences from NMEA
messages from navigation satellites. Let these individual samples be
denoted as
 . The
calculation is performed as follows:
. The
calculation is performed as follows:
The centroid
 of the
set
of the
set  consisting of all defined points
 is
computed as the average of the points
is
computed as the average of the points
 where
where
 is
the innermost convex hull of set
is
the innermost convex hull of set
 .
.
The innermost convex hull is computed based on following definition:
Let the set
 be a
convex hull of the original set
be a
convex hull of the original set
 .
.
Then the recursive relation
 is
convex hull of
is
convex hull of


can be defined
( ).
Since finally many points in the set
).
Since finally many points in the set
 are
defined, there exists finally one
are
defined, there exists finally one
 for
for
 .
Then
.
Then  is the innermost convex hull of the set
.
is the innermost convex hull of the set
.
In the path tracking mode of the map, you can record a path in the map view. Click the RECORD button, the dialog opens for entering a path name, which is optional. When this dialog is confirmed, the path will be recorded. The user can switch the application screens at will when recording the path, but the application must remain active and in the forefront of Android processes. The path is recorded in the form of points, between which there is an approximate recording interval of 1 second. When recording, the path is simultaneously drawn on the map in the form of a black linearly angled curve. Each point on the curve is
represented by a pin ![]() . When you click on it, an overview of its geolocation data is
displayed. Use the PAUSE / UNPAUSE button to pause a path recording.
Click the STOP button and then confirm the dialog box to end the
recording. The path is then drawn as a polygon, where the first and last points of the path are connected. You can send the path to the server by clicking on SEND button. Click the PATHS button to go to the list of already recorded paths (Paths), where you can select a path to draw it on the map. Fields id and name of the drawn path on the map (currently recorded or already recorded) are displayed in the overview next to the buttons for recording the route. Clicking in this report will move the map view to this path. In the application settings, you can turn on a sound tone when recording a path point and automatically pan the map view to the current location during recording.
. When you click on it, an overview of its geolocation data is
displayed. Use the PAUSE / UNPAUSE button to pause a path recording.
Click the STOP button and then confirm the dialog box to end the
recording. The path is then drawn as a polygon, where the first and last points of the path are connected. You can send the path to the server by clicking on SEND button. Click the PATHS button to go to the list of already recorded paths (Paths), where you can select a path to draw it on the map. Fields id and name of the drawn path on the map (currently recorded or already recorded) are displayed in the overview next to the buttons for recording the route. Clicking in this report will move the map view to this path. In the application settings, you can turn on a sound tone when recording a path point and automatically pan the map view to the current location during recording.
Paths#
This list shows all recorded routes (Fig. 14). Clicking on a specific road will draw it on the map (M). Each path already sent to the server is assigned its ID (identification number). If the route has not yet been sent, it can be deleted by clicking on the
![]() . Click on the SEND button to send all paths which has not been sent
yet.
. Click on the SEND button to send all paths which has not been sent
yet.
-
The Area attribute is an approximation of the area of a polygon formed by a path in square meters.
-
The By the center of gravity attribute determines whether waypoints were taken as the center of gravity of the positions.
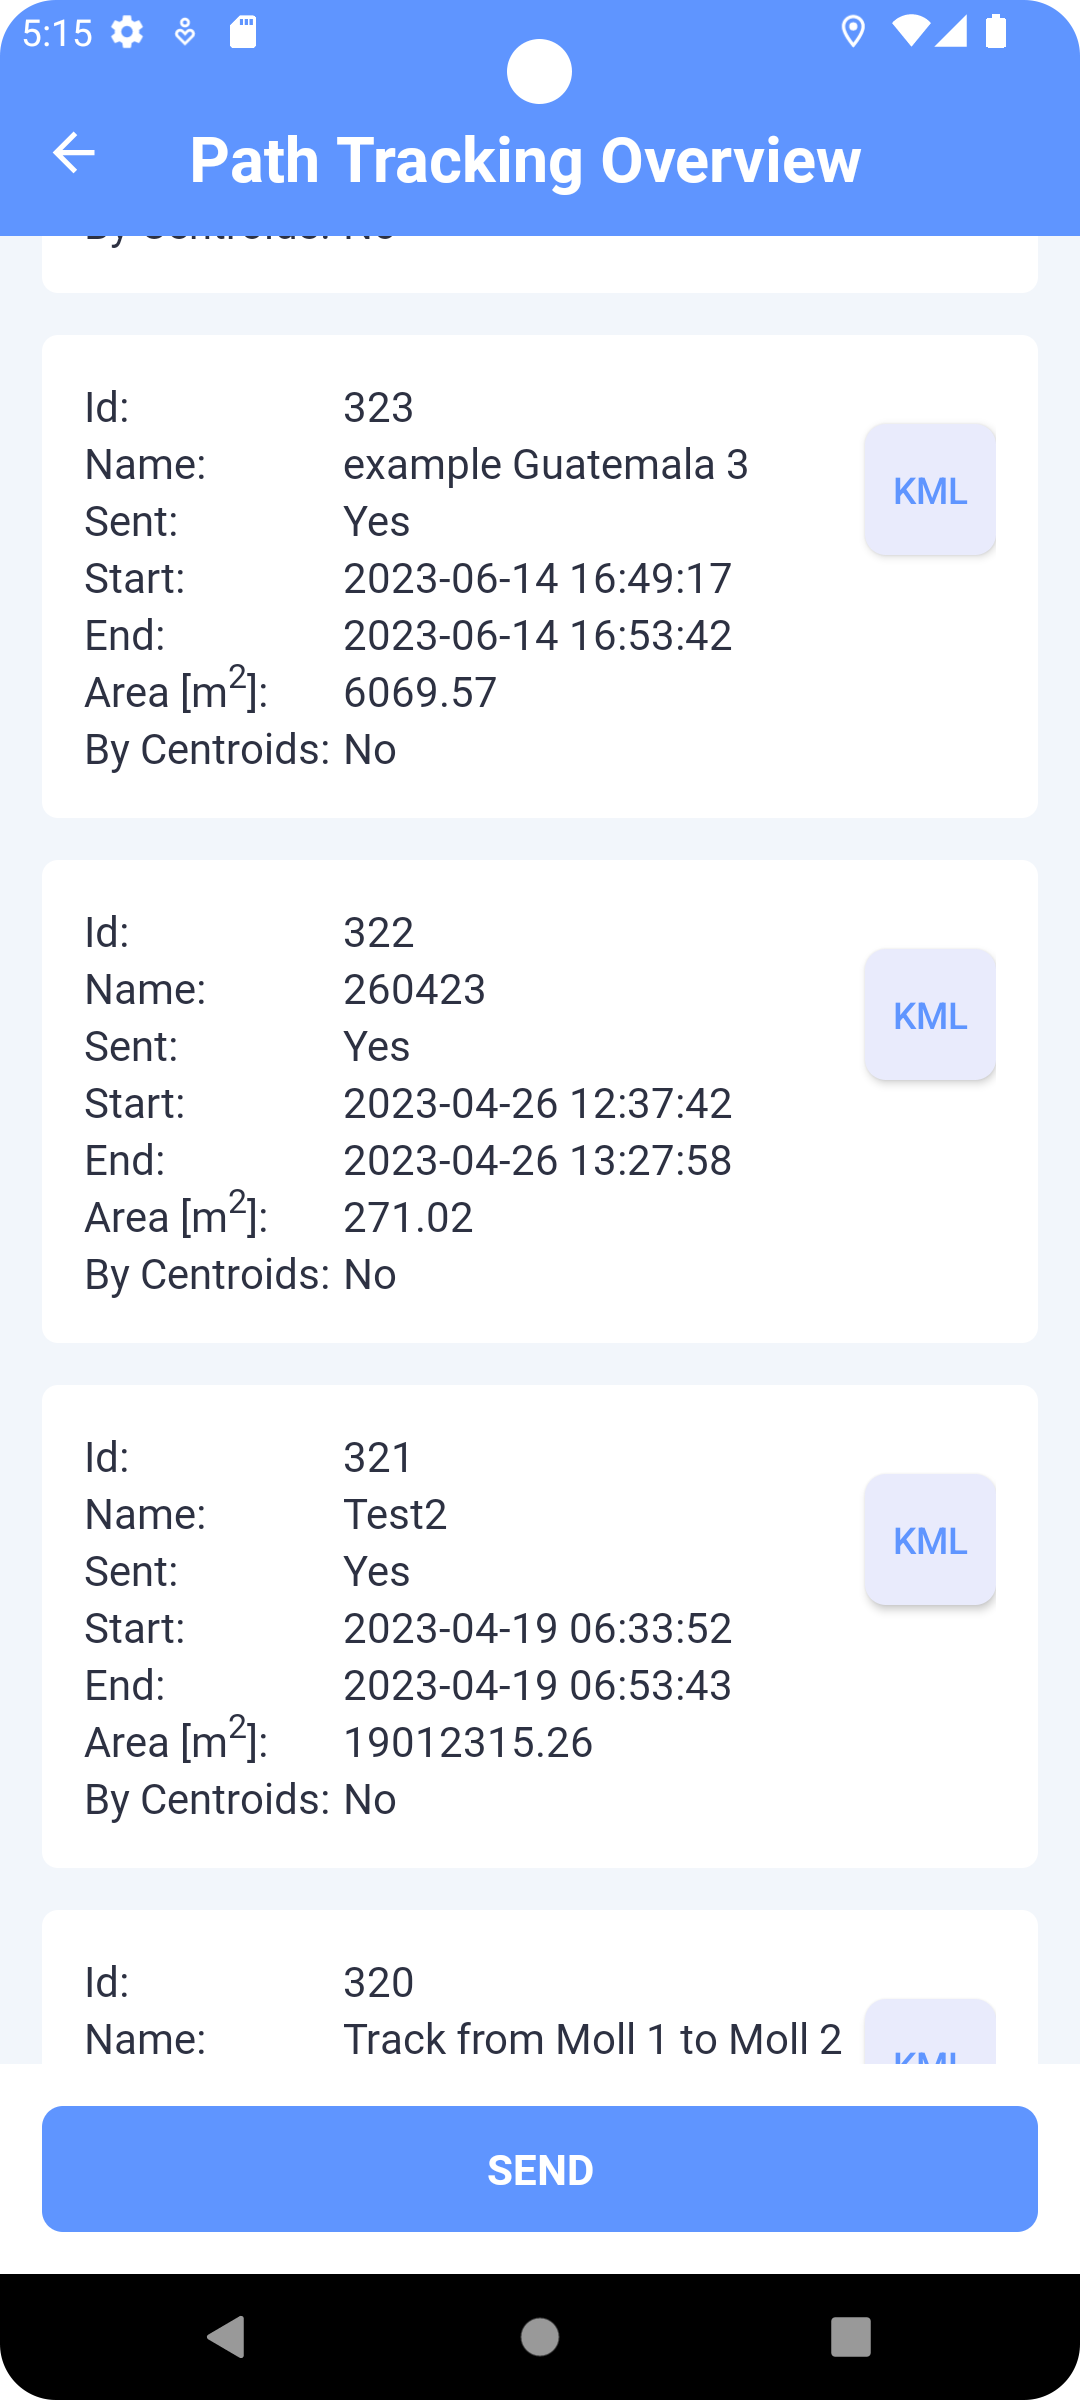
Fig. 14 Recorded paths list
GNSS Raw Data#
In this screen (Fig. 14) the user sees the current raw GNSS data received from the satellites with a basic overview of the device, the same as on the main screen (M). Most of the data is obtained from NMEA message records.
- Used satellites
- Number of satellites used
- Satellites visible
- Number of visible satellites sending the SNR.
- EGNOS
- Marked positive if the GPS Quality indicator value of the GGA sentence is equal to 2, marked negative if it is equal to 1, and marked as undecided in other cases.
- Geolocation information
- The Latitude, Elevation, Altitude, N / S, and E / W attributes are taken from the GSA sentences.
- The attributes HDOP, PDOP, VDOP, and Quality Assessment are taken from the GSA sentence.
- The Accuracy attribute is an estimate of horizontal accuracy as the radius of 68% reliability. It is obtained from the location service.
- The Accuracy in meters attribute is calculated above the center of gravity of the position. The calculation parameters are defined by the application settings.
- VTG info All attributes are read from the VTG sentence.
- RMC Info All attributes are read from the RMC sentence.
- SNR
- Mean SNR of the last detected satellites.
- List of satellites
- GALILEO SATs, GPS SATs, GLONASS SATs, BEIDOU SATs display satellites sending the SNR.
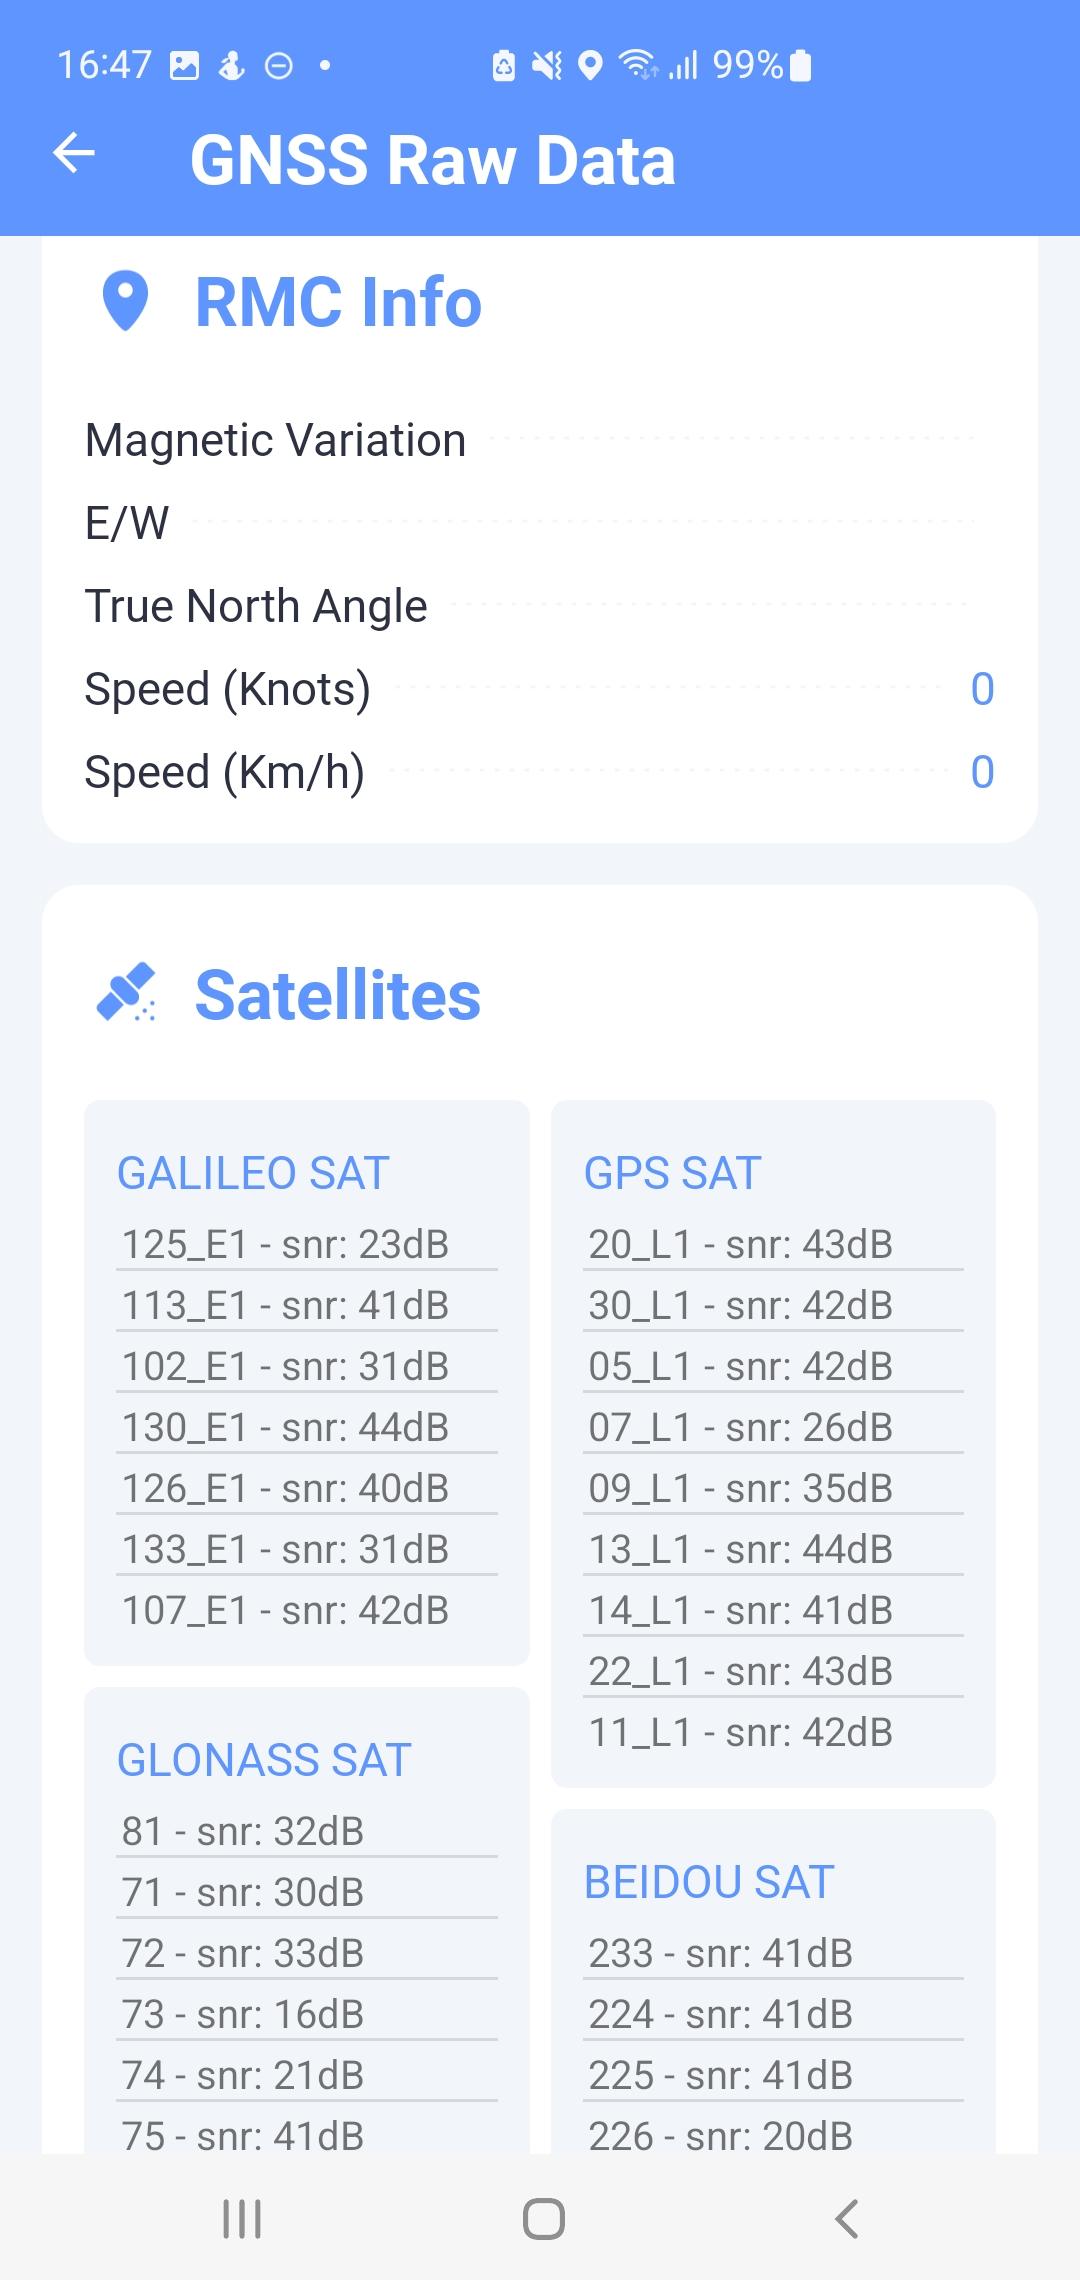
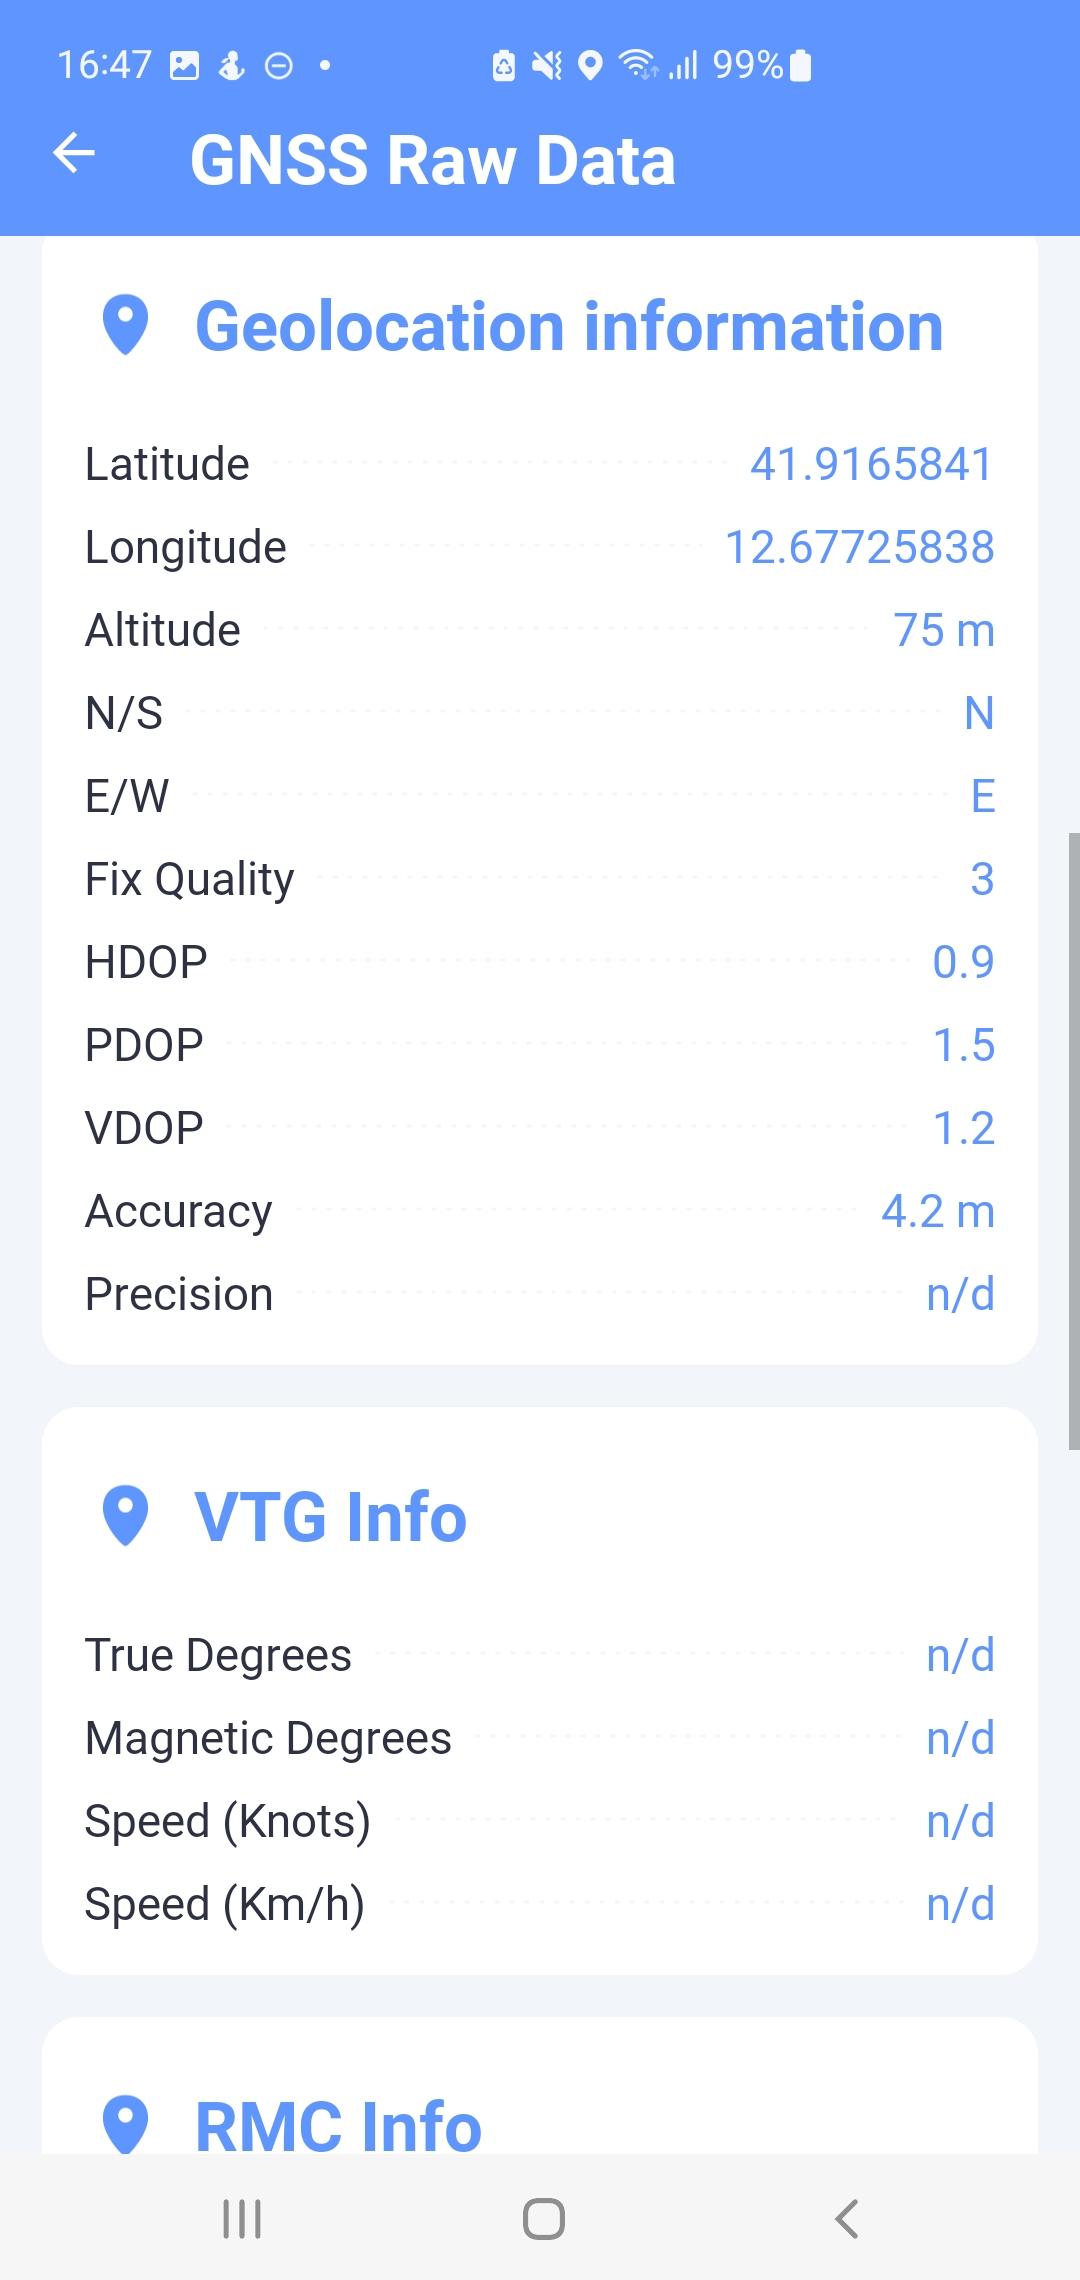
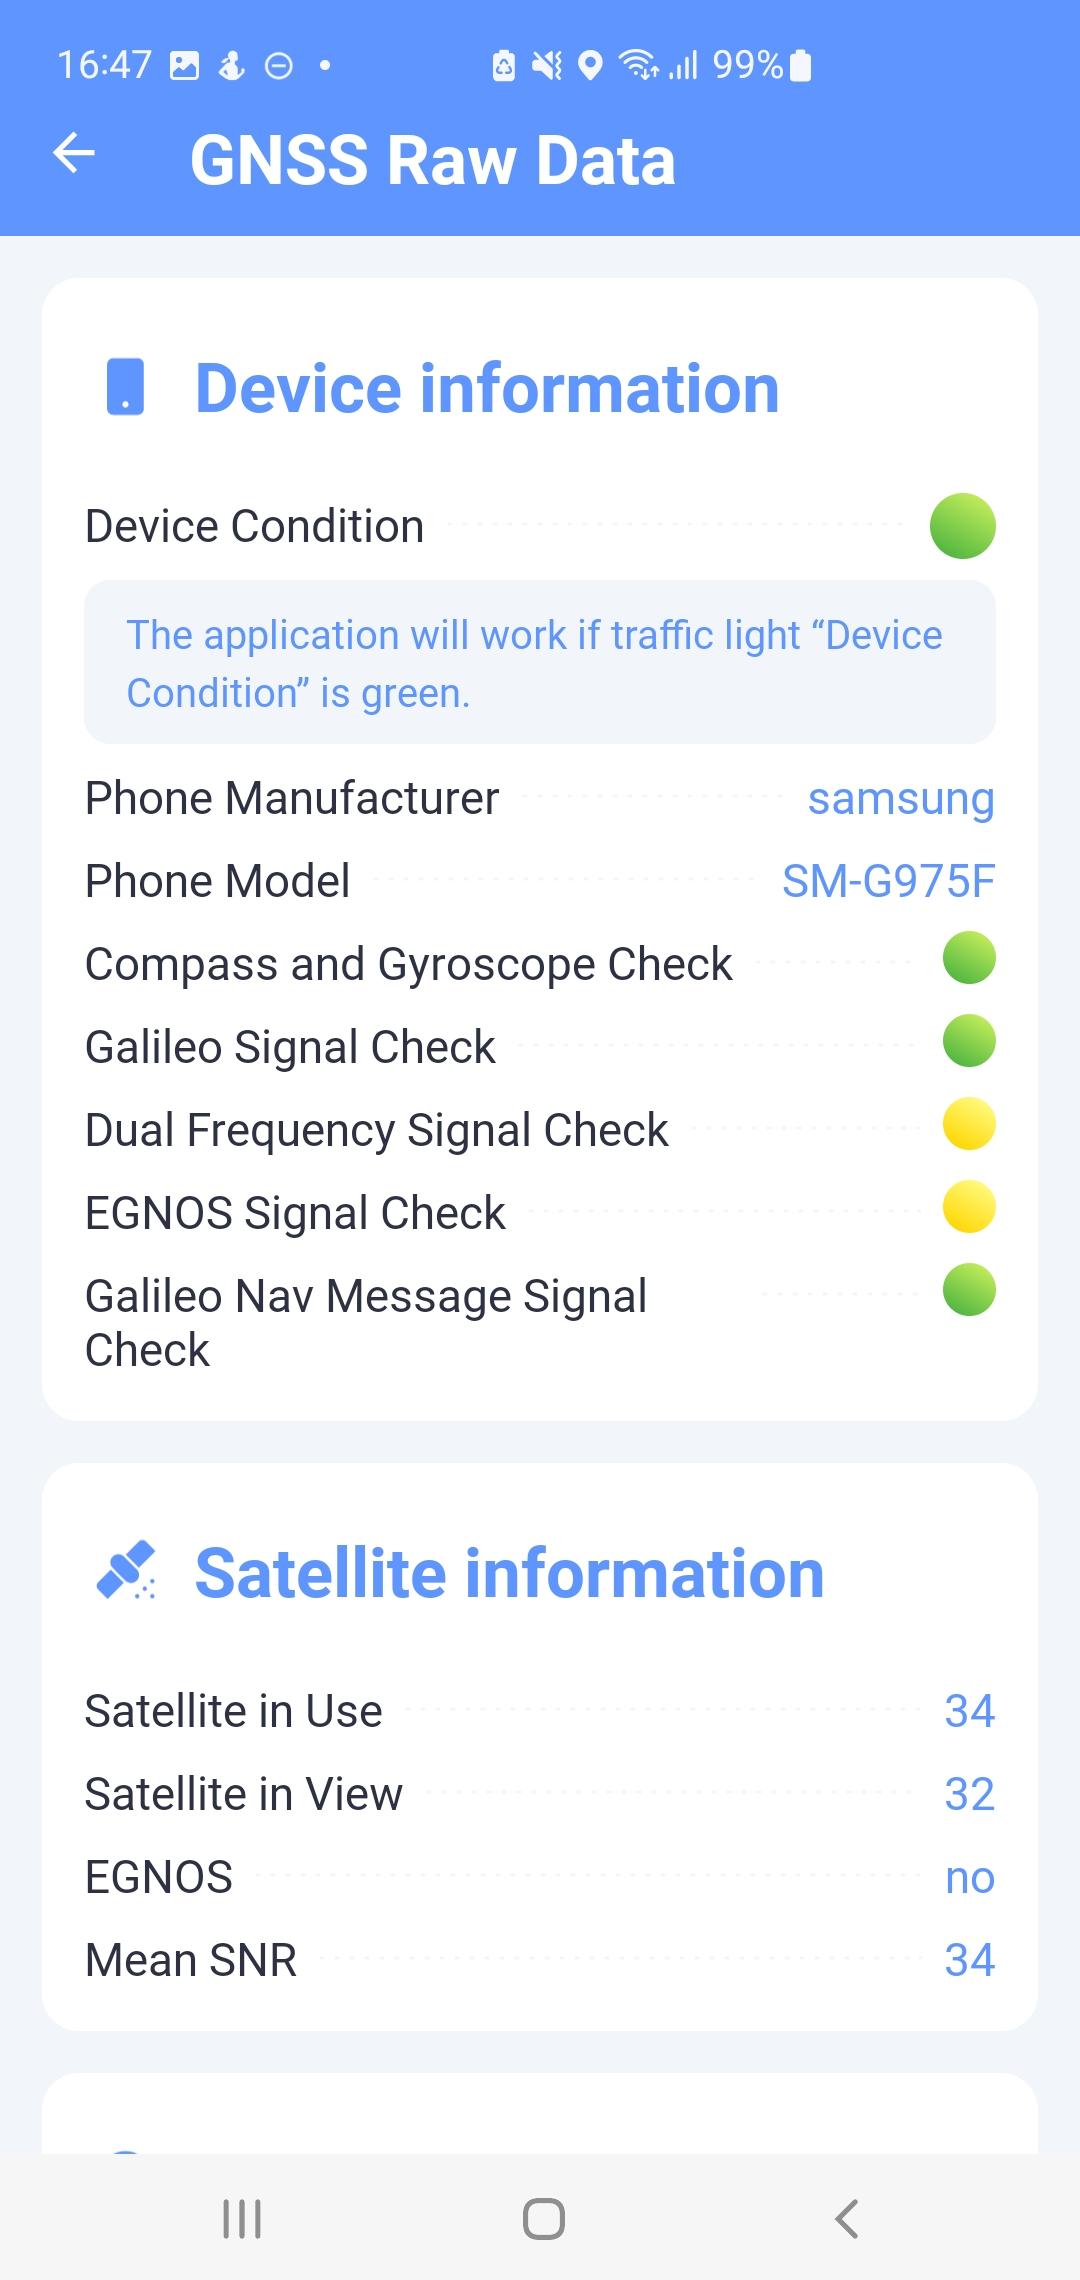
Fig. 15 GNSS Raw Data
GNSS SkyMap#
This section let you compare the expected sky map of satellites calculated from your position to your actual measured sky map from the phone.
A constellation drop-down menu let you choose a constellation to compare and the graph updates accordingly
The points in red represent the calculated satellites position, the blue points the actual measured positions. Positions may overlap and result in a purple point representing the two values are one and the same and therefore correct.
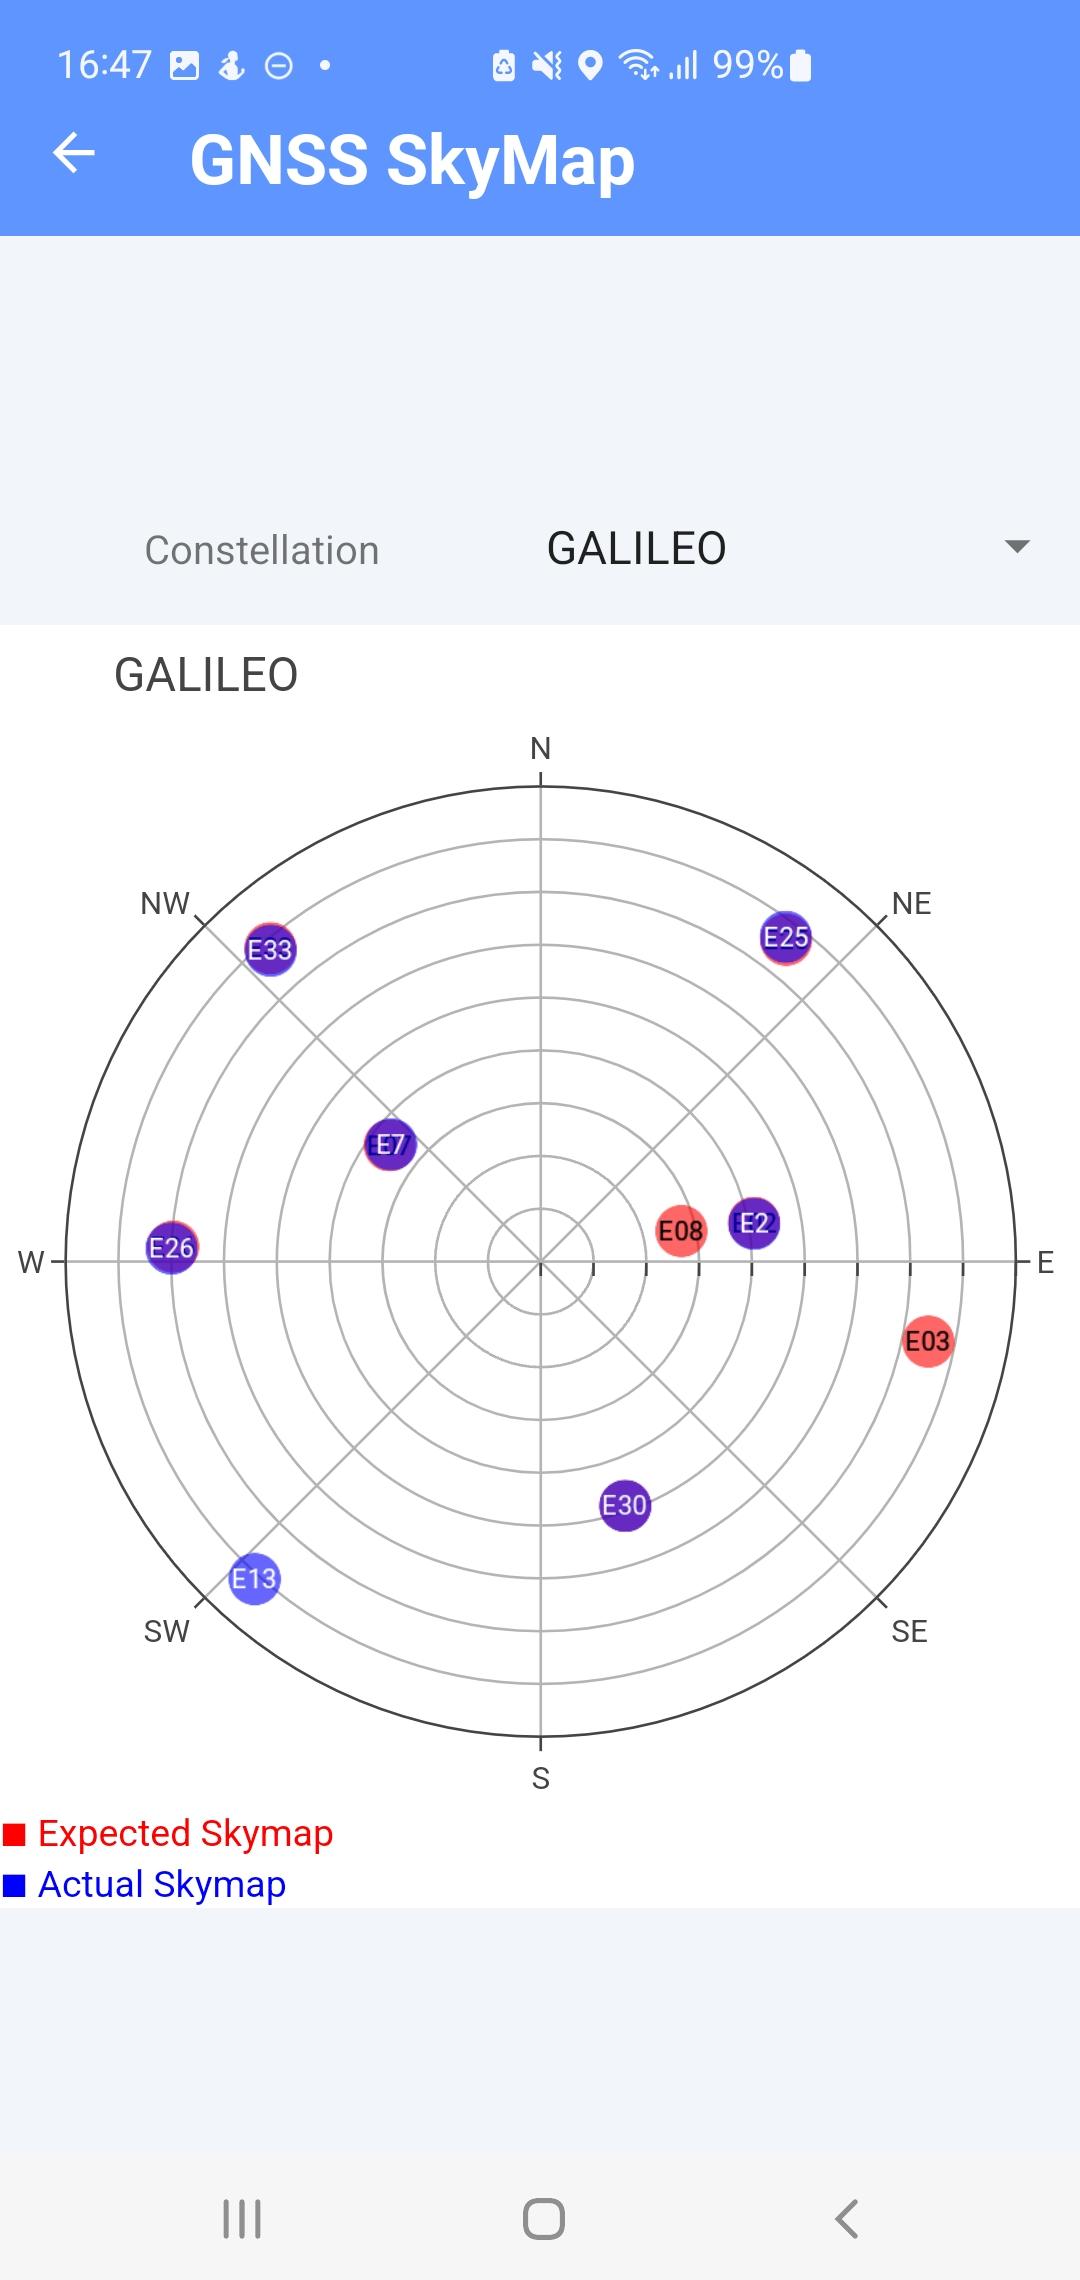
Fig. 16 GNSS SkyMap
About#
This screen contains basic information about the application (Fig. 16).
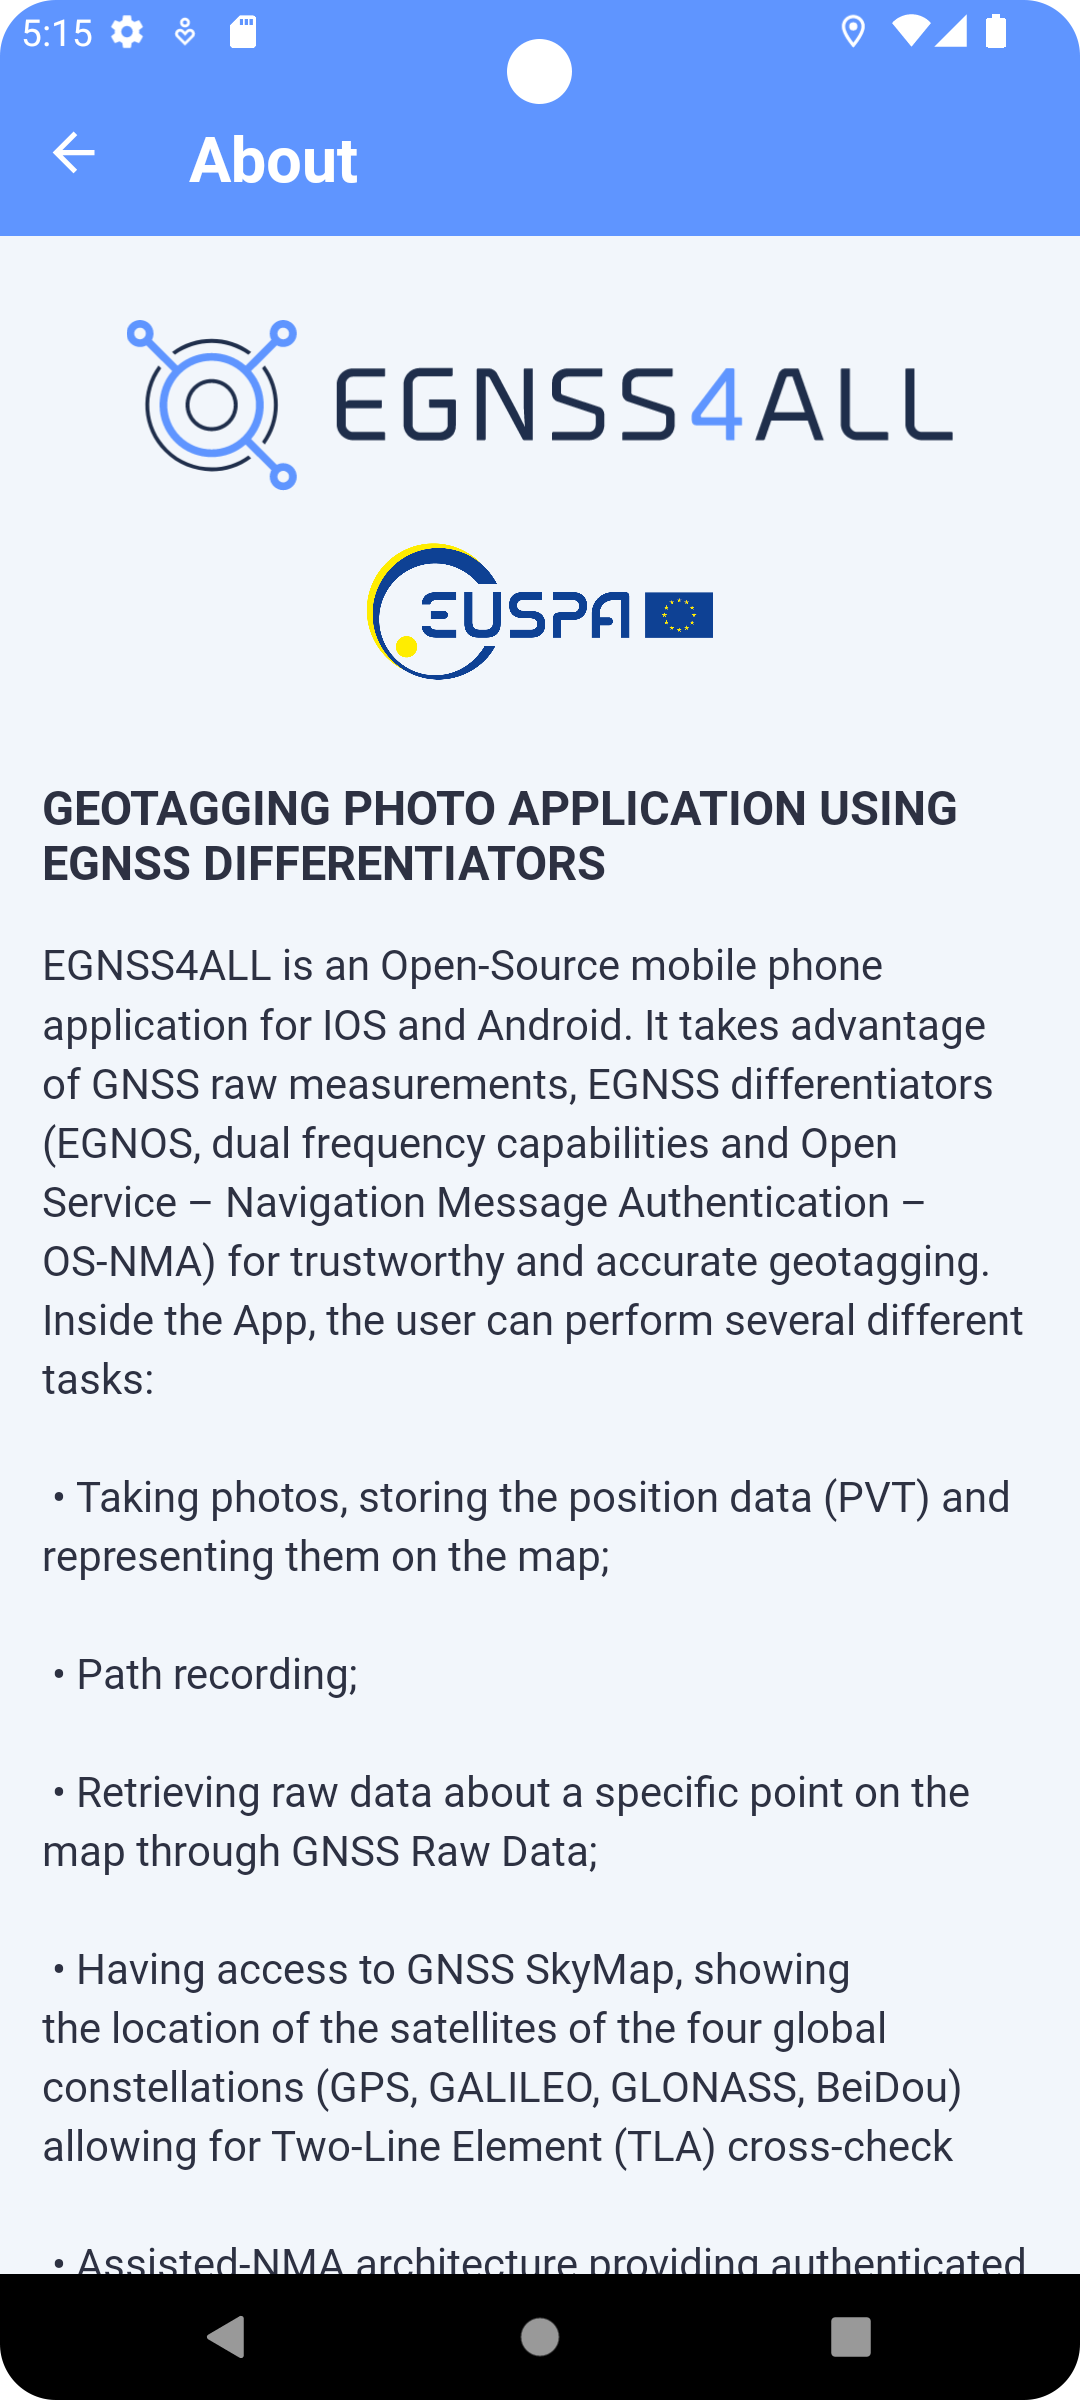
Fig. 17 About screen
Settings#
The screen provides the main settings of the entire application (Fig. 17).

Fig. 18 Settings Screen
-
GNSS Location Settings
-
Customization of the location algorithm and constellation, assisted correction and centroid calculation (Fig.18)
-
External Bluetooth GPS
-
Use an external bluetooth GPS device as location source. (Fig. 19)
-
Tracking centroid samples
-
Sets the number of samples required to calculate the position centroid.
-
Click the Default button to set the default number.
-
Button to take a photo
-
Defines a hardware button for taking a photo in camera mode (C).
-
If activated, the dialog for setting the hardware button on the device is displayed. The setting is made by pressing the desired button when this dialog is displayed.
-
Not all buttons on the device are suitable or usable. E.g. suitable buttons are for volume control. E.g. the screen lock button cannot be used.
-
Manual brightness correction
-
Activates the manual brightness correction option in camera mode (C).
-
Automatically pan the map during a path recording
-
Automatically focus the map view to your current location while recording a path (M).
-
Beep when recording a path point
-
Emits a tone each time a point is recorded while recording a path (M).
External Bluetooth GPS / GNSS#
This section allows to scan for an external GPS Device and pair it to your application to use it as the source of the location.
The button SCAN DEVICES allow you to start scanning for devices, a list of devices detected will appear. After choosing a device, you can press TEST CONNECTION to test if the device is connected AND compatible with the application.This setting is saved and the device data will be used for all location instances in the application (map, tracking and photo).
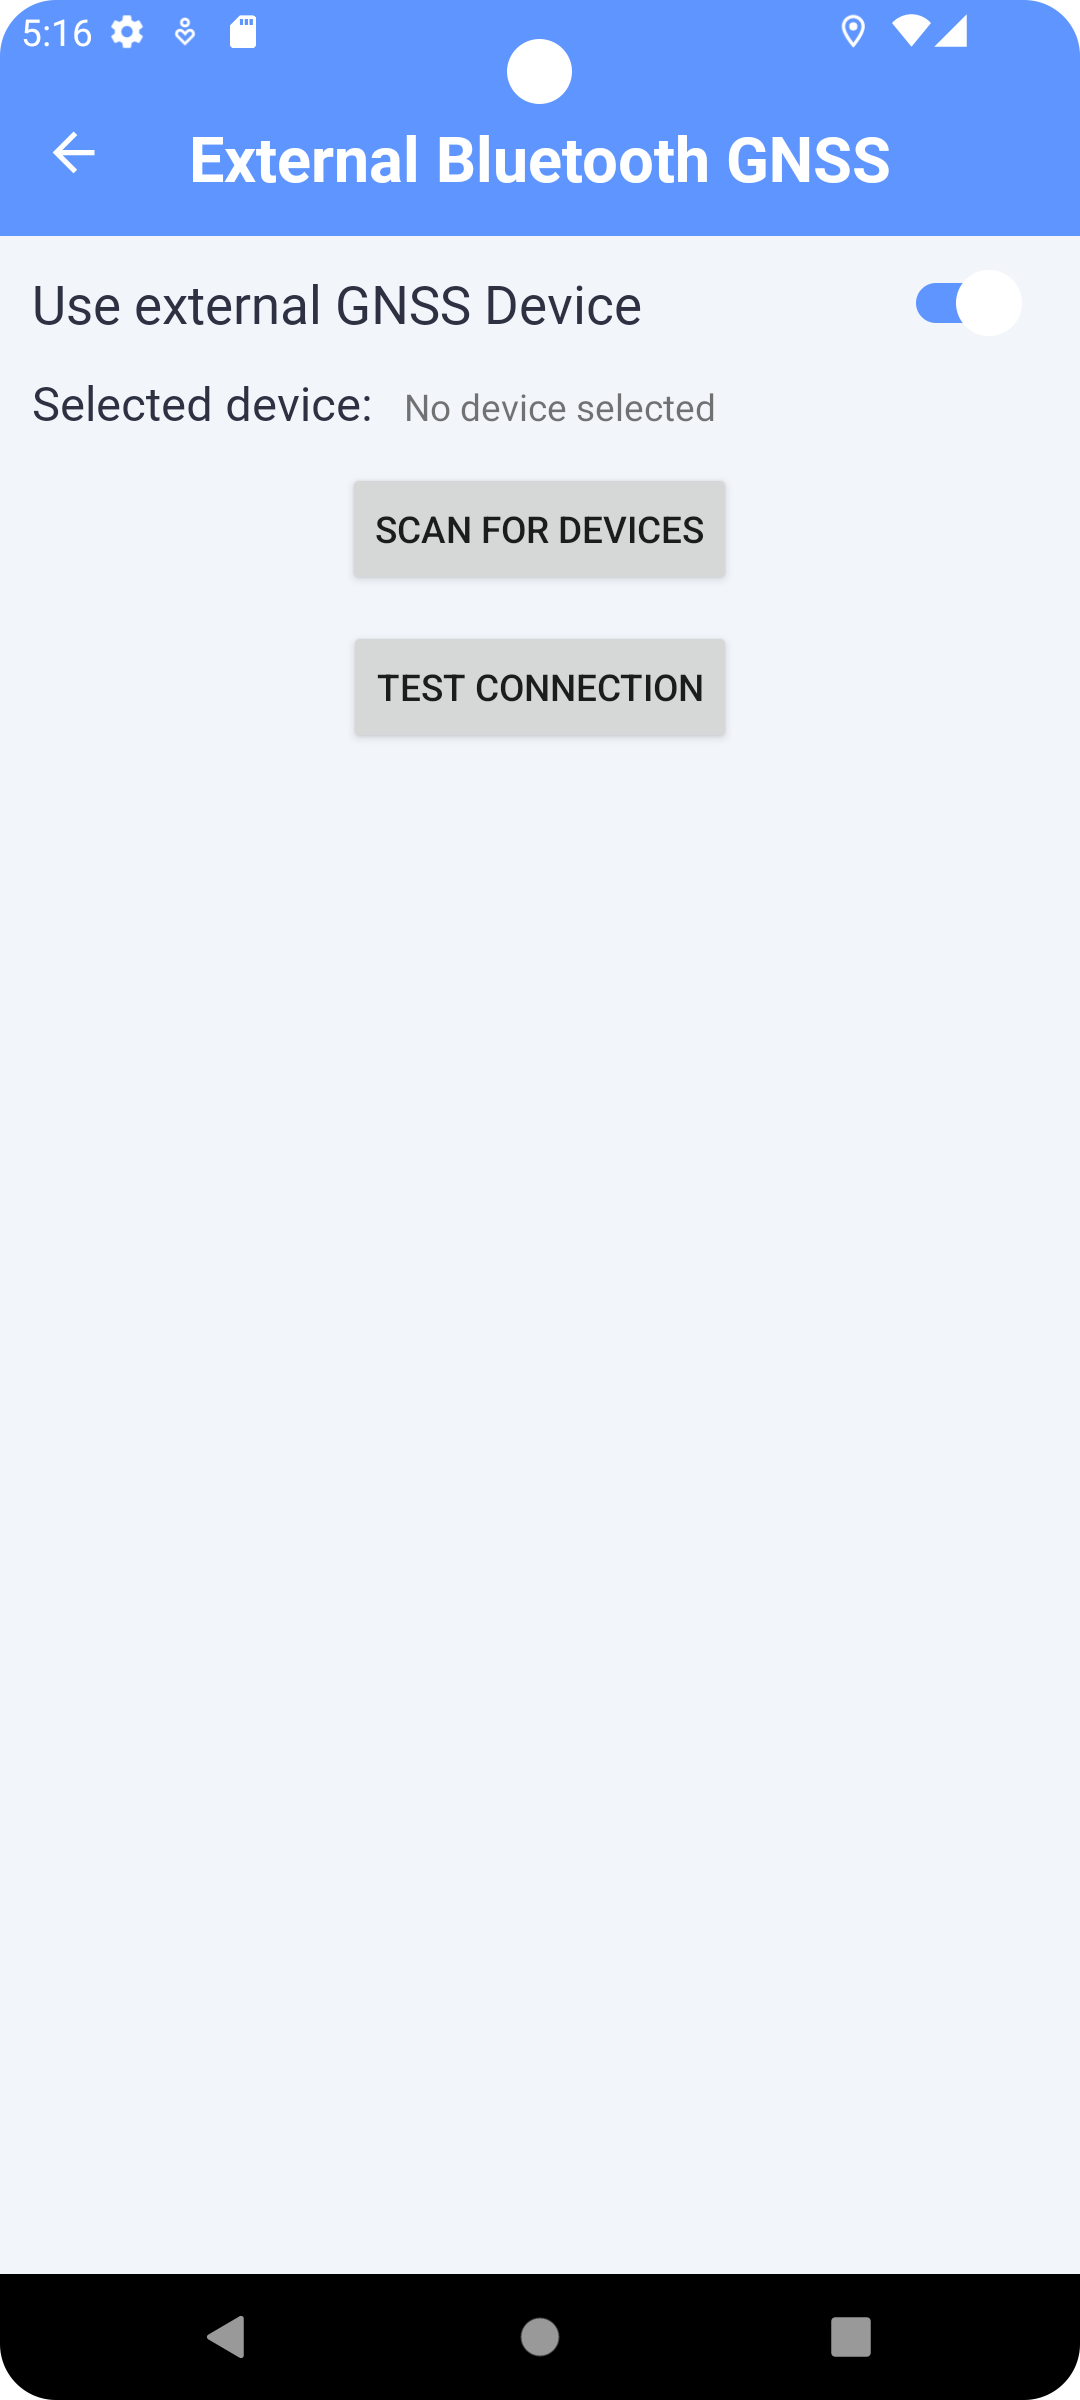
Fig. 19 External Bluetooth GPS
Offline Usage#
The user can snap pictures even when there is no internet connection available, and then send the pictures when it is. Pictures will be stored in a protected storage space of the app for later usage.
In case of OSNMA validated picture, the verification process of the picture will happen when the user sends their pictures to the server, based on the data gathered during the shot.
Software Development#
PIC2BIM (EGNSS4ALL) is a geotagging photo mobile phone application, which is Open-Source for see following Readme iOS-Developer and Android-Developer. Web-Console
Initially developed by EU Space Programme see http://egnss4cap.eu/ for more information, now being maintained and developed by PIC2BIM.