Web Console
The web console is accessible through the following link: https://www.pic2bim.co.uk/
Login screen#
To log in to the web interface, enter your login details.

Fig. 34 Web Console login
Change Password#
After logging in to the platform, every user can change his password to a more fitting one using the button in the top right area of the console.
![]()
To change the current logged user password, fill in a new password and the confirmation in the change password form. A message will warn you of your action and if confirmed your password will change to the new one.
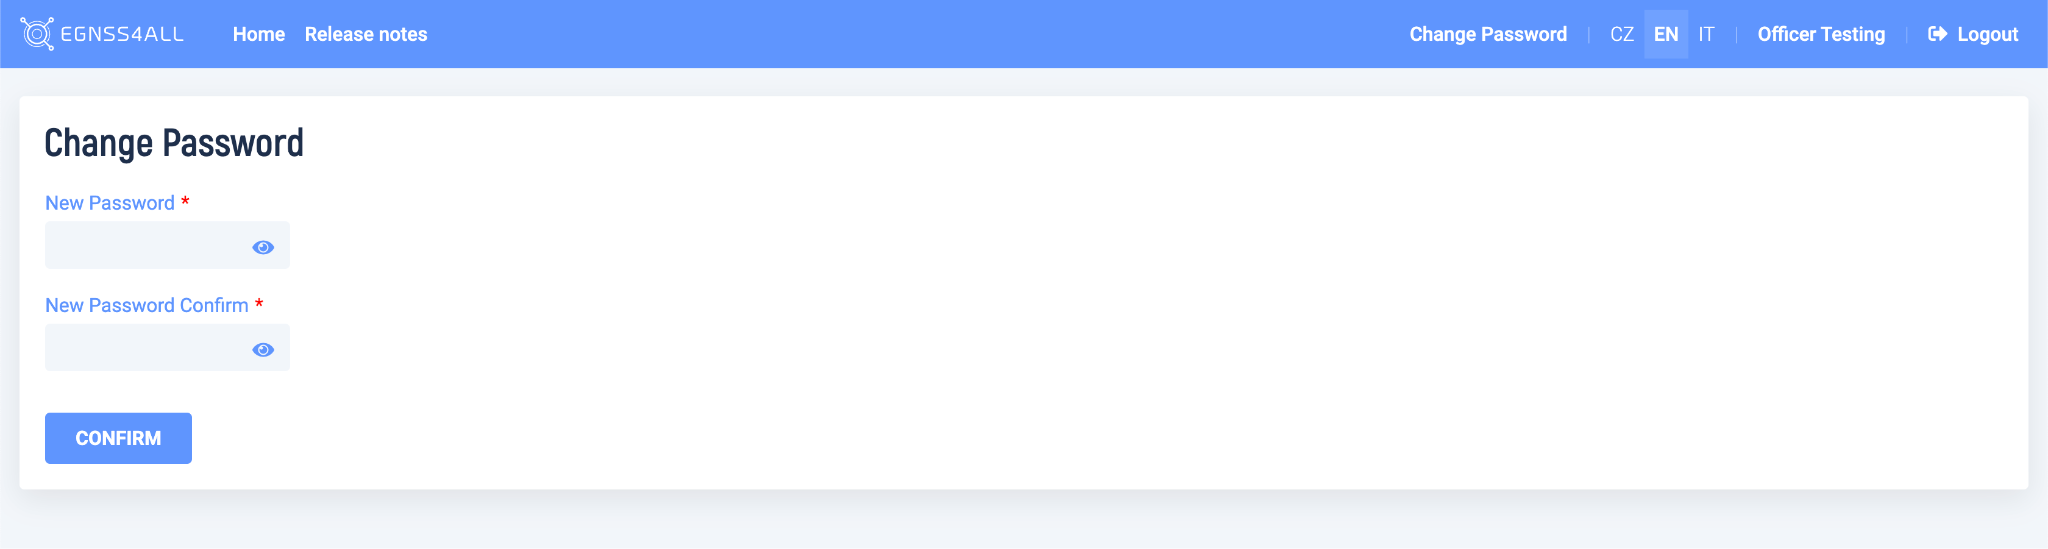
Fig. 35 Web Change Password
User access
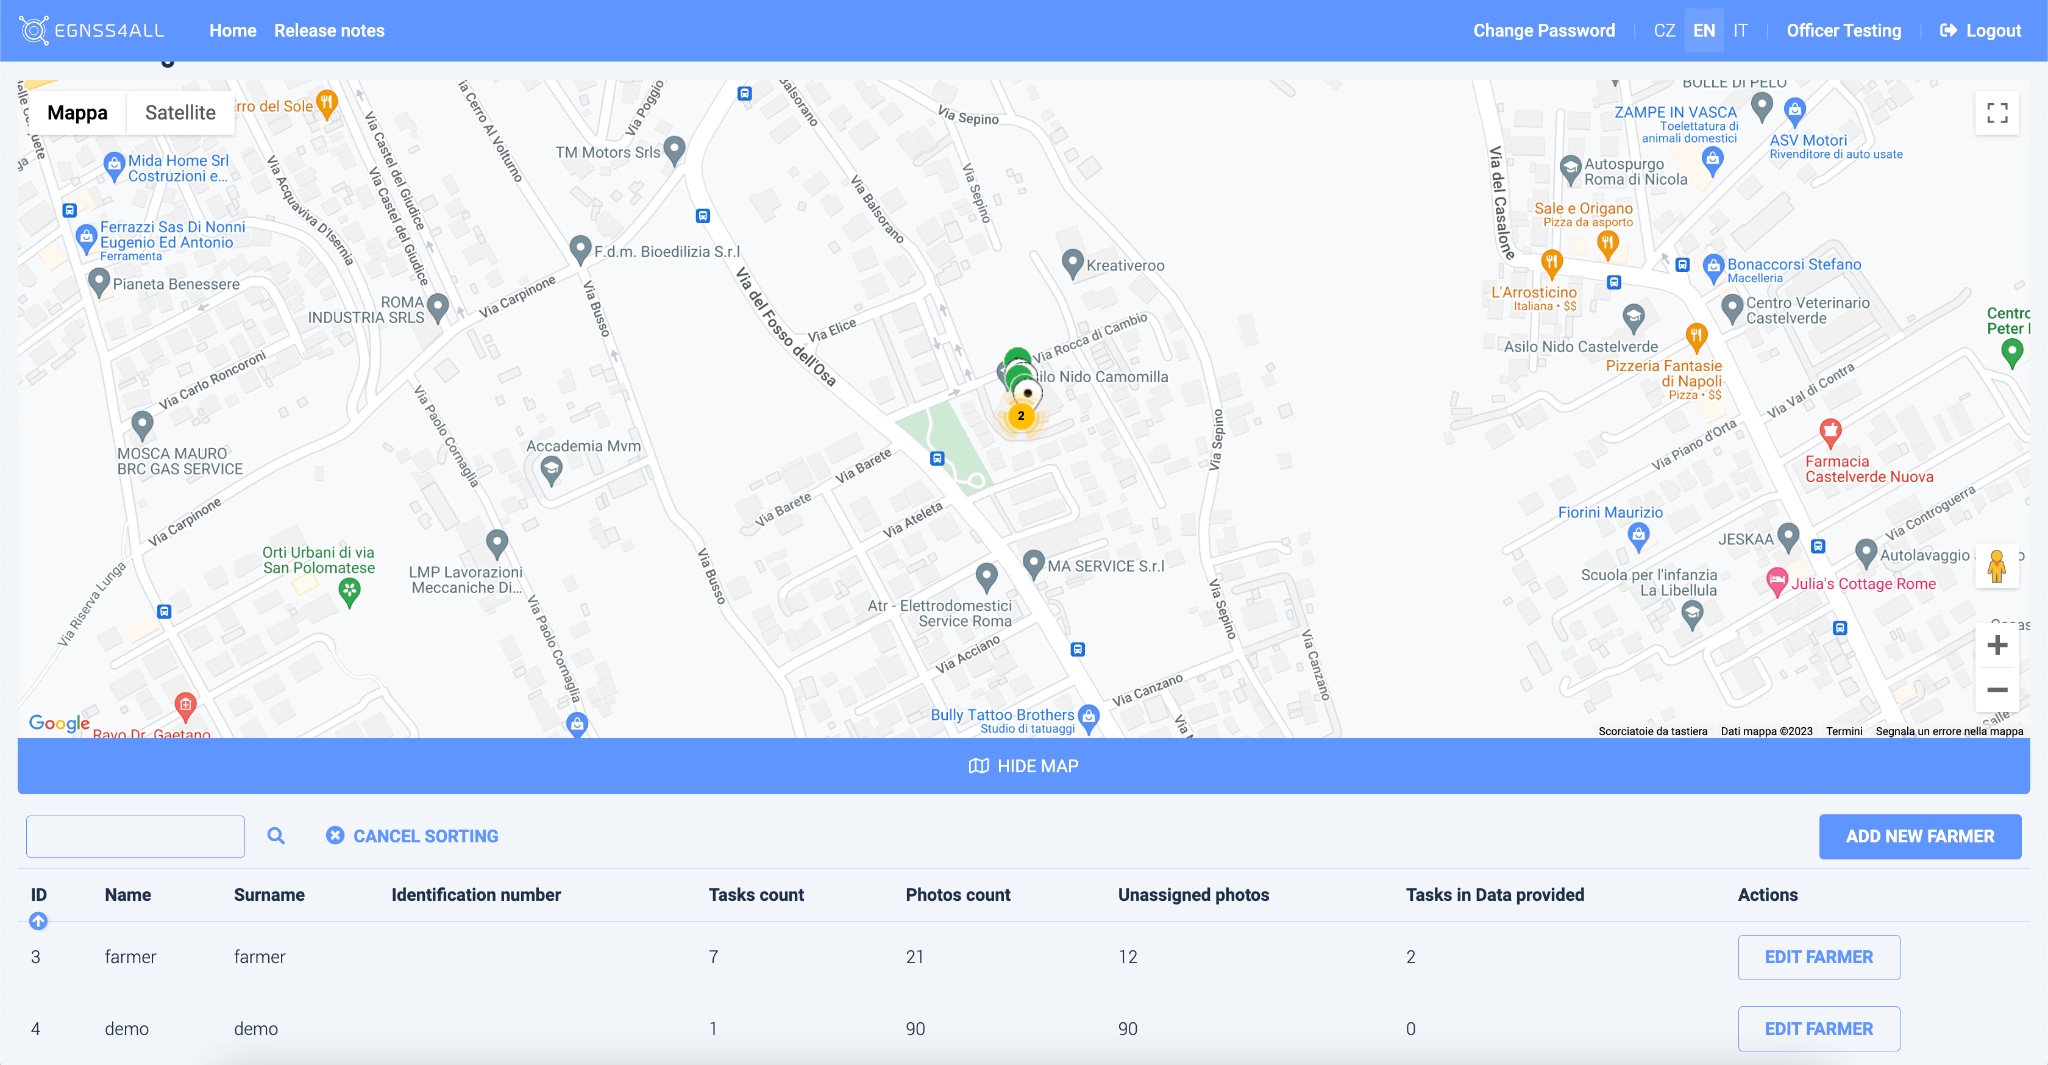
The default page after login is the Task list.
Tasks#
2.1 Task List#
The bottom part shows the assigned tasks, which can be sorted, filtered and searched. In the top part, points representing individual tasks are displayed on the map. Map is shown by default.
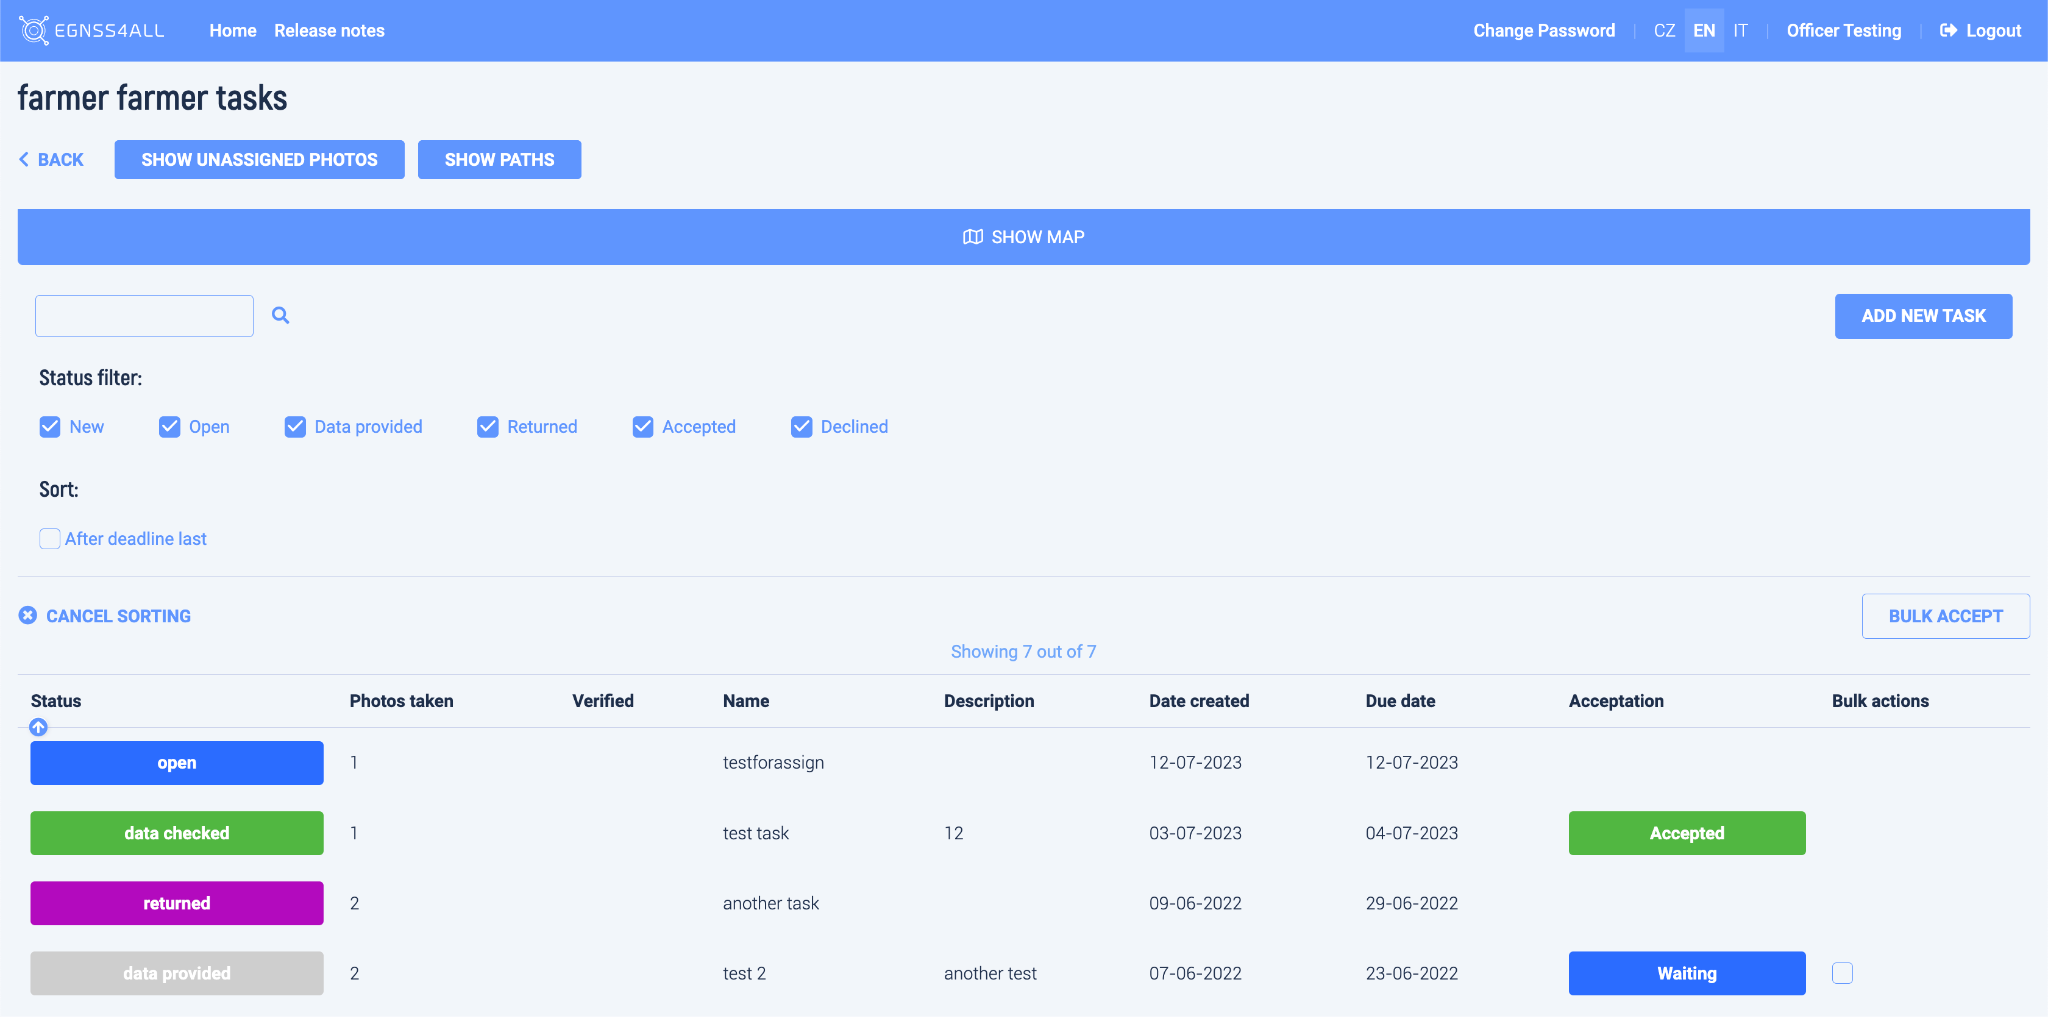
Fig.36 Tasks and Map
Task Stautus#
Tasks can be set in following states, which also determine their editability:
Description |
Editable |
|
|
New |
YES |
|
Open A new task, which has been already displayed by the user. The user is aware of the task. |
YES |
|
Returned |
YES |
|
Data provided The task which was completed and sent by the user to the Paying Agency (PA) |
NO |
|
Data confirmed (approved task) The completed task has been approved. |
NO |
|
Data checked (rejected) The completed task has been rejected. |
NO |
|
Closed The task has been closed is not active. |
NO |
The following options are available for the user:
2.1.1 Open task detail#
- (by clicking on the selected row in the list)
![]()
![]()
2.1.2 Search for tasks#
- by the specific text
2.1.3 Filter tasks#
- by status (by clicking on the selected status)

2.1.4 Sort tasks#
- in a list by the selected column (by clicking on the column heading) or according to the date of completion of the task (with the button "Passed to the end")


![]()
2.1.5 Display a page with unassigned photos#
![]()
2.1.6 Display a page with paths#
Browse the map and open the task detail by clicking on a point on the map
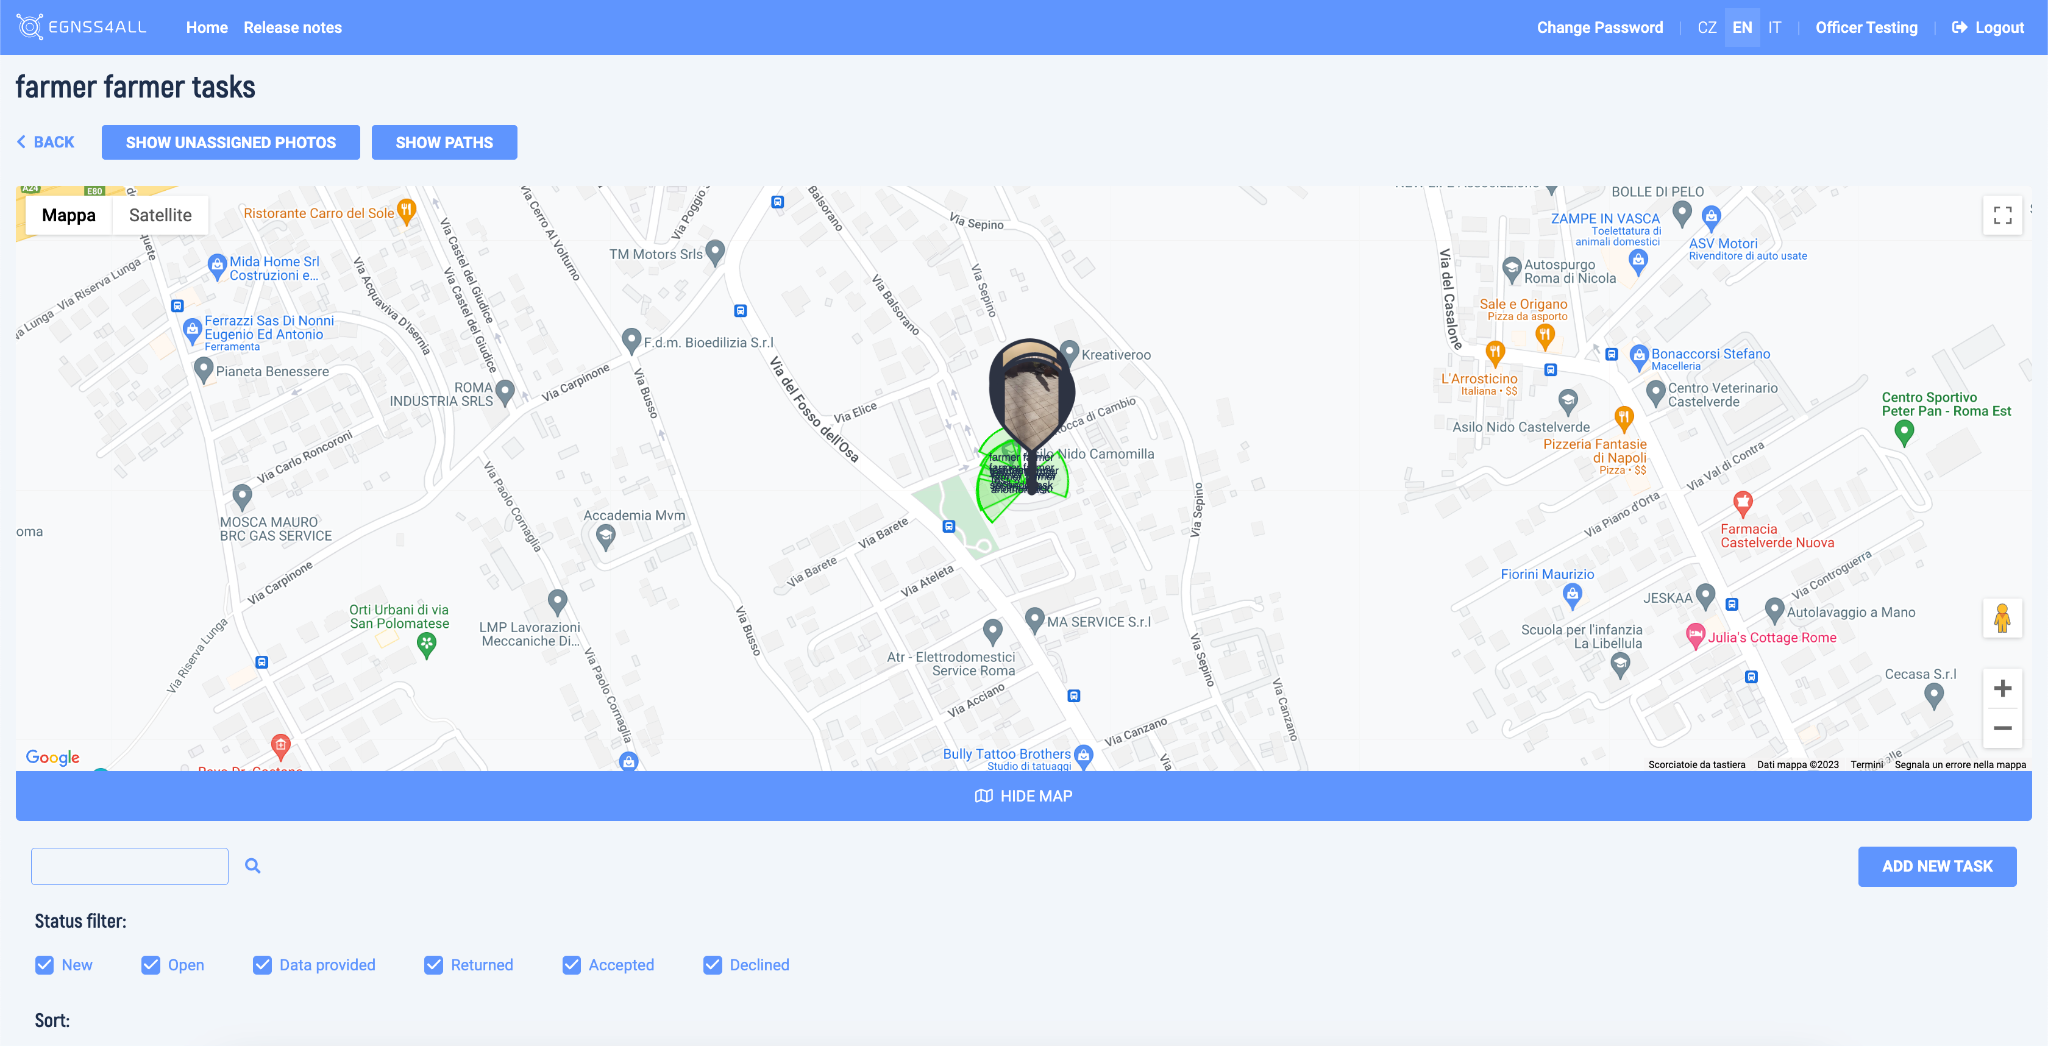
Fig. 37 Tasks Status
2.2.0 Task Detail page#
This page contains detailed information about the task, as well as photos that were taken for the task. The map shows the position of the photos, the viewing radius of the camera and the direction of the photo.
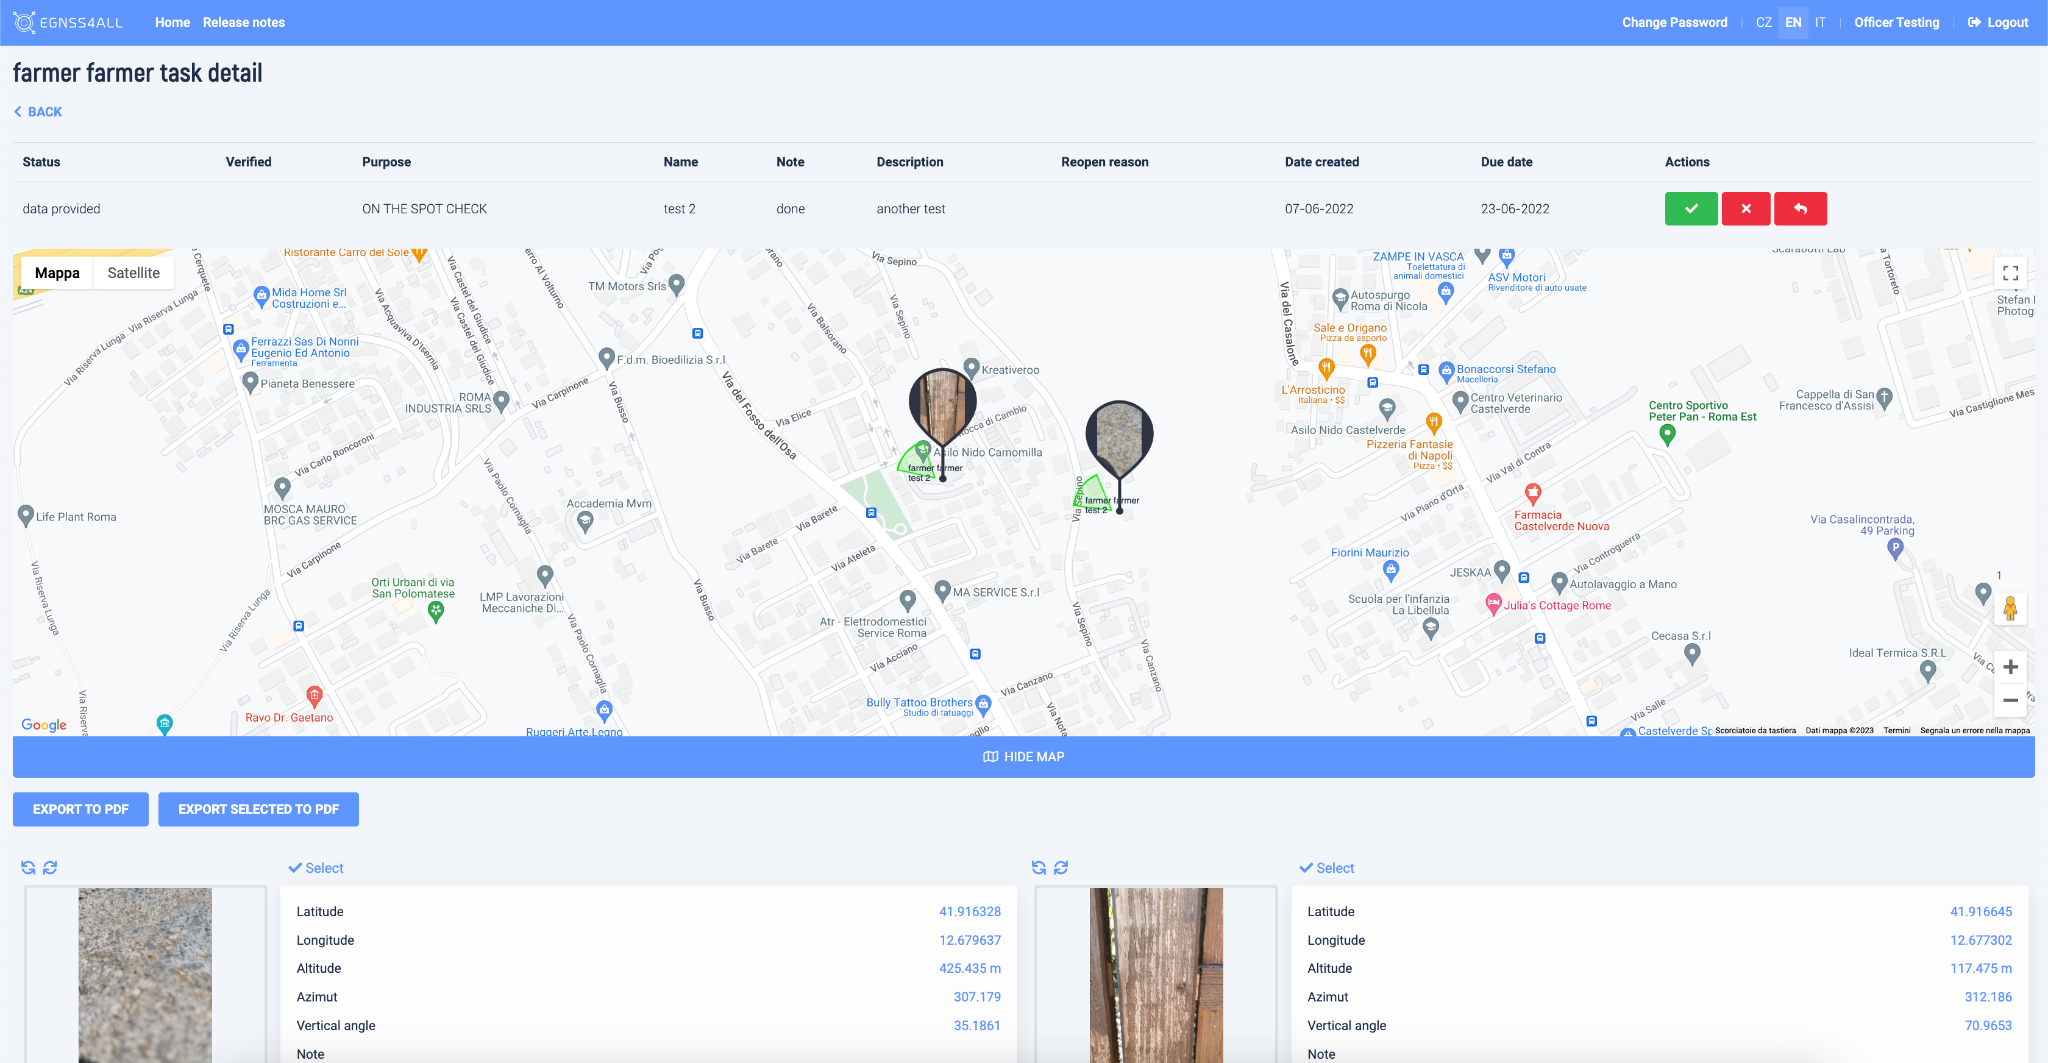
Fig.38 Task detail
2.2.1 Photos can be rotated#
here using the buttons:
![]()
2.2.2 Click on the photo to open the Photo Gallery#
A table with source data is placed next to each photo.
2.2.3 User can select photos for export to PDF#
![]()

PDF export functionality is described below.
3.0 Photos#
3.1 Standalone photos gallery#
At the top of the page, a map is displayed, where the position of individual unassigned photos is marked.
Fig. 39 Standalone task unassigned photos
Below are photos that are not assigned to any task. A table with source data is placed next to each photo.
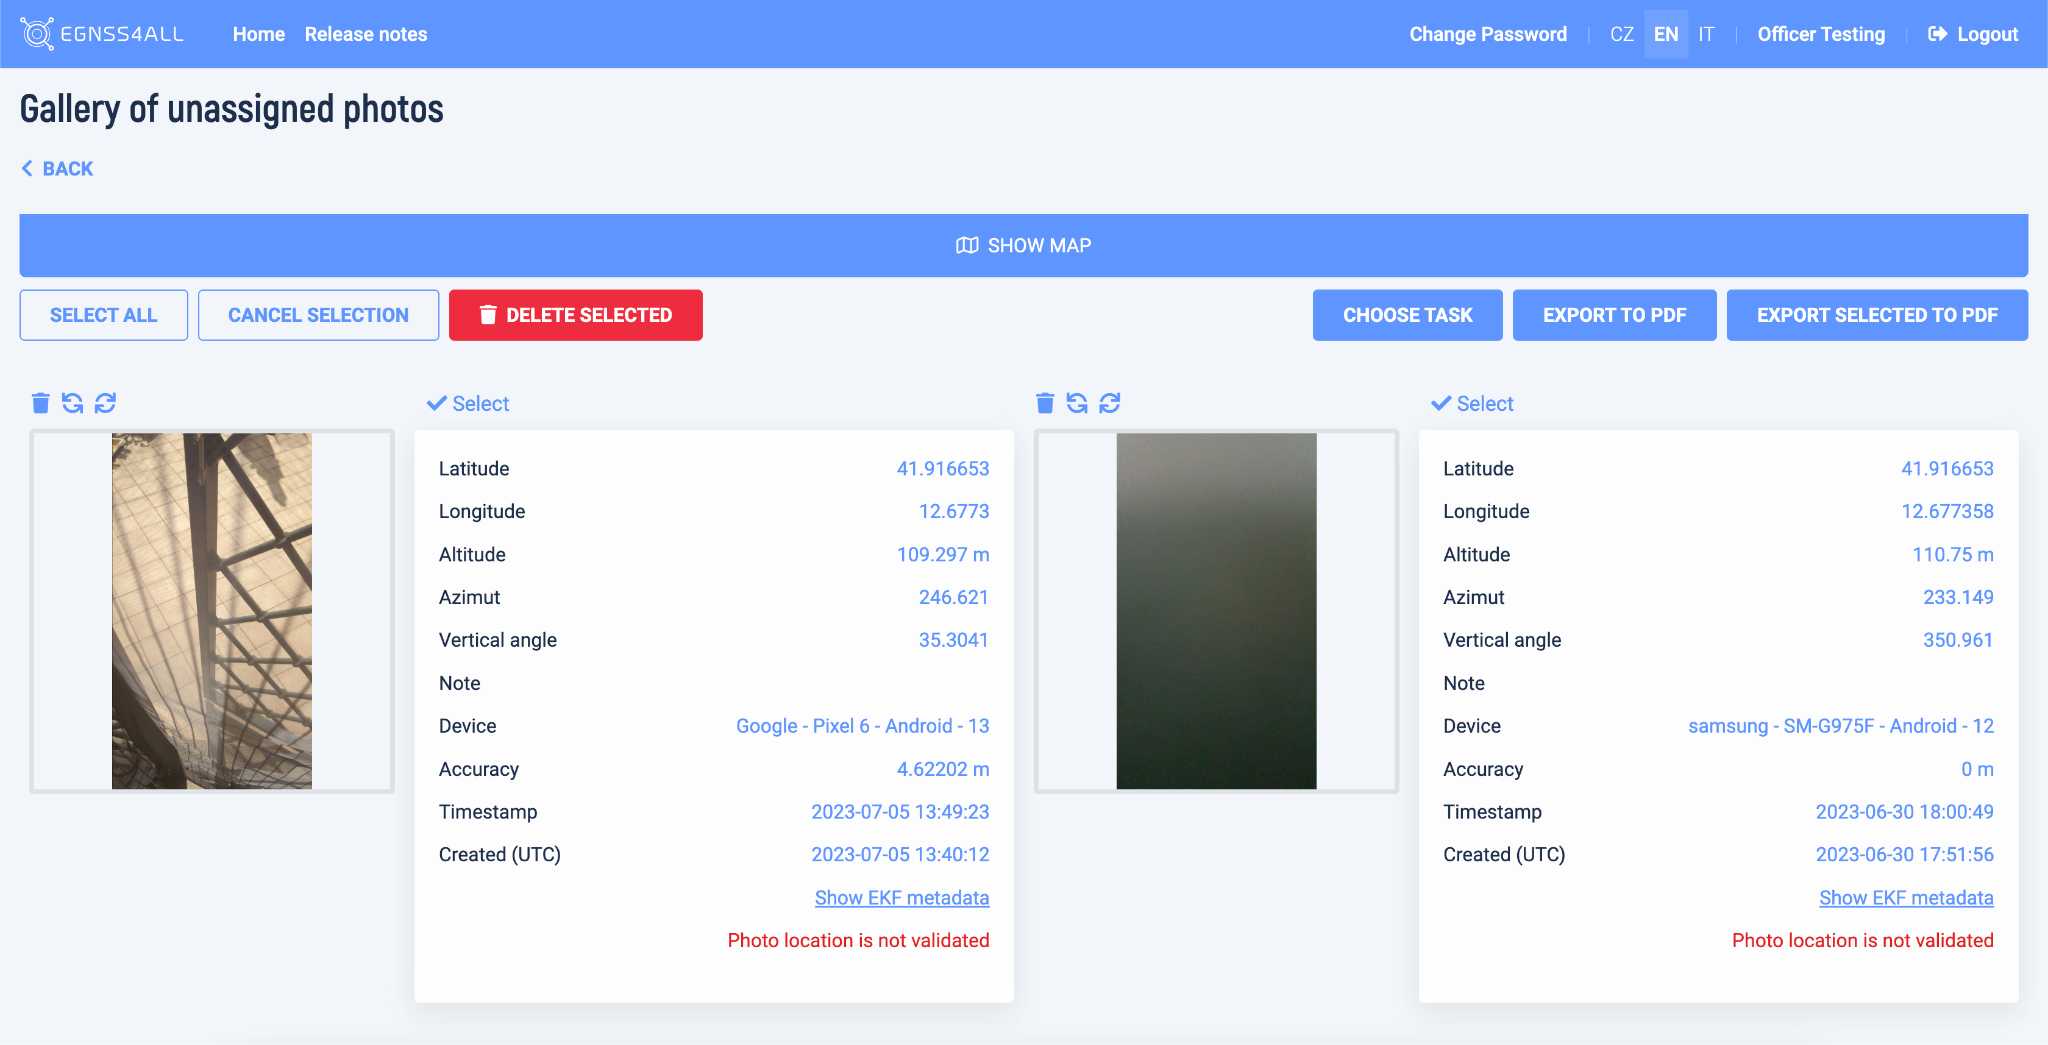
Fig. 40 Unassigned photos
Several options are available to edit the photos:
3.1.1 Rotation  #
#
3.1.2 Delete  #
#
3.1.3 Select for an action  #
#
- By clicking the Select button, the photo is marked for the bulk assignment to a task, to a bulk delete or bulk export to PDF

- Selected photos are marked by the red rectangle. Open photo gallery – click on the photo (see below)
3.1.4 When selecting bulk actions, the following options are available#


Select all
Selects all unassigned photos
- Cancel selection
Cancels current selection
- Choose task
3.1.5 Displays a page where you can select the task:#
to which the selected photos are to be assigned.
For recapitulation, the photos that were marked on the previous page are displayed here.
Below the photos, a selection box is available, where it is necessary to select the target task. The map is displayed at the top of the page.
- After clicking the Confirm button, a dialog box will appear, where by pressing the OK button, the process of assigning photos will be completed.
- Once finished, the user is navigated back to the Task list screen.
3.1.6 Delete selected photos#
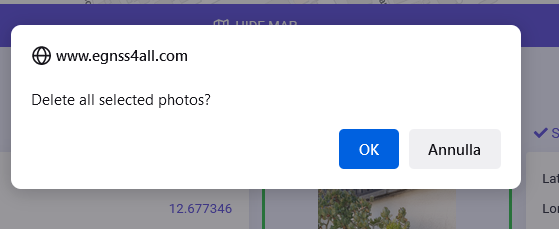
Displays a dialog box where, after confirmation by pressing OK, the marked photos will be deleted
3.1.7 Export all to PDF#
This button pass all photos to PDF export
3.1.8 Export selected to PDF#
This button pass selected photos to PDF export
PDF export functionality is described below.
Photo gallery#
The gallery is accessible from various places in the application, always by clicking on the photo.
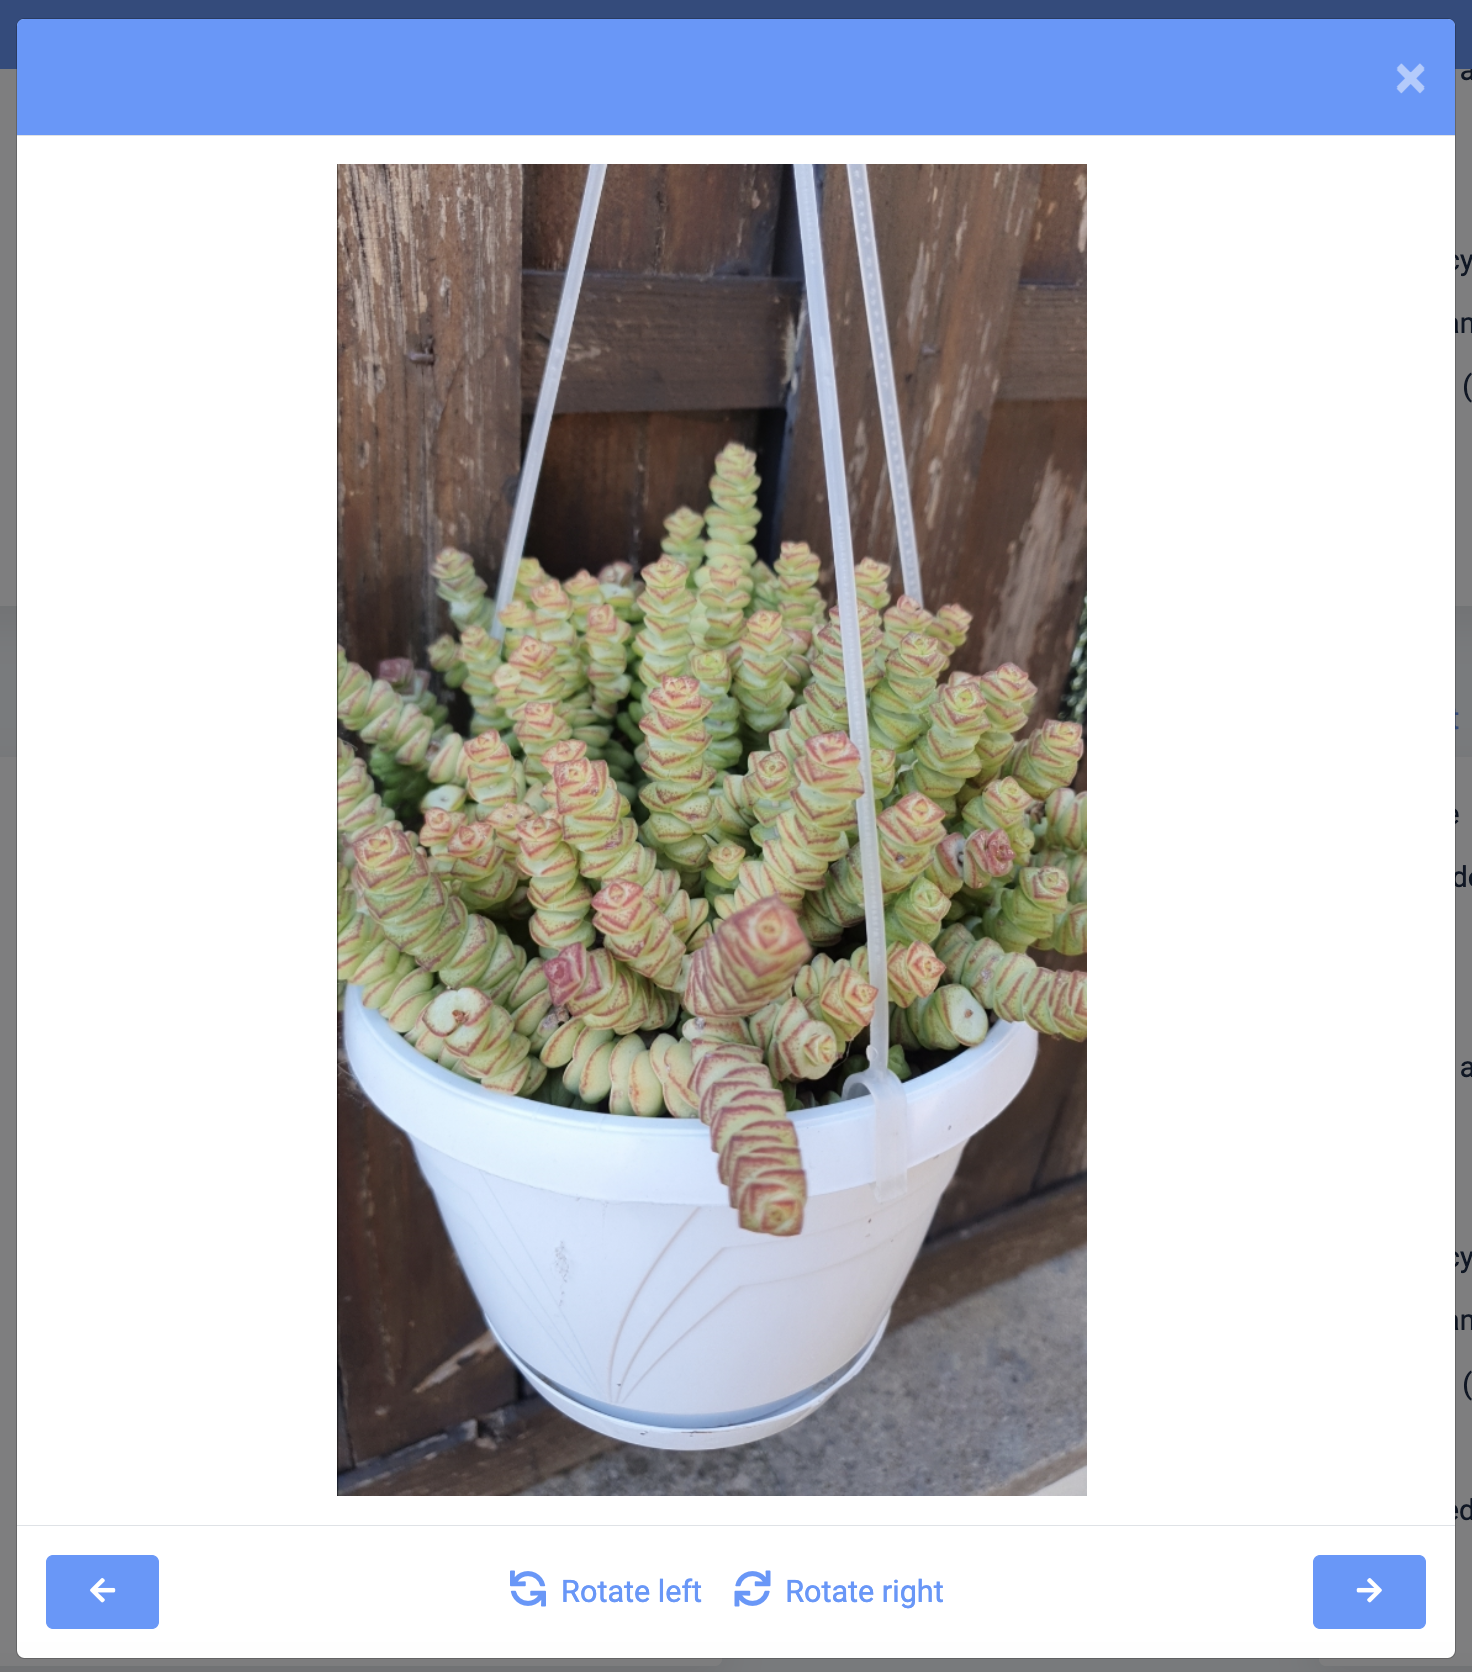
Fig. 41 Photo gallery
3.1.9 Control panel#
At the bottom is the control panel, where you can rotate the photo and jump between photos using the arrows.
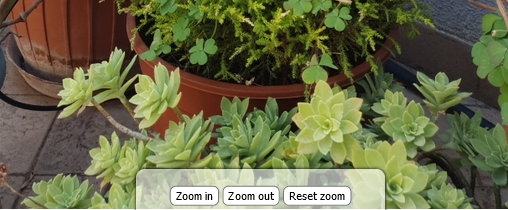
Clicking on a photo in the gallery opens a new window in which the photo is loaded in its maximum size and it is possible to
- Zoom in
- Zoom out
- Reset zoom or set the default size change is for preview only, and will not be saved.
4.0 Paths#
4.1 User paths#
At the top of the page, a map is displayed, where all of the paths are shown.
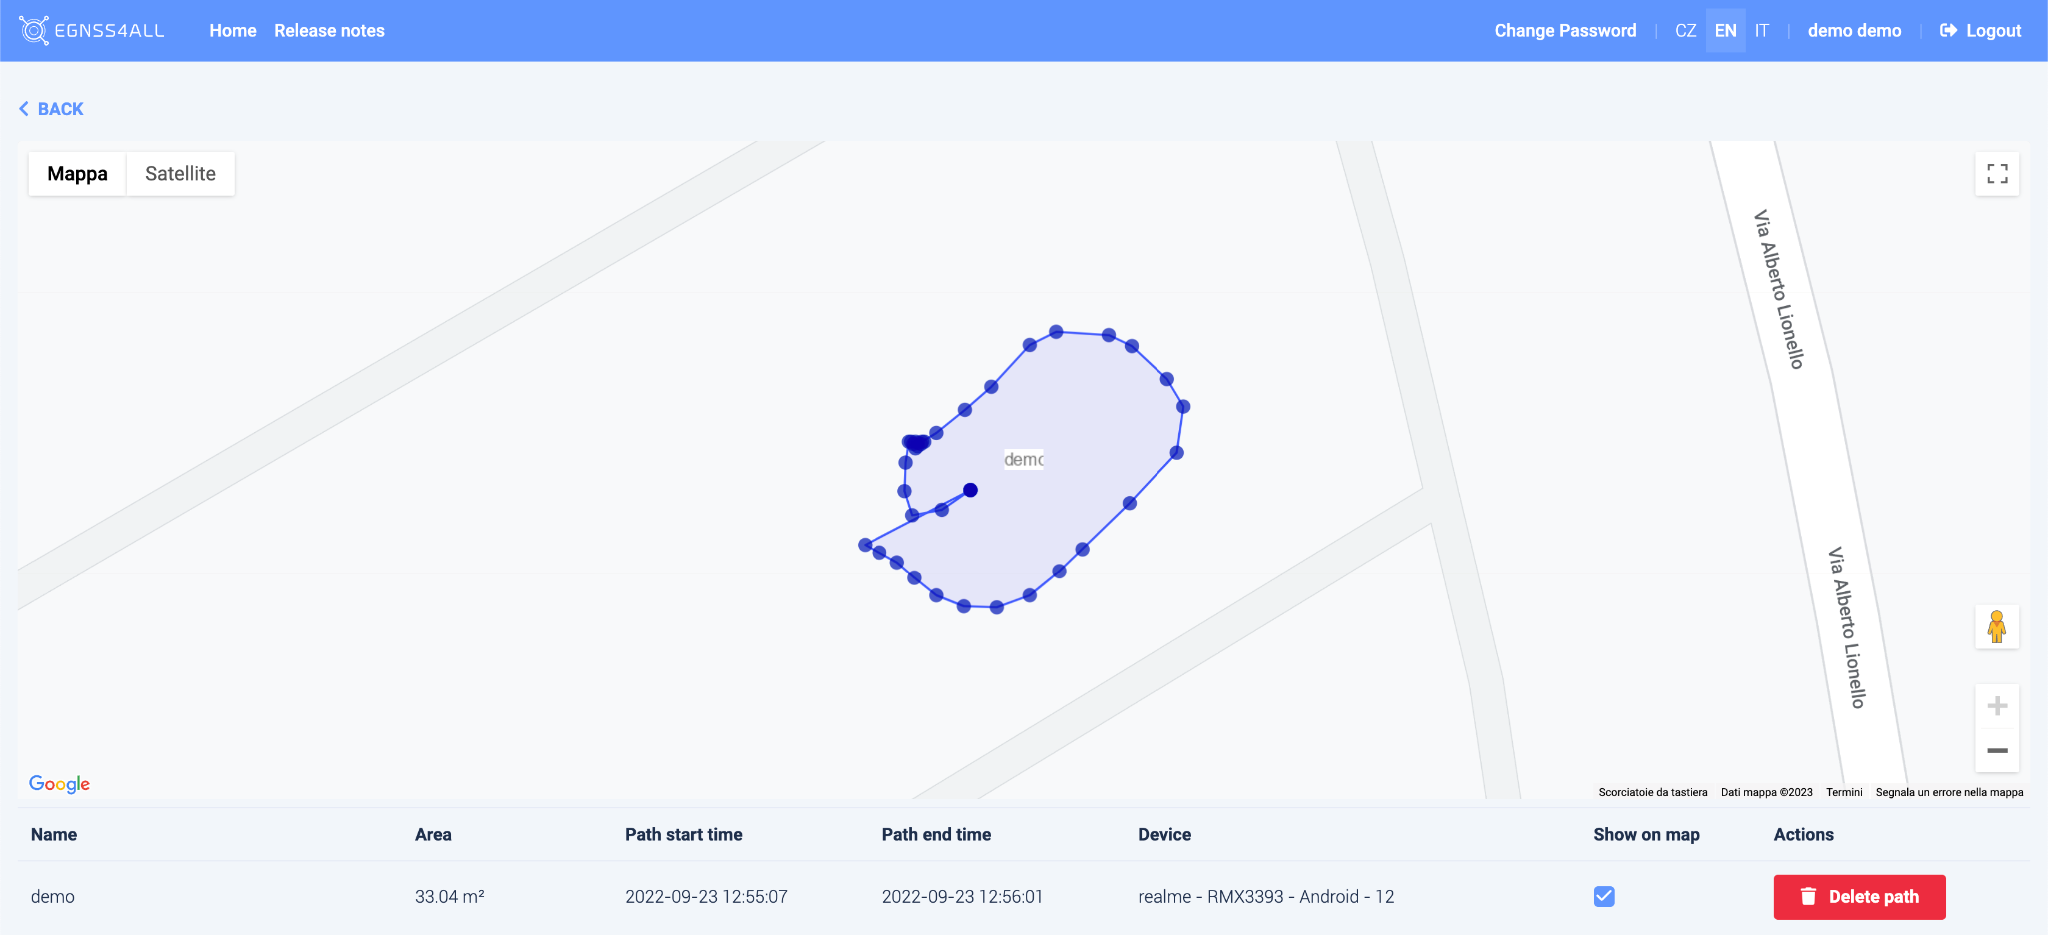
Fig. 42 User paths
Paths can be highlighted by clicking on the map. Each path has displayed points of which it is composed. Click on the point to display a table with detailed information.
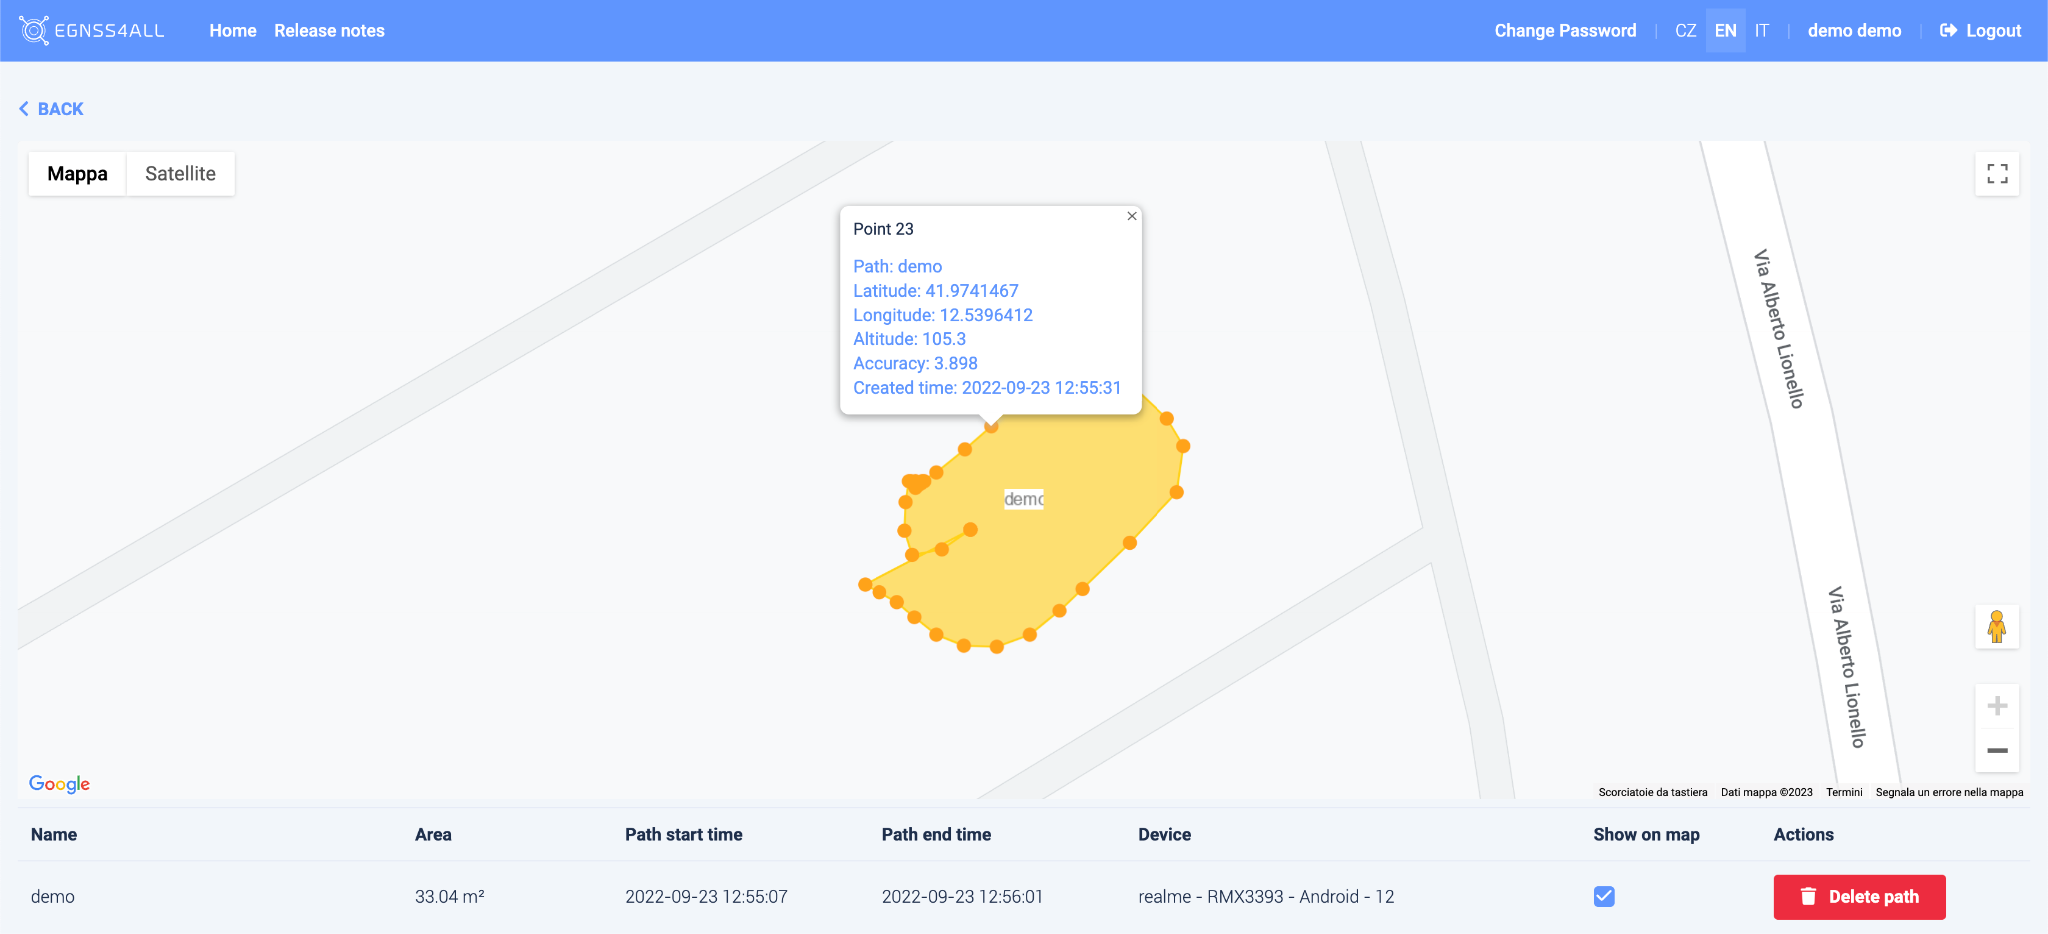
Fig. 43 Highlighted path with point detail
Below is a list of paths of the selected user. Only selected routes can be displayed on the map using the checkbox in the Show on map column.
Paths can be deleted using delete path.
![]()
4.1.1 Generating PDF documents#
The functionality of exporting data to PDF is triggered by buttons:
The buttons are available at the Unassigned photos page and the Task detail page.
The button (Export all to PDF) passes all photos at current page to a PDF export and open a PDF prepare page.
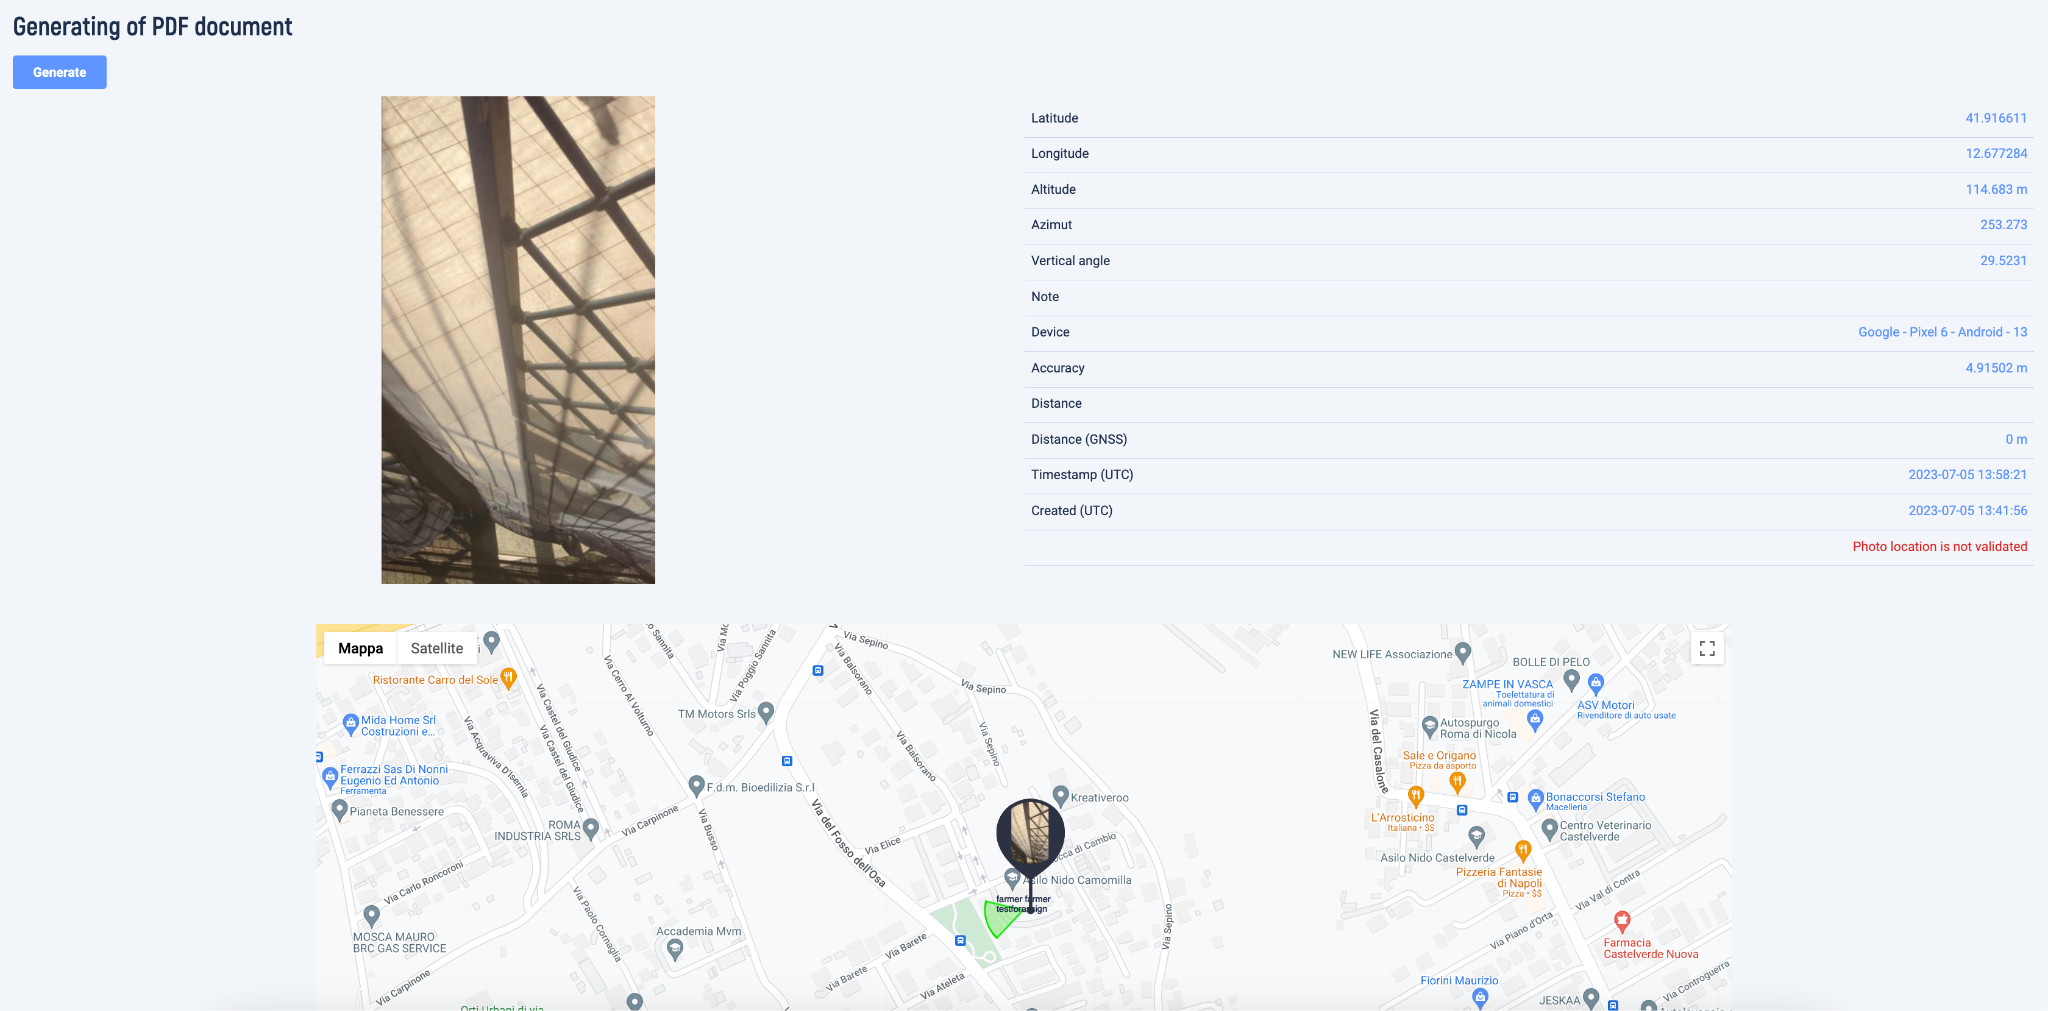
Fig. 44 PDF generating prepare page
On the PDF prepare page are displayed all the photos which are going to be exported. Every photo has its own map generated especially for the PDF which can be adjusted before export. Once everything is prepared (progress loader disappears), export is executed by clicking the “Generate” button.
Generating PDF can take some time, which depends on total count of exported photos. The user is informed by progress loader.
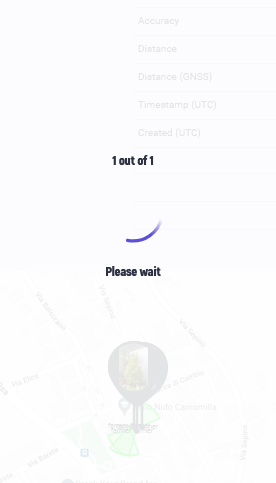
Fig. 45 Progress loader
The button “Export selected to PDF” passes to the PDF export just the selected photos:
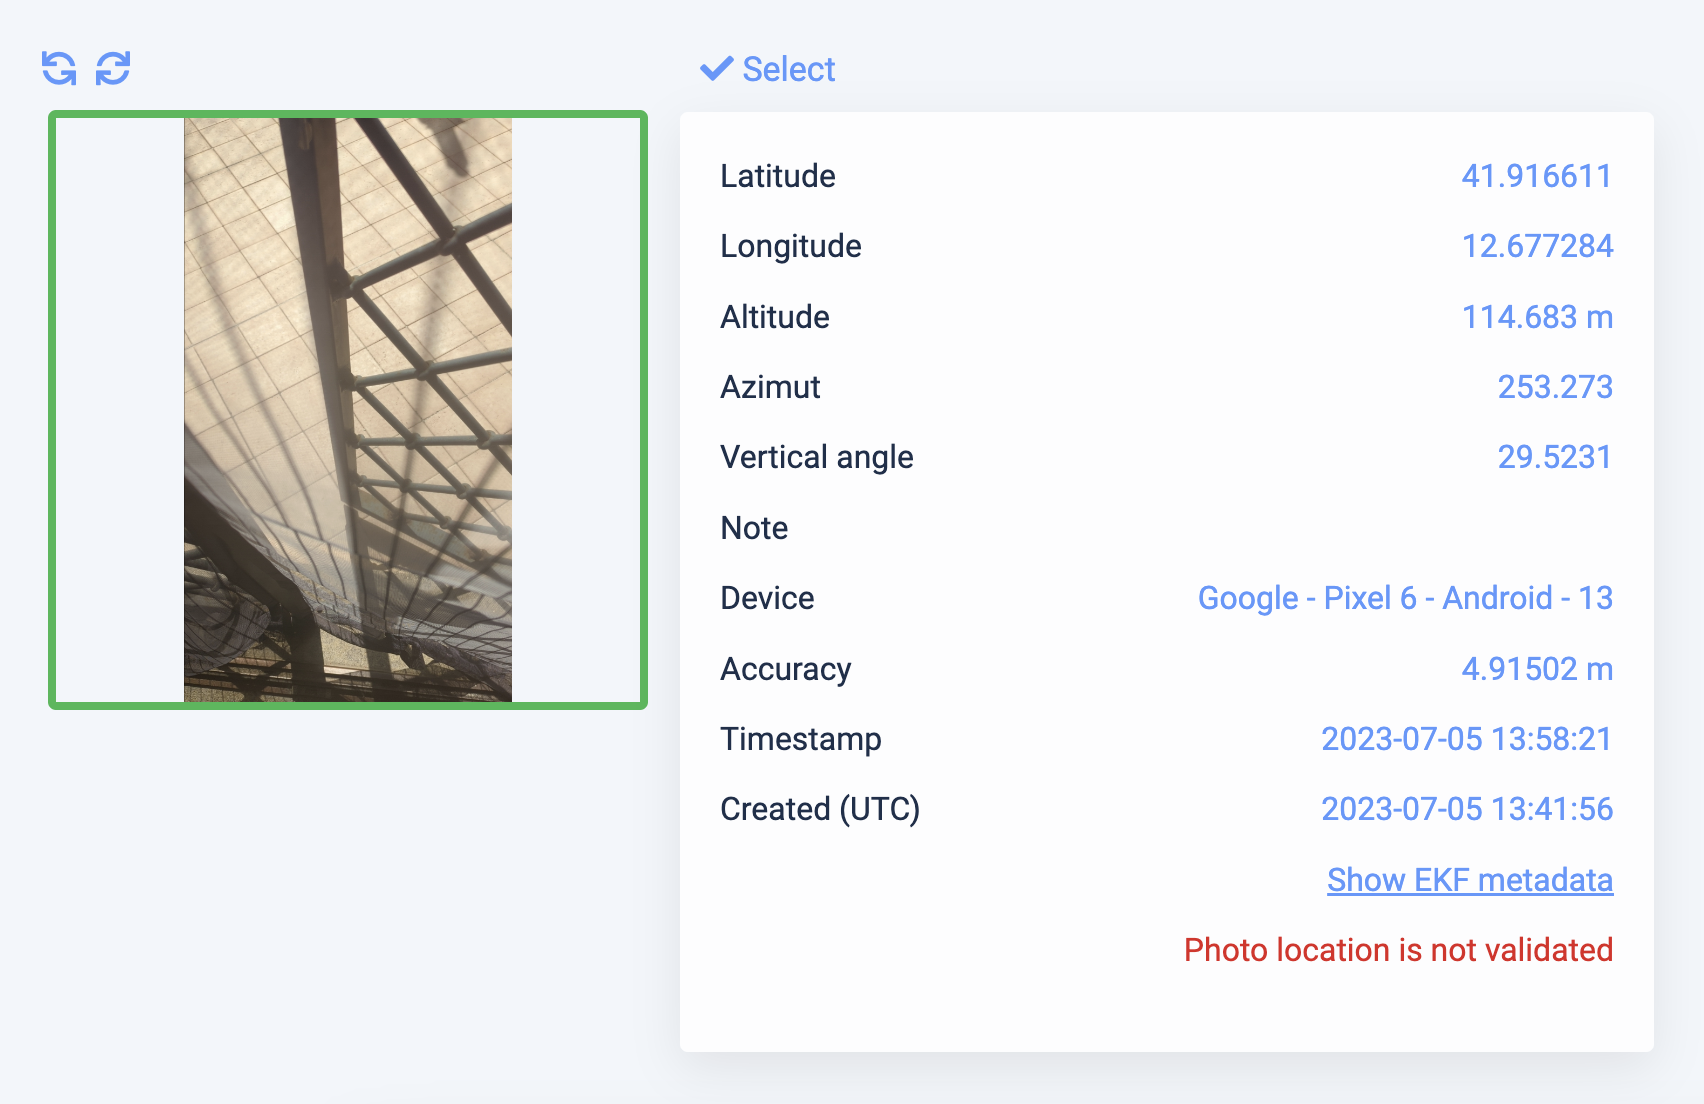
Fig. 46 Selected photo
Next steps of the exporting process are
identical to process steps described above (“Export all to PDF”).
5.0 Map#
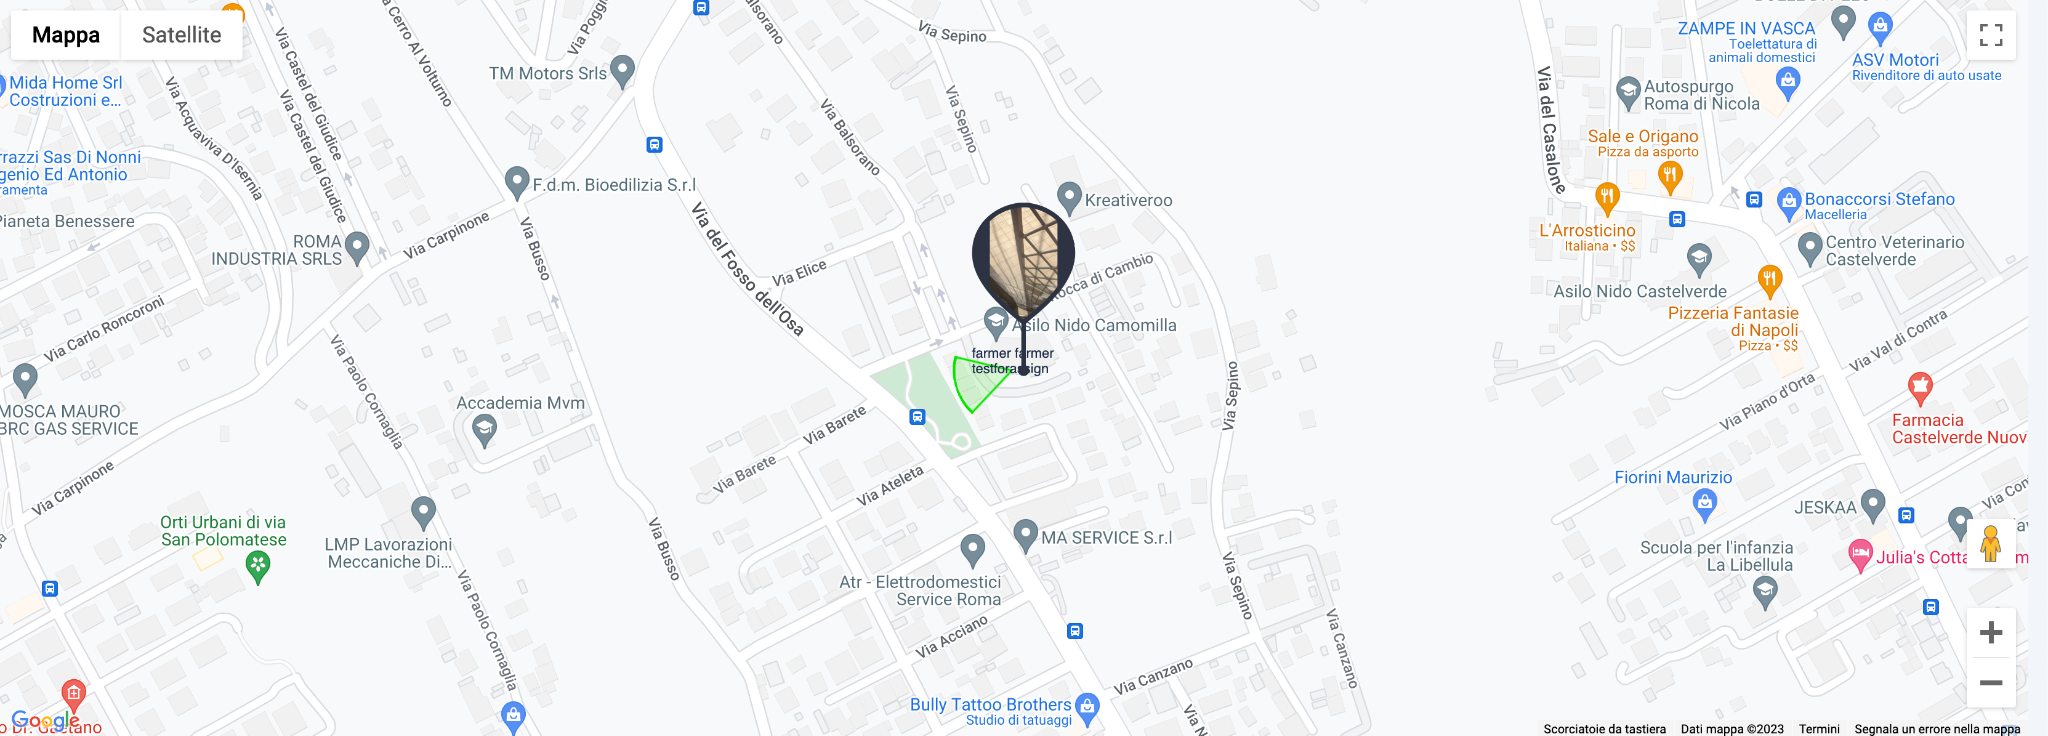
Fig. 47 Map
Points that represent photos or tasks displayed on the currently open page are always displayed on the map.
The zoom of the map is automatically set so that all points are visible in the displayed area of the map. The zoom can be adjusted manually (with the mouse wheel or using the control panel on the map).
The points are color coded according to the active status of the task. The color of the points corresponds to the color of the status in the task list. Points representing unassigned photos are not color coded.
![]()
Fig. 44 Task status list
Click on a map point to open the task detail.
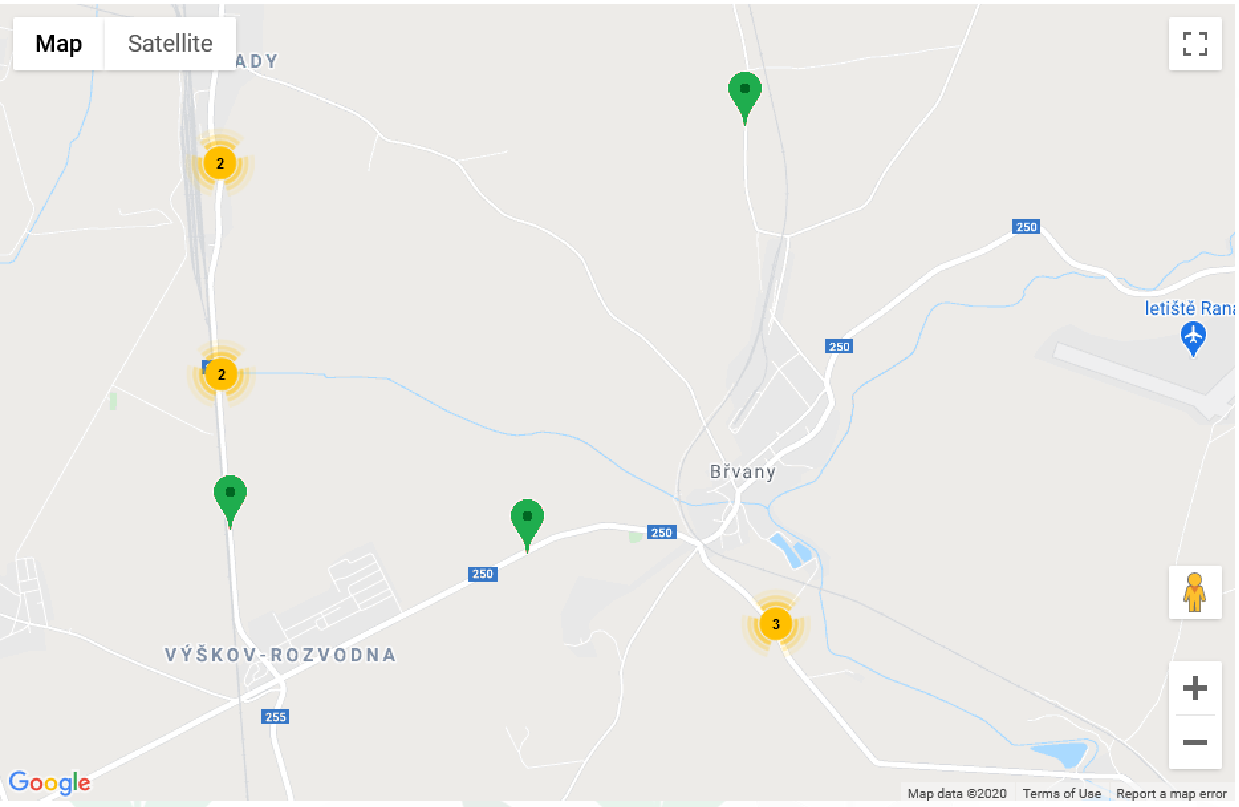
Fig. 48 Map a middle zoom
Due to the possible high concentration of points in a small area, the points are grouped into one group with a numerical expression of the number of points in a given place. Click on the group icon to zoom in on the group position. As you zoom in greatly on the map, points are changed to preview banners that display a specific user, the name of the task, the photo and the radius of the camera view at the time the photo was taken. Clicking on this banner opens the following task detail.
Polygons of existing plots and their names are also shown.
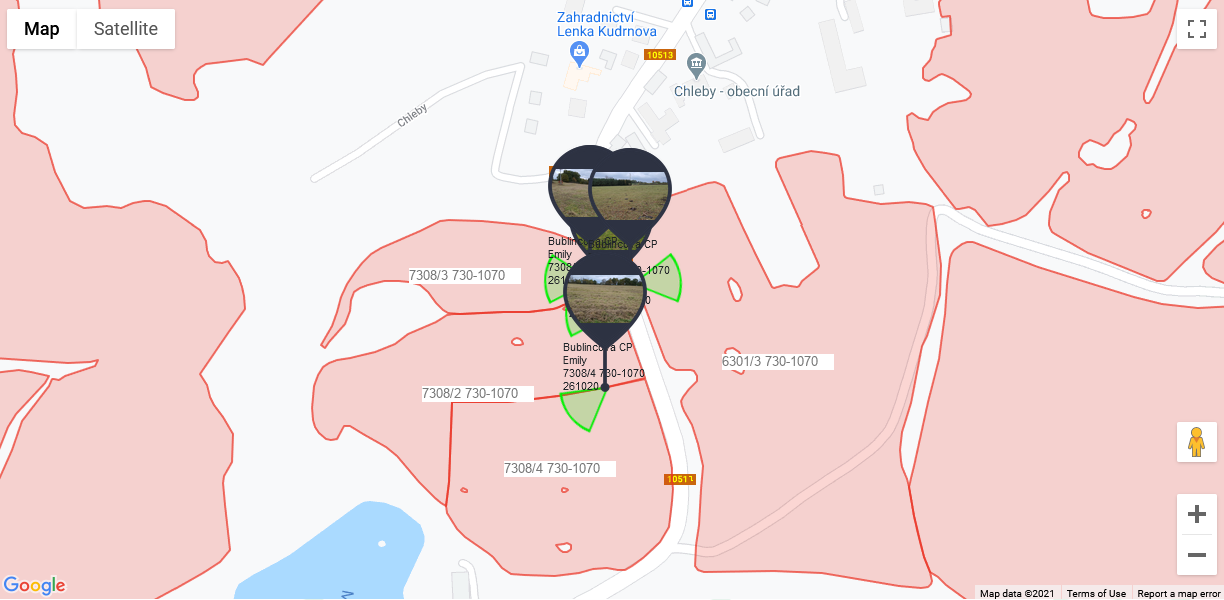
Fig. 49 Map – detail zoom in