Getting Started#
Updated
This page was updated to remove duplication with the Introduction. It now begins with a cross-reference to the Introduction.
For an overview of PIC2BIM and its key features, see the Introduction.
This page shows how to quickly install, sign in, and start capturing trusted photos.
Sign Up#
If you don’t have a PIC2BIM account, go to the Sign Up page and click Sign Up on the login screen.
Enter your details and create a password. You’ll then be asked to verify your email.
Click the link in the verification email to activate your account, then return to the app and log in.
![]()
💡 If you don’t receive the email, use the Resend Verification Email option.
Login#
Enter your username and password on the login screen, then click Sign In to complete the login process.
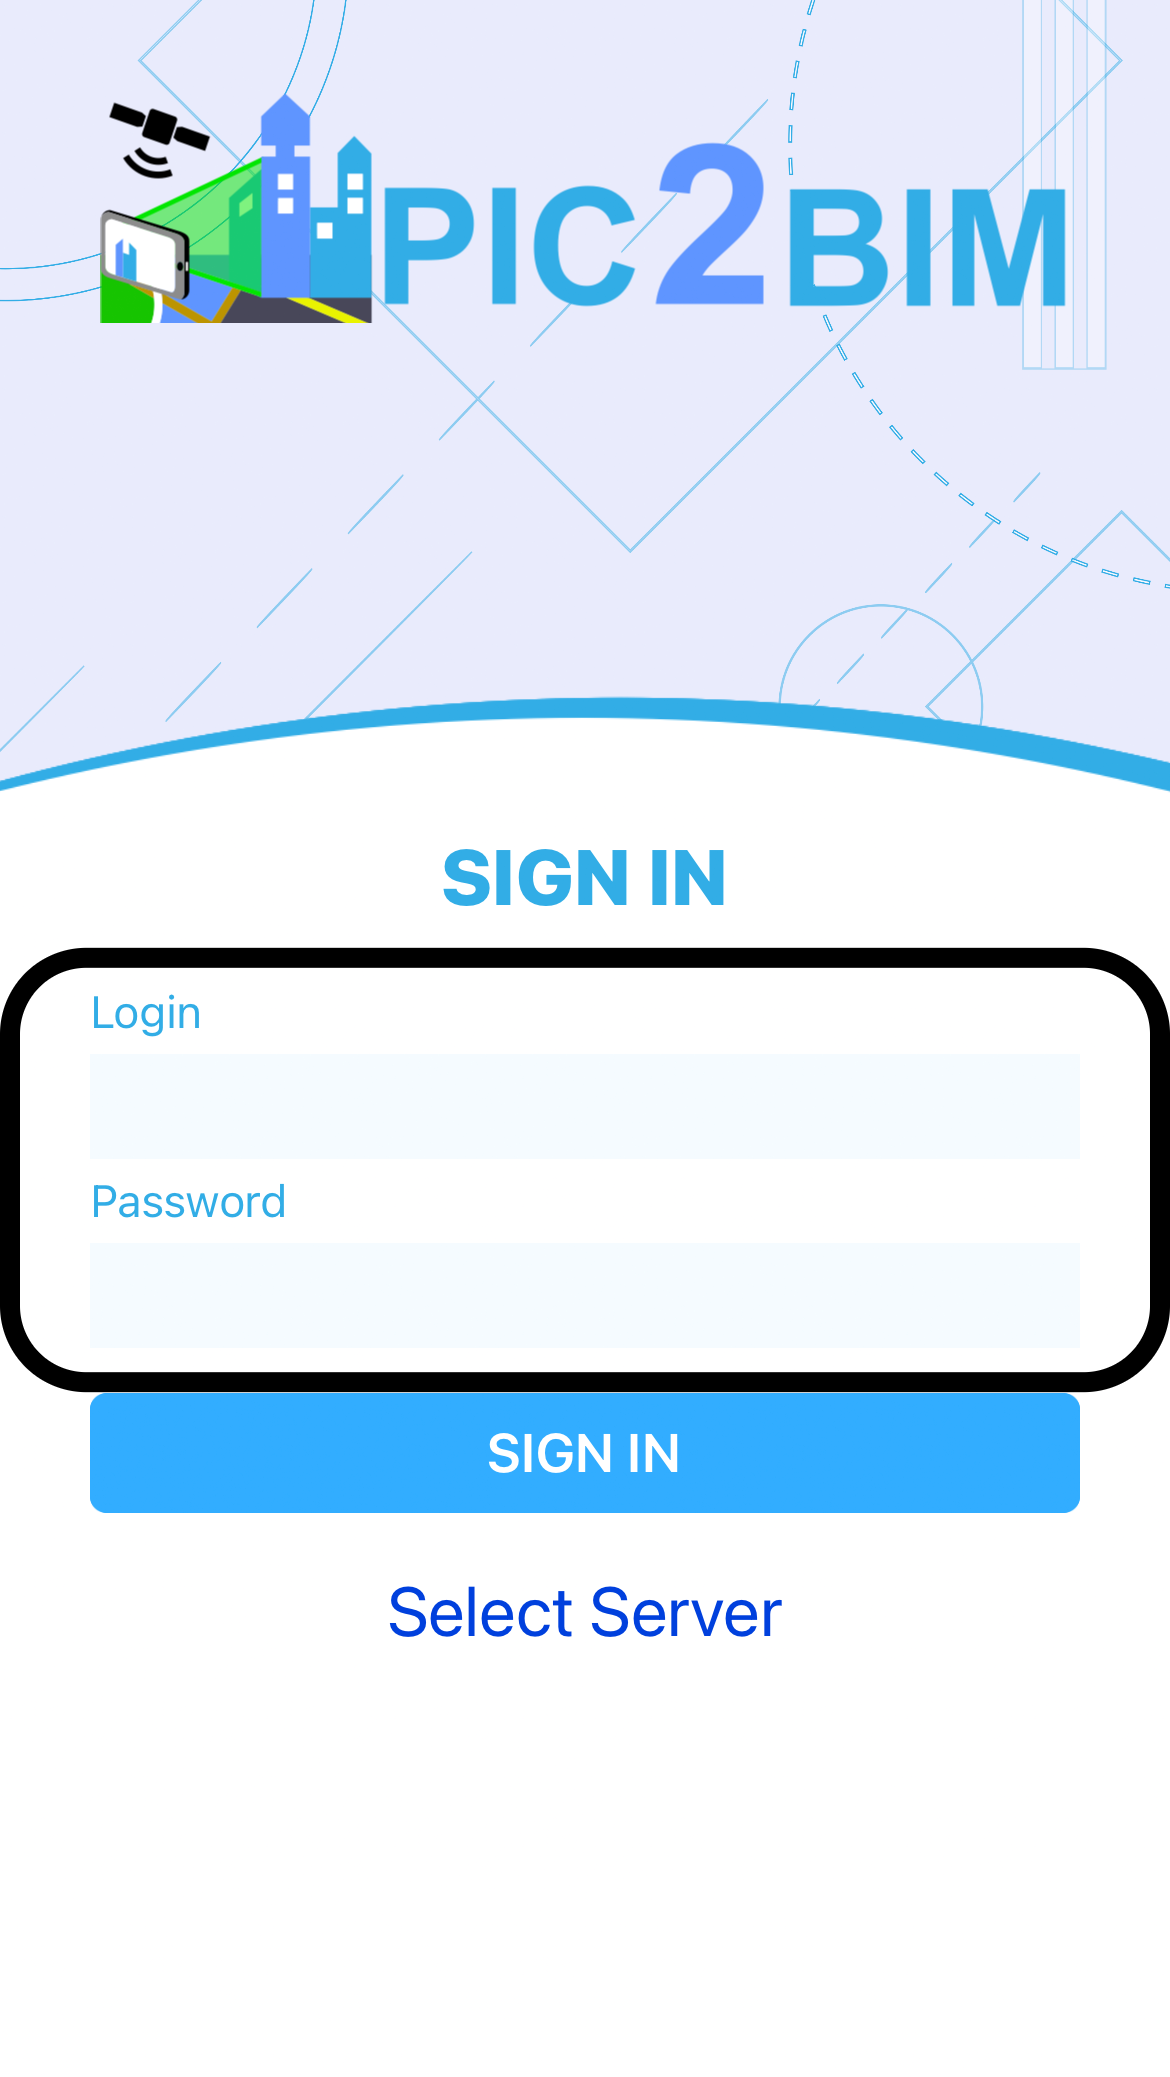
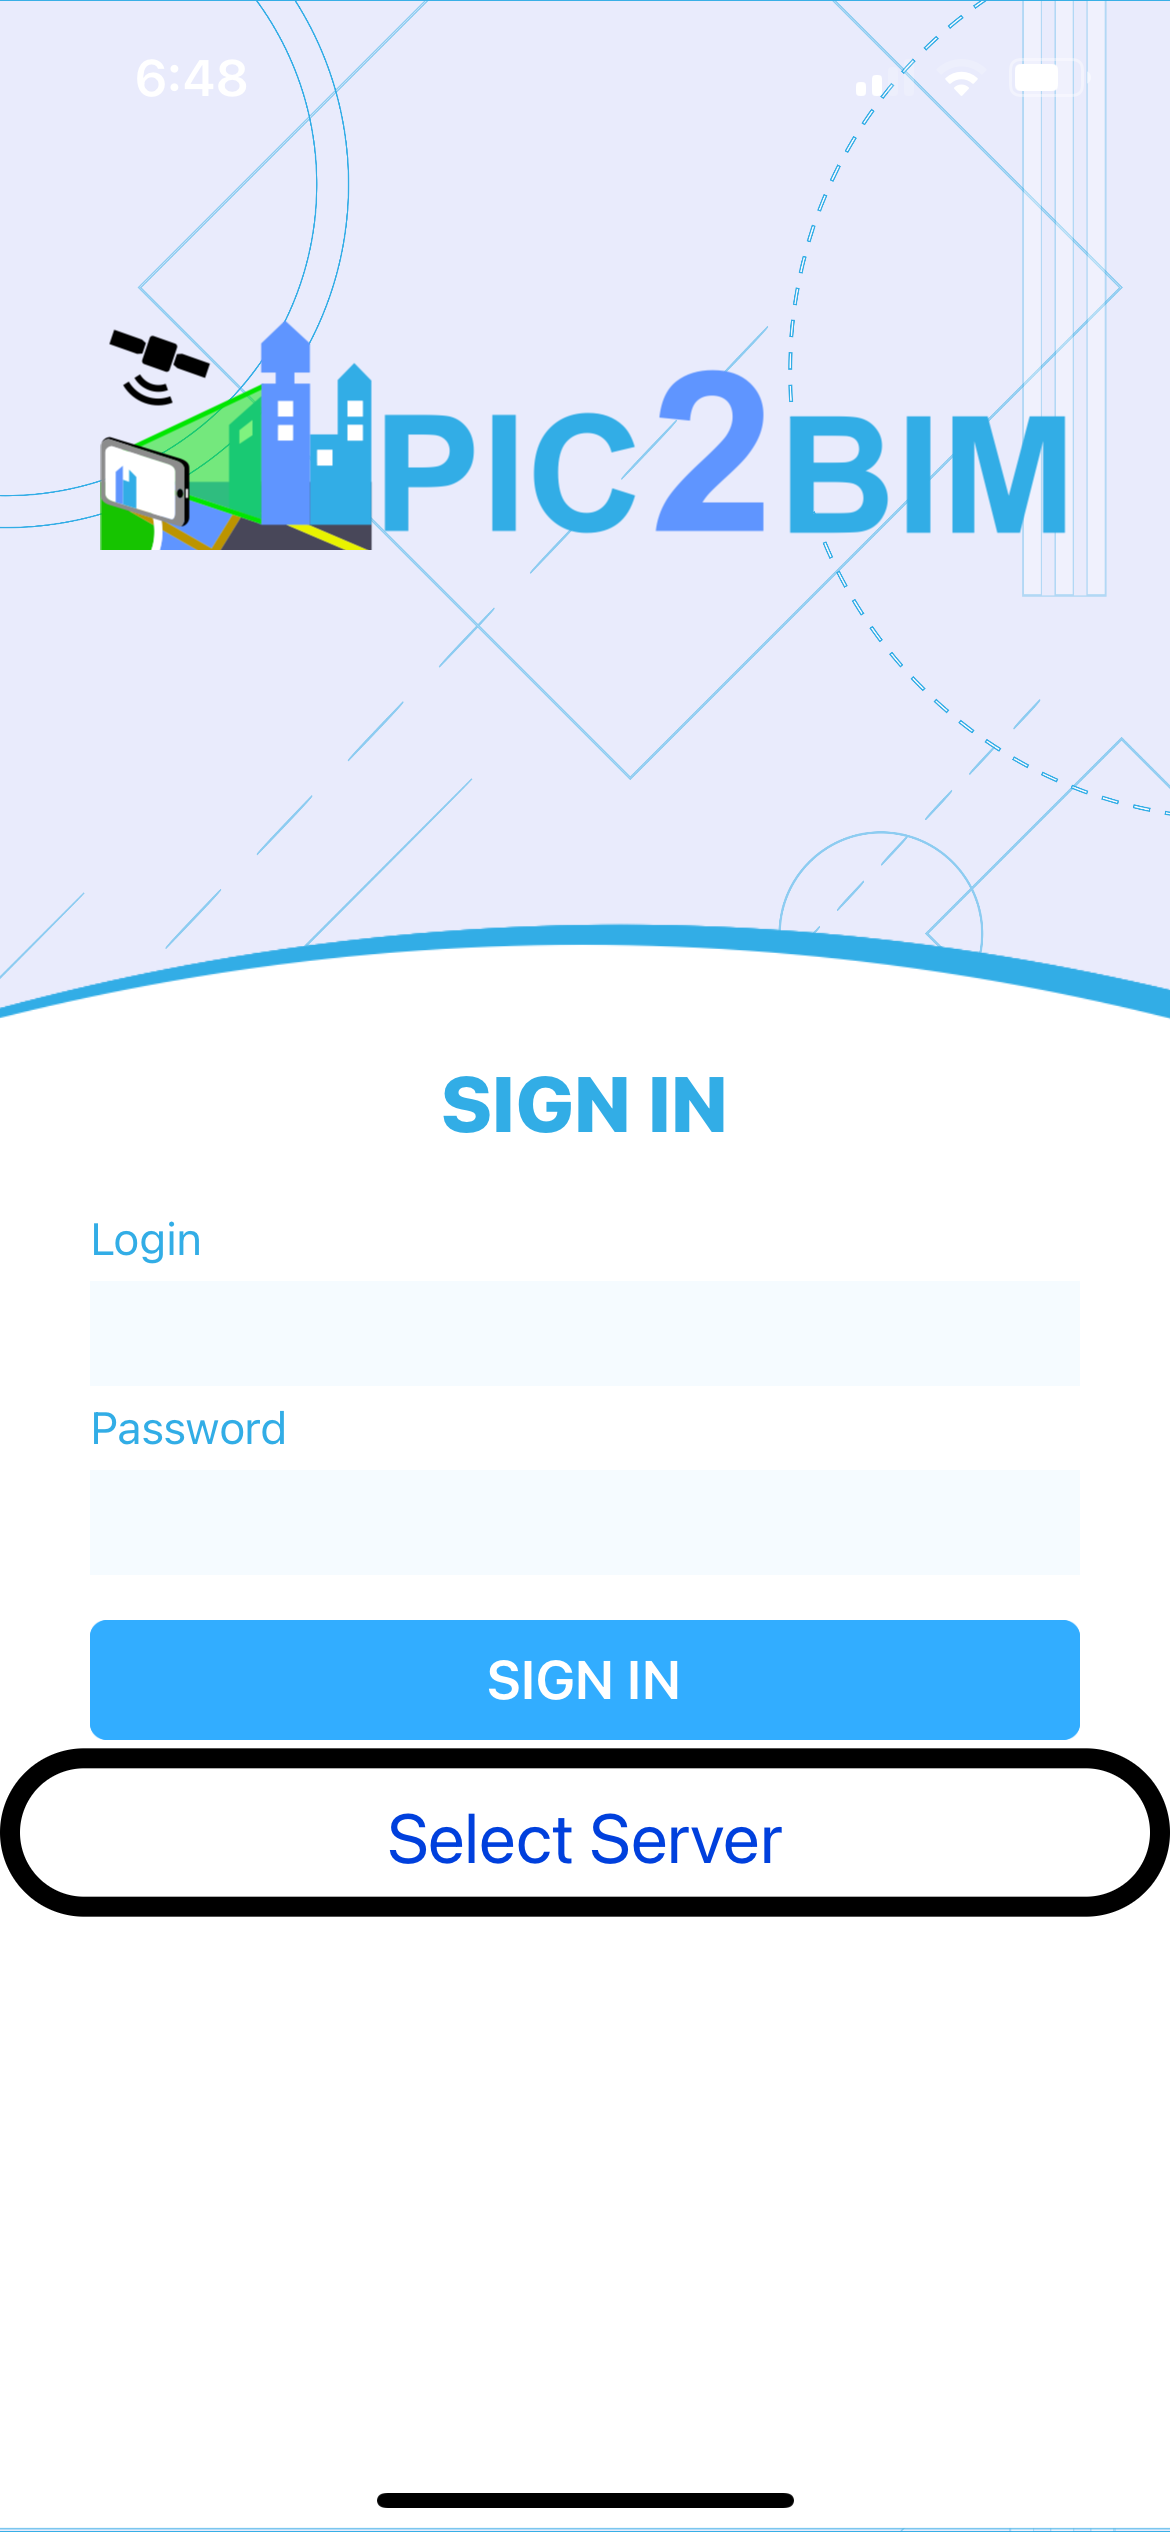
Select Server#
Make sure to grant permissions to access the device’s location.
For the first login, request a username and password at https://pic2bim.co.uk/ or use the demo credentials (demo/demo).
After logging in once, your credentials will be stored on the device for future use.
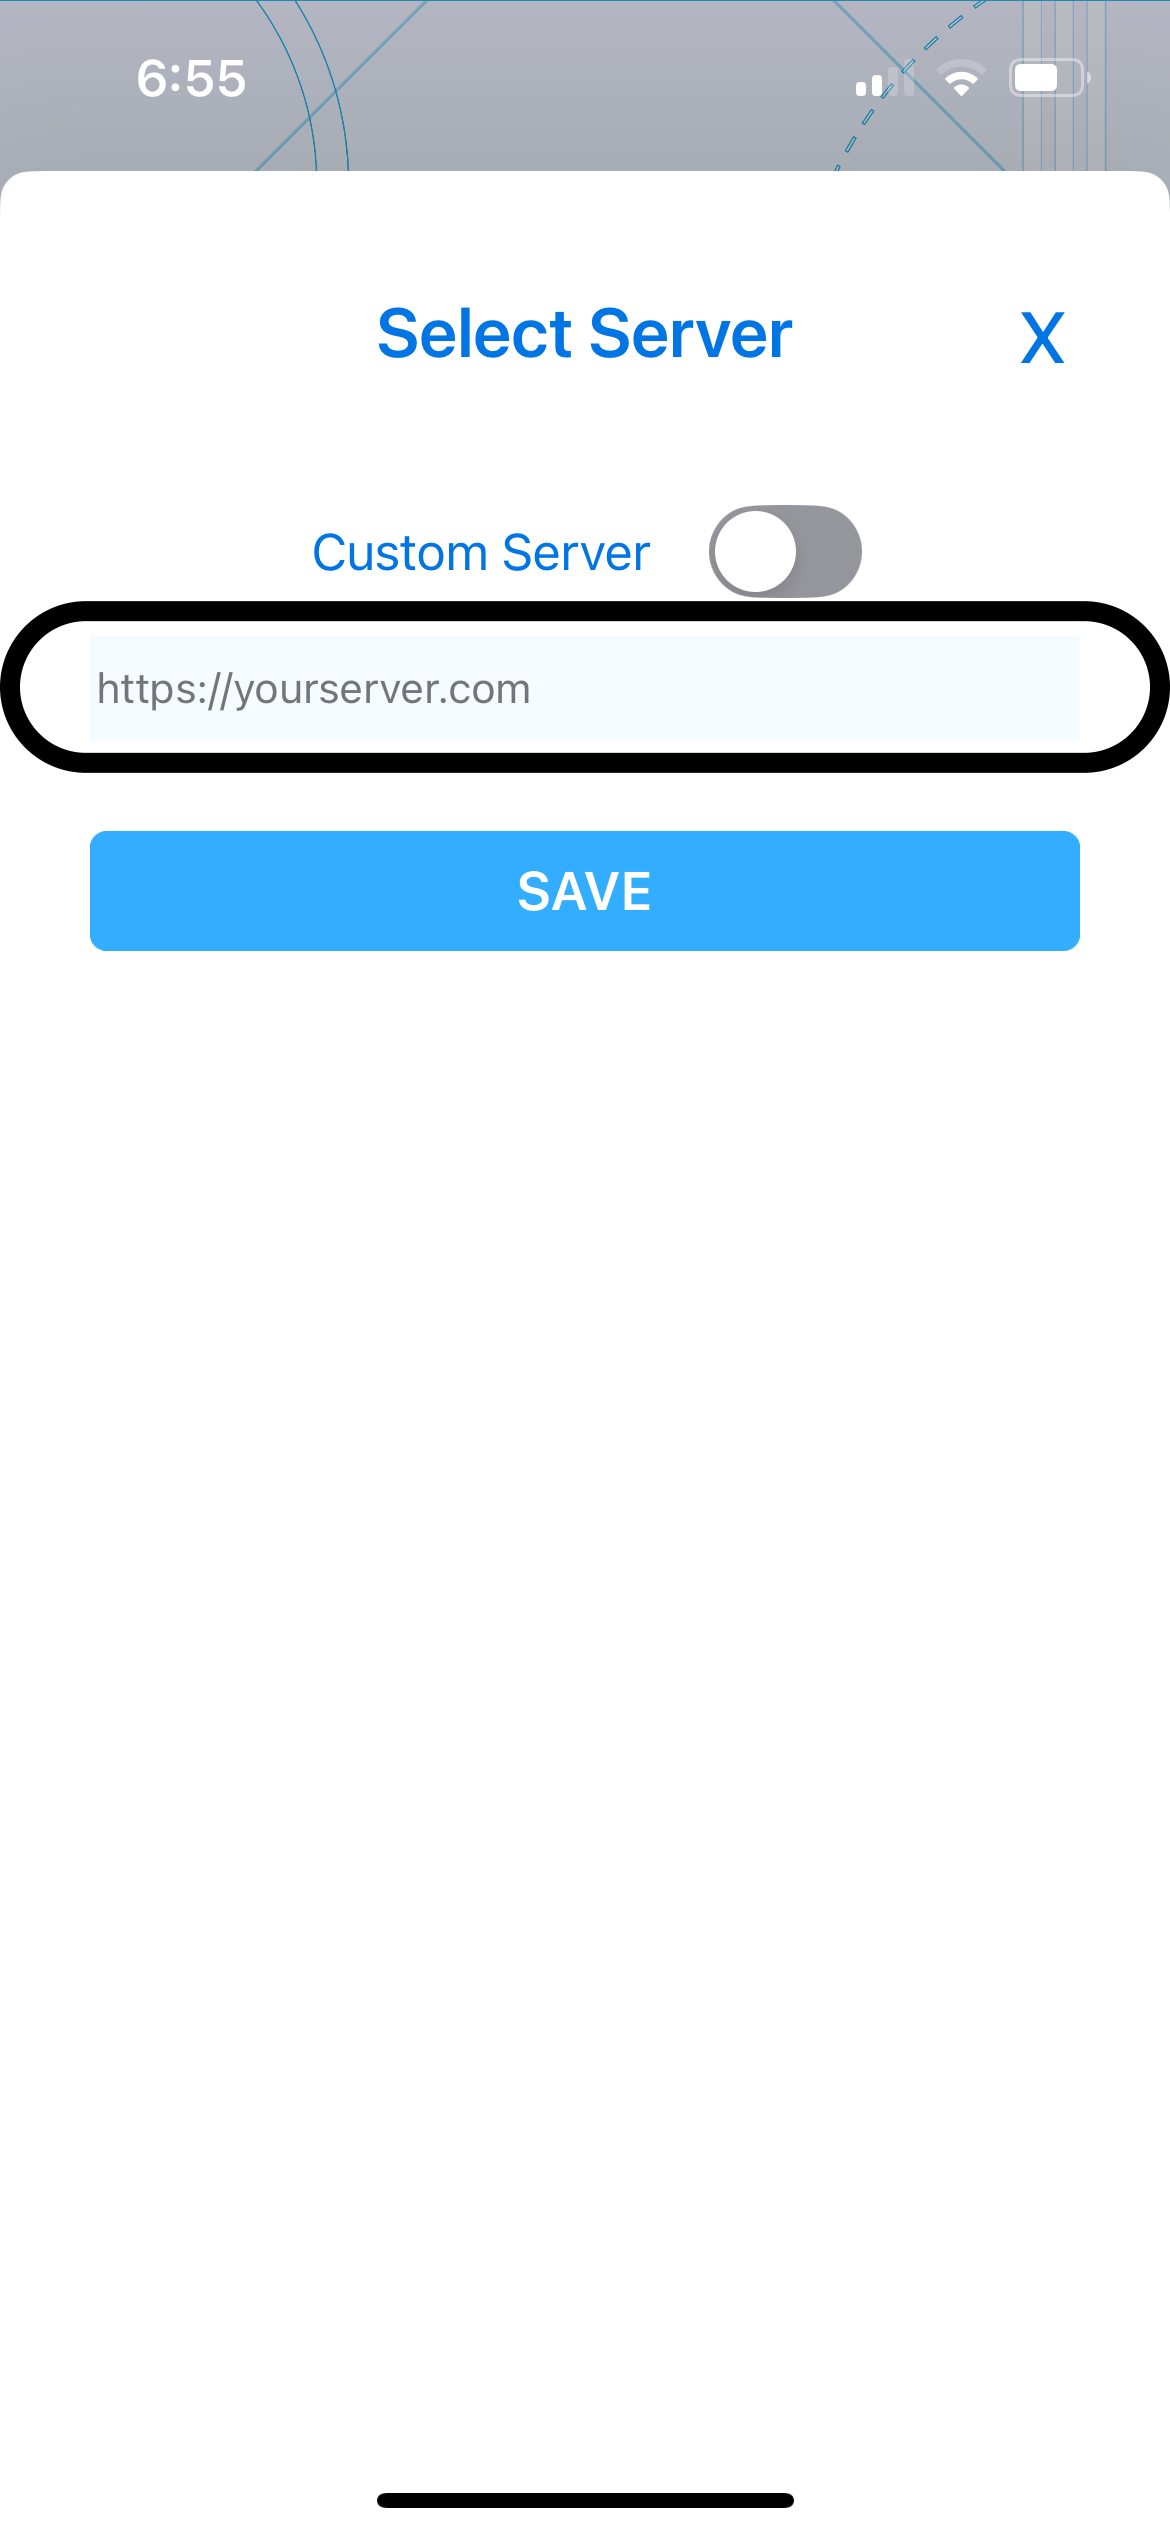
Custom Server (Optional)#
If you need to connect to a custom GeoBIM Portal, tap Select Server, enter the GeoBIM Portal URL (for example, http://192.168.1.xxx), and tap Save.
The app will then connect to this custom GeoBIM Portal instead of the default one.
You’re Ready to Go! 🎉
A photo of a construction site wall is not just an image—it’s automatically linked to its building footprint and stored with secure metadata, ready for BIM integration.
Taking Photos#
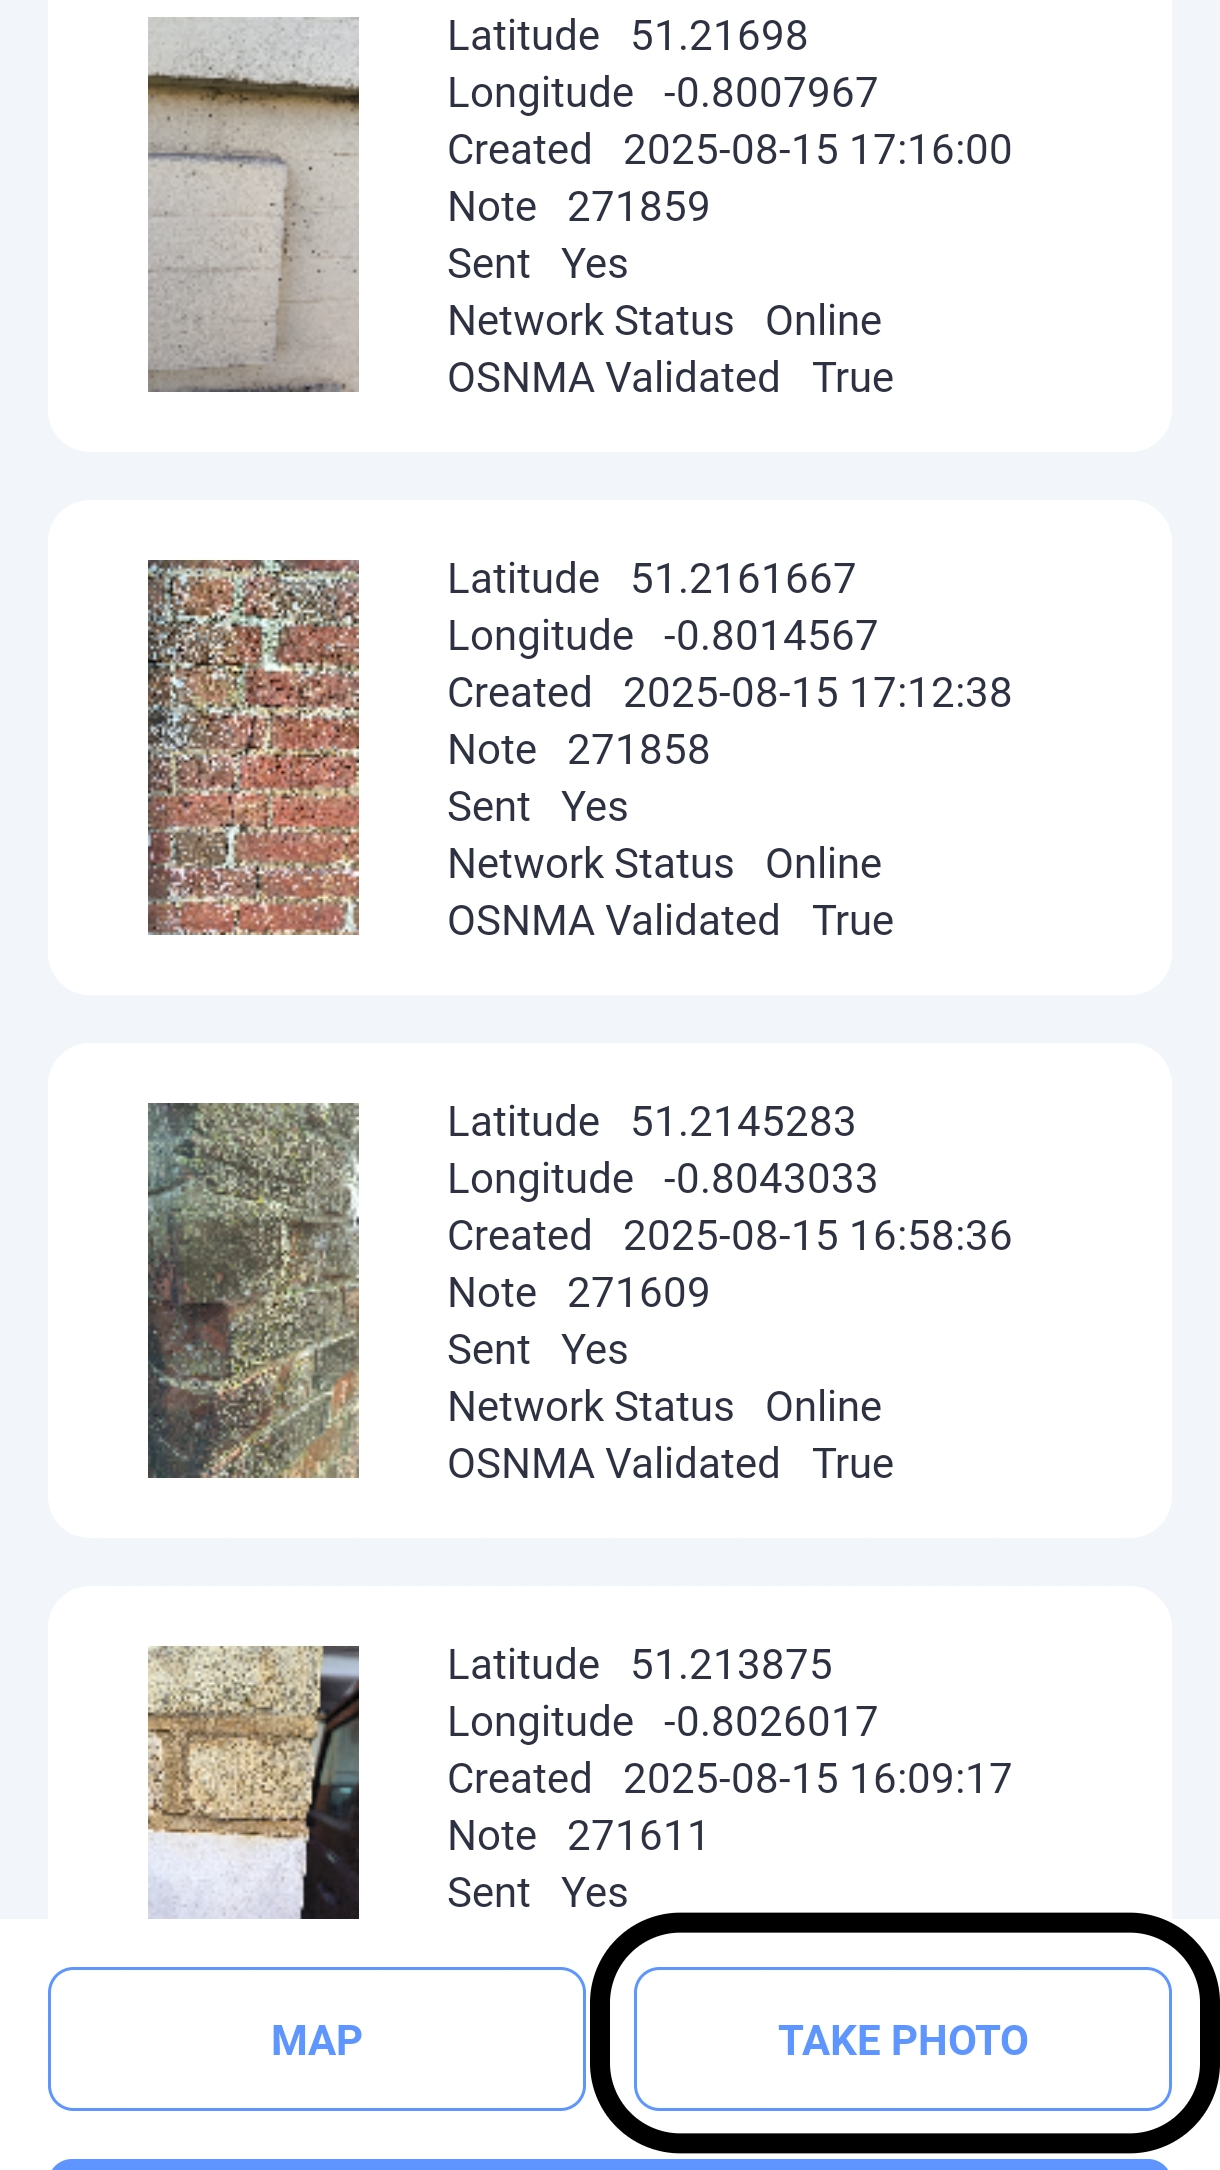
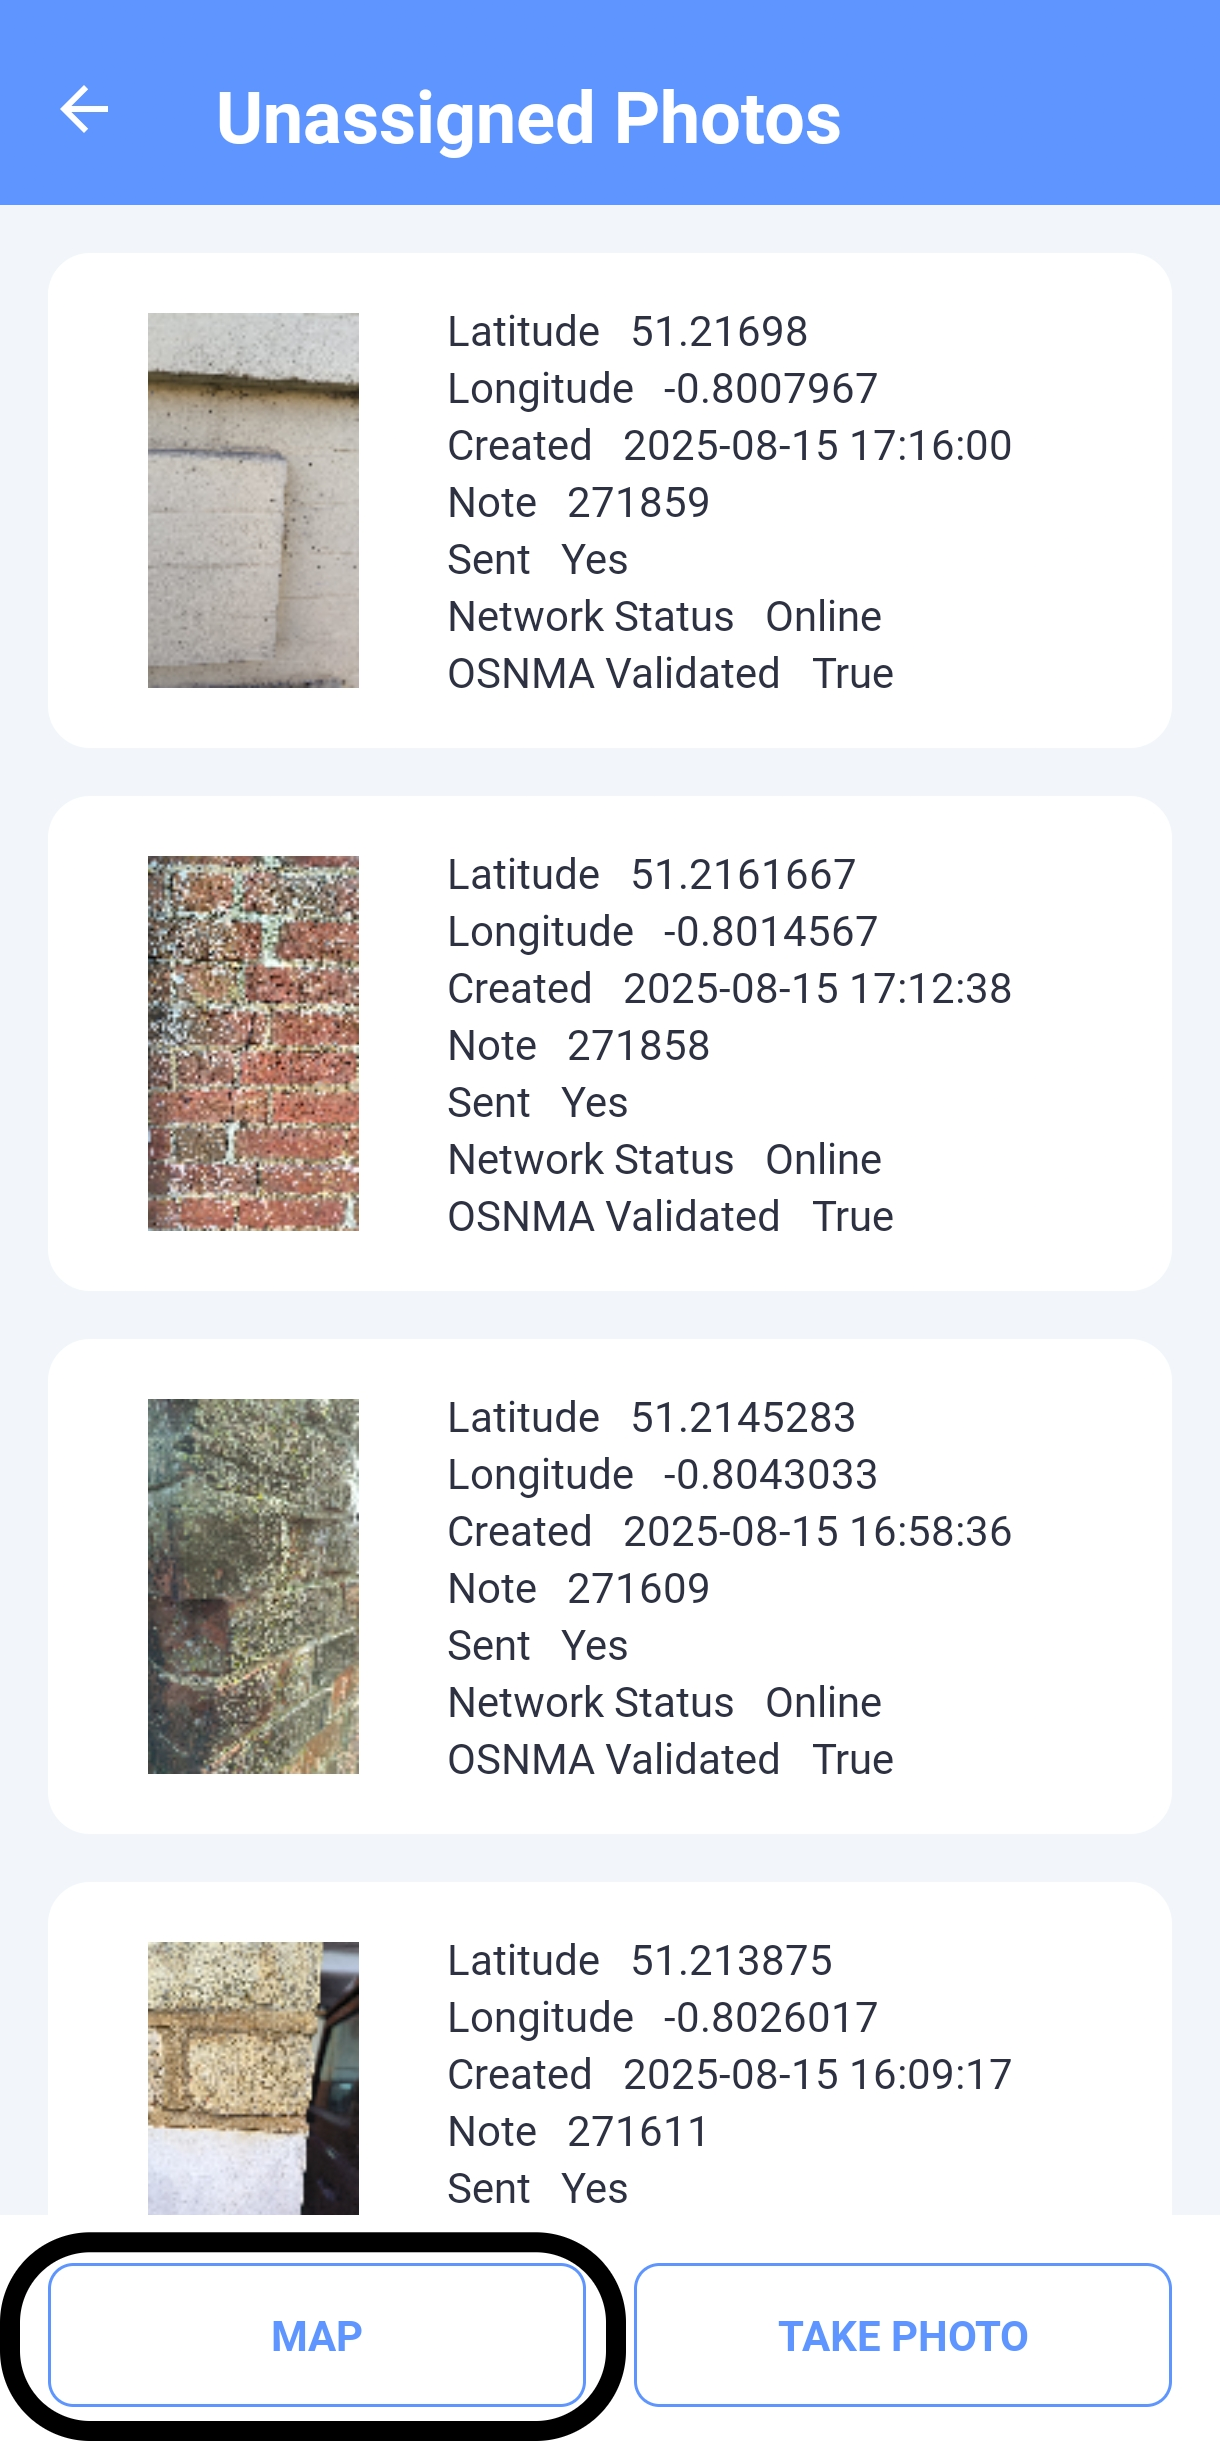
Go to Photos Menu (iOS) or Unassigned Photos (Android).
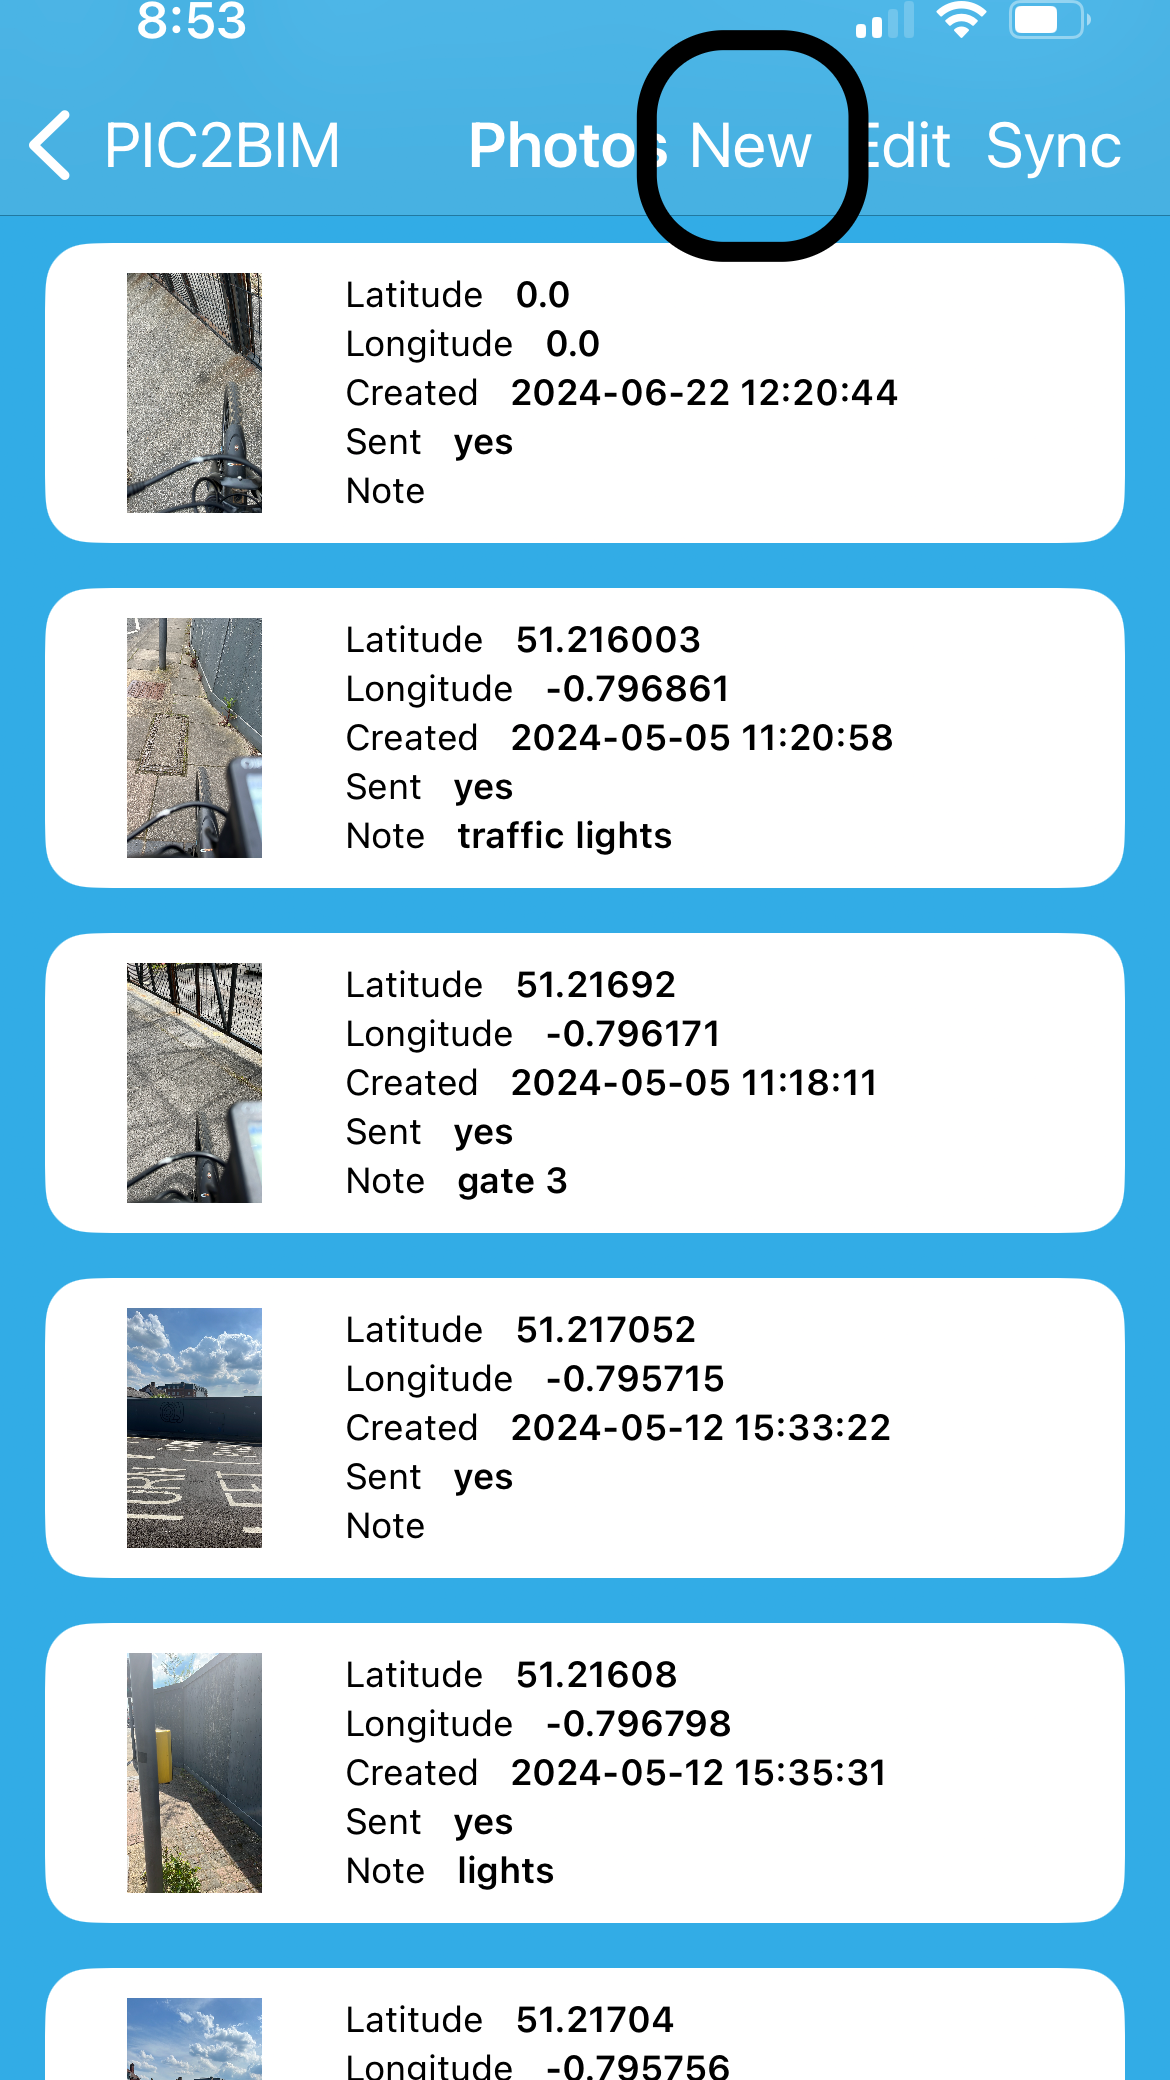
On iOS, tap New. Once ready, the Snap Photo button appears.
On Android, tap Take Photo. Once ready, the Snap Photo button appears.
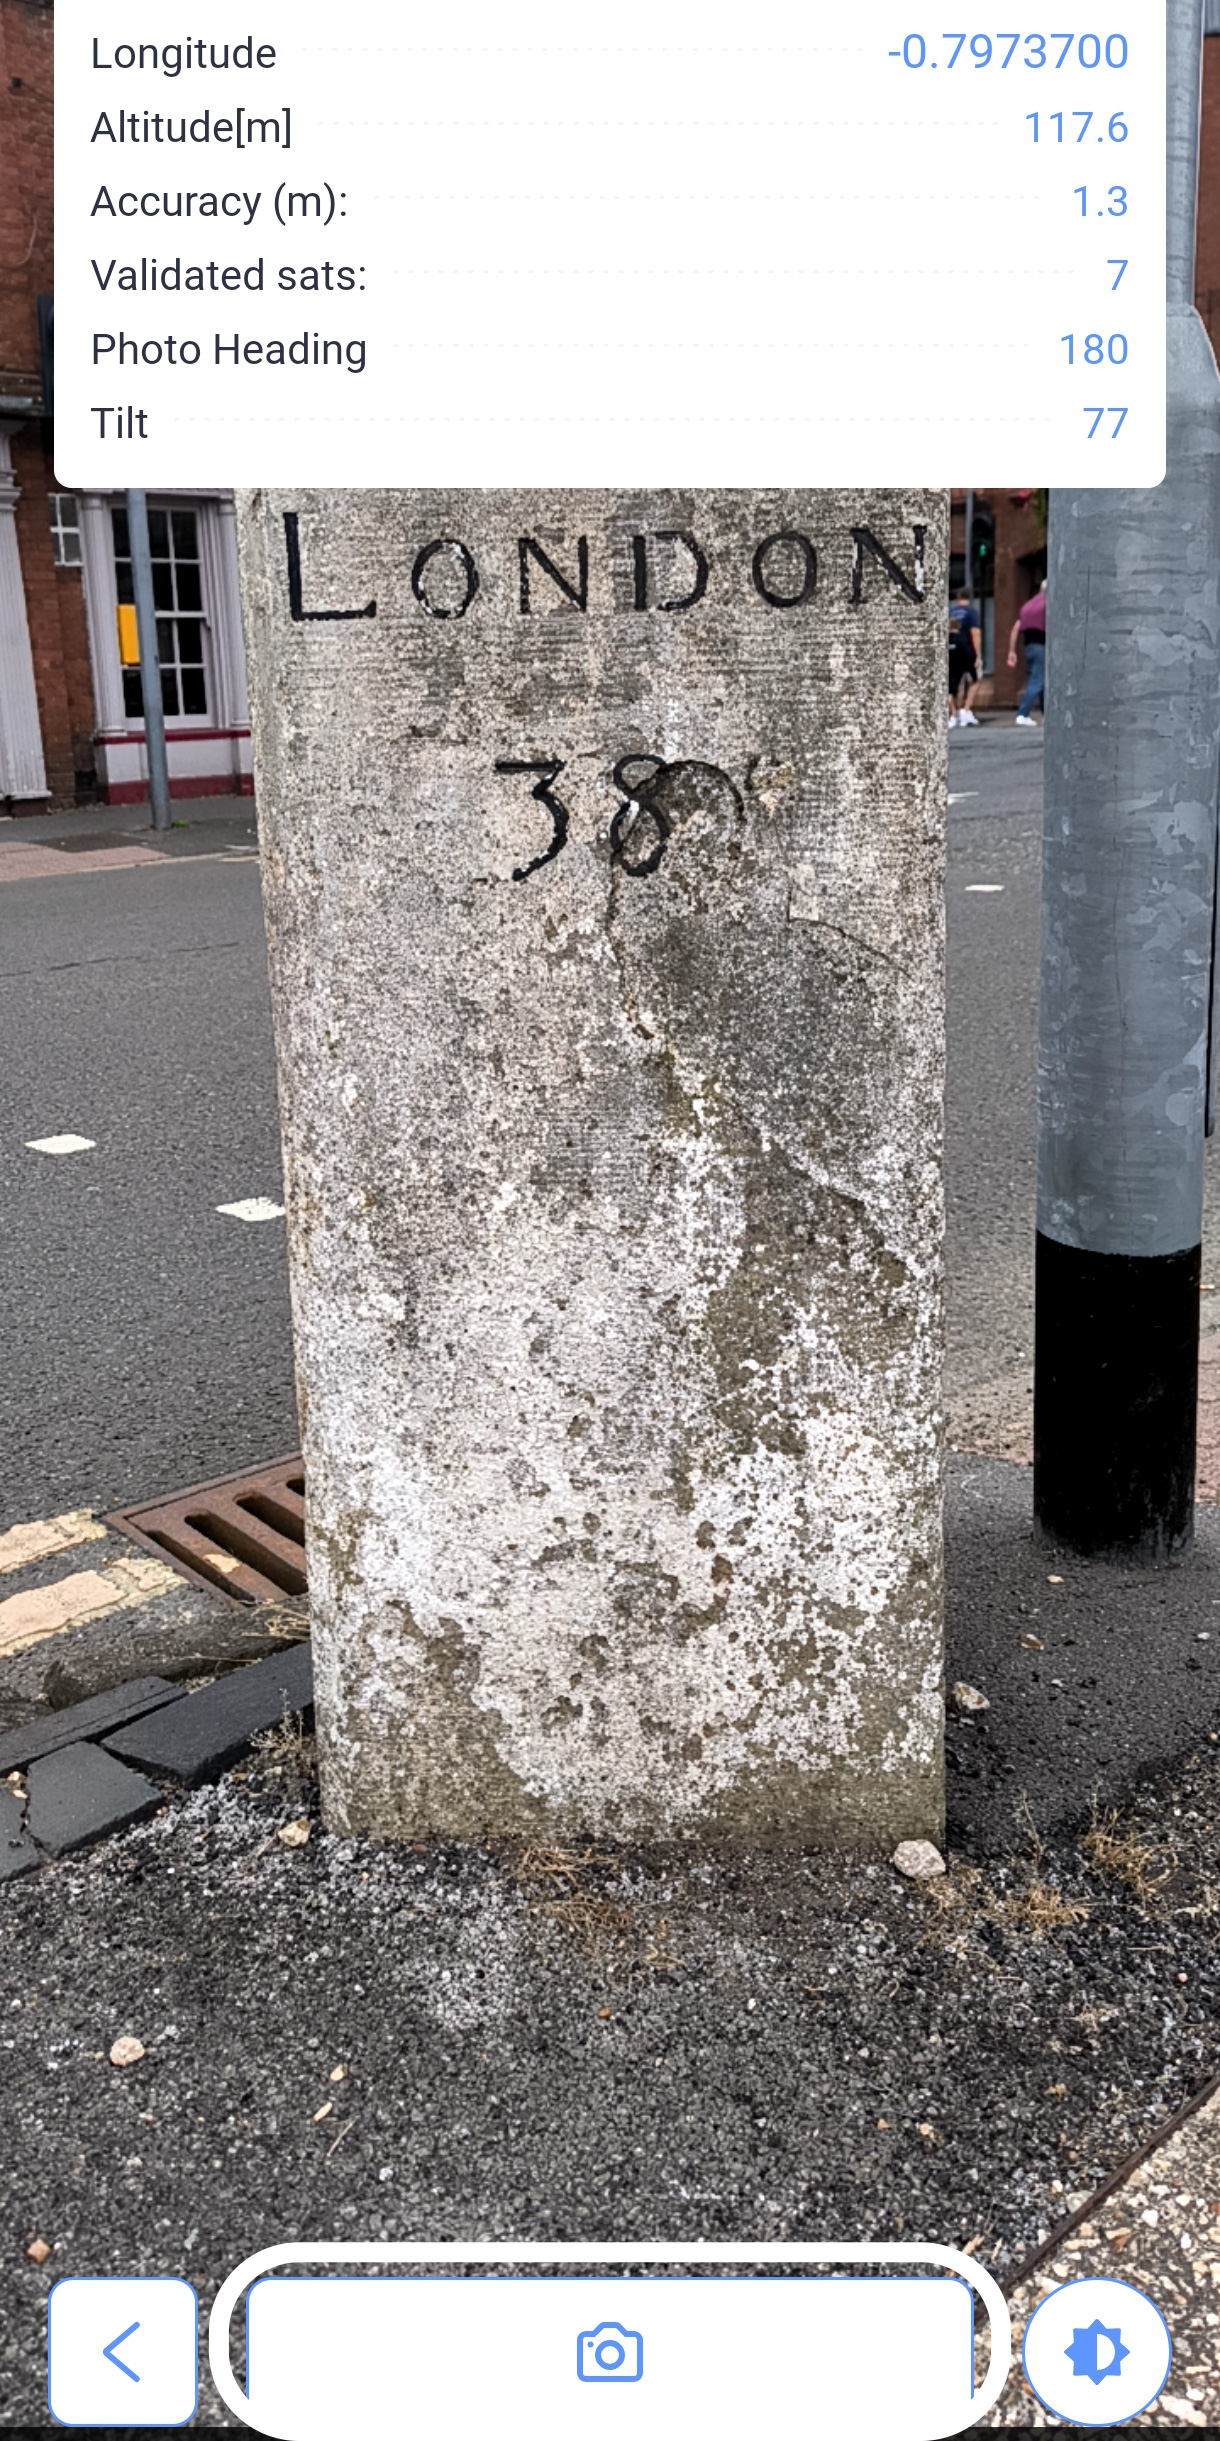
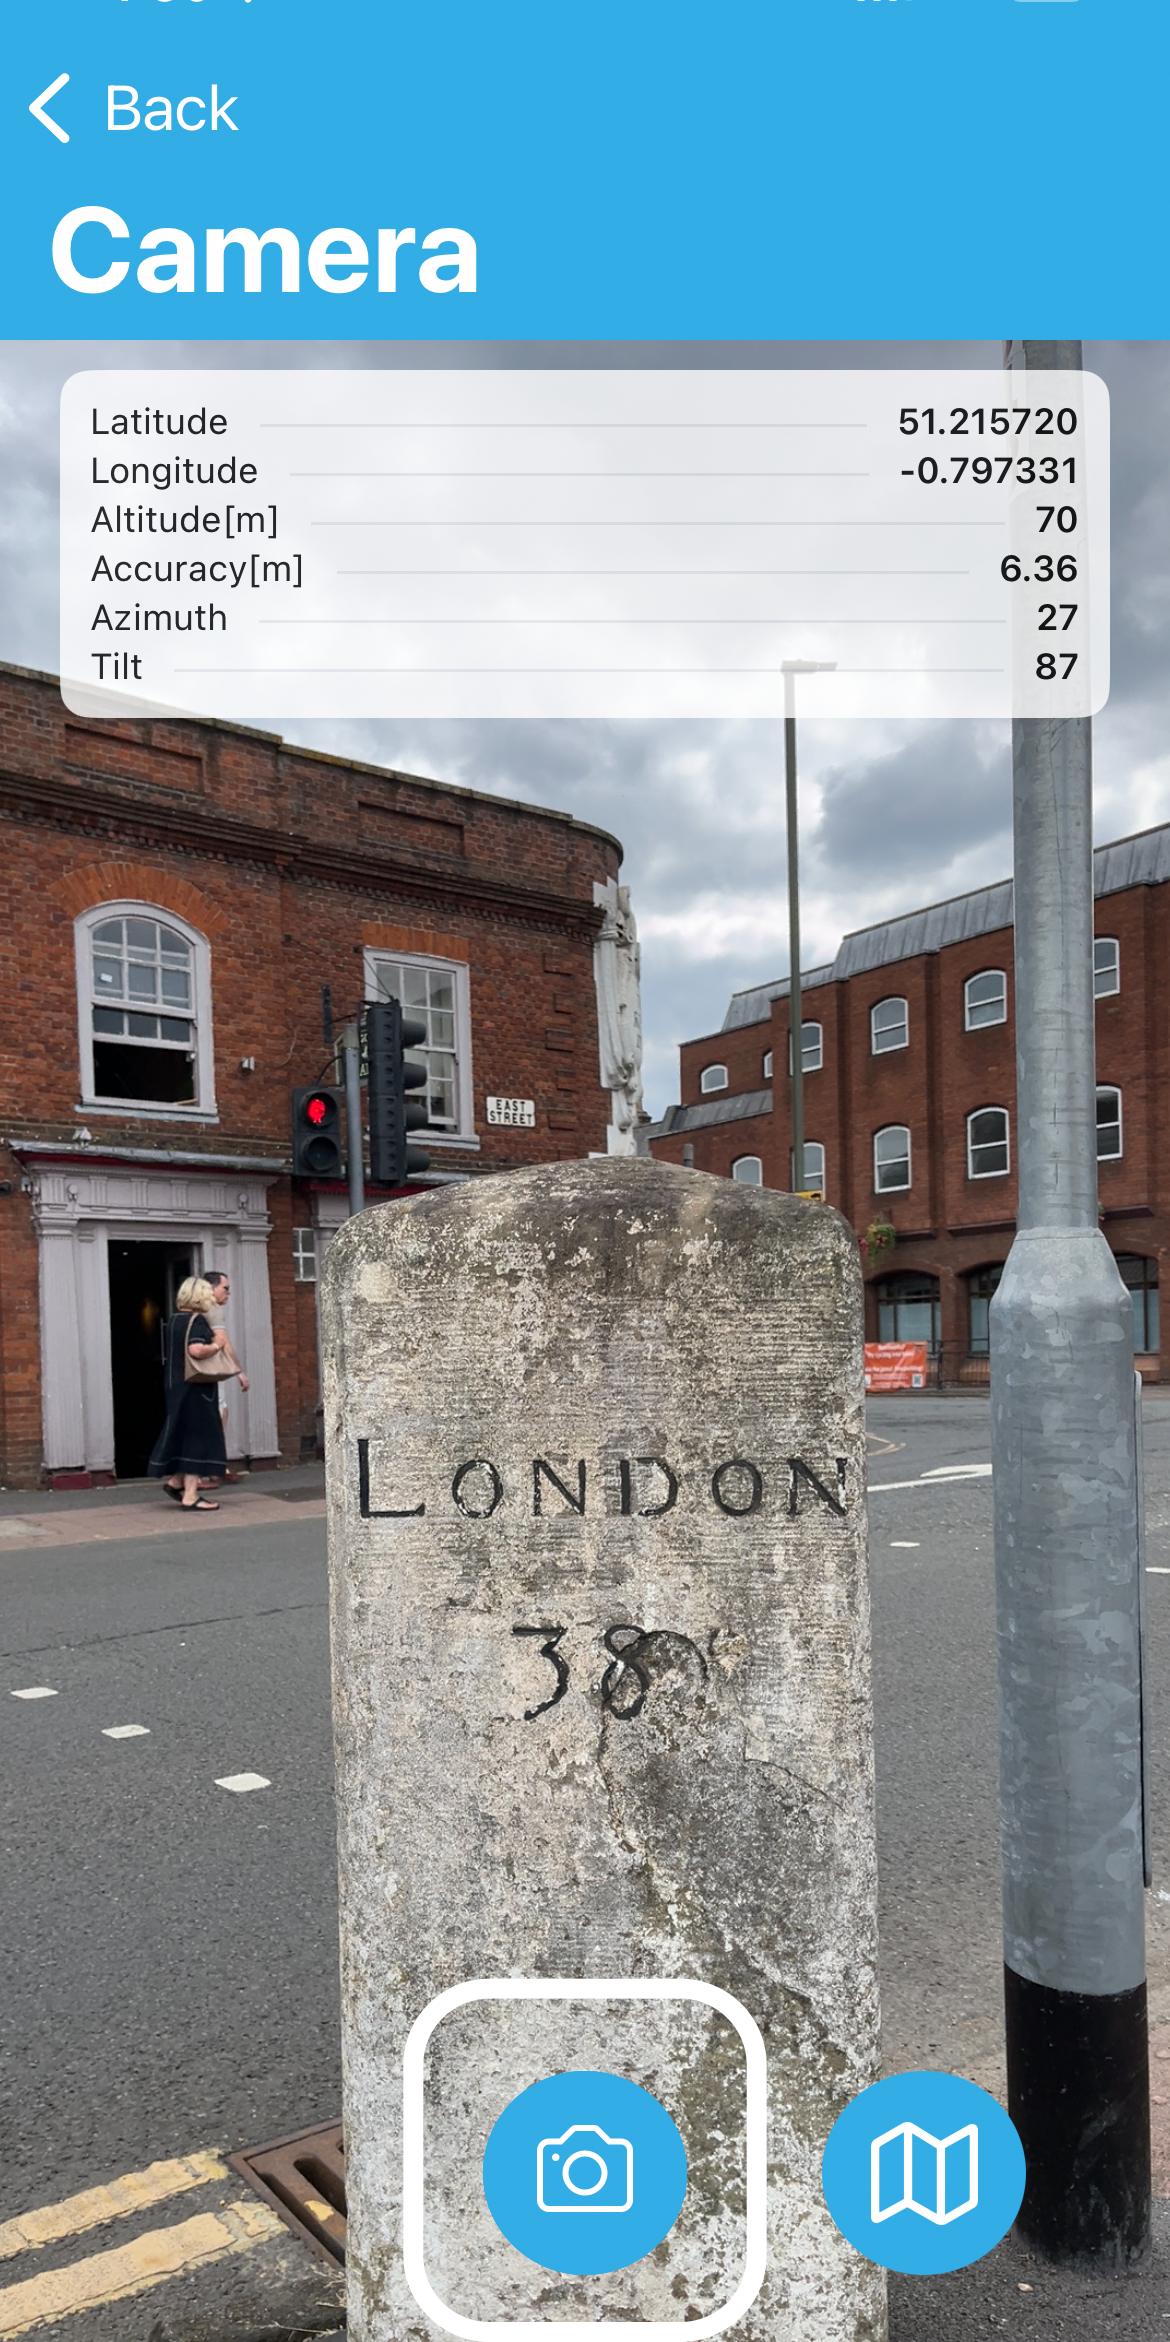
Each photo you take is automatically connected to the relevant building data, ensuring it can be trusted and easily integrated into your project workflows. See Trusted Photo Capture.
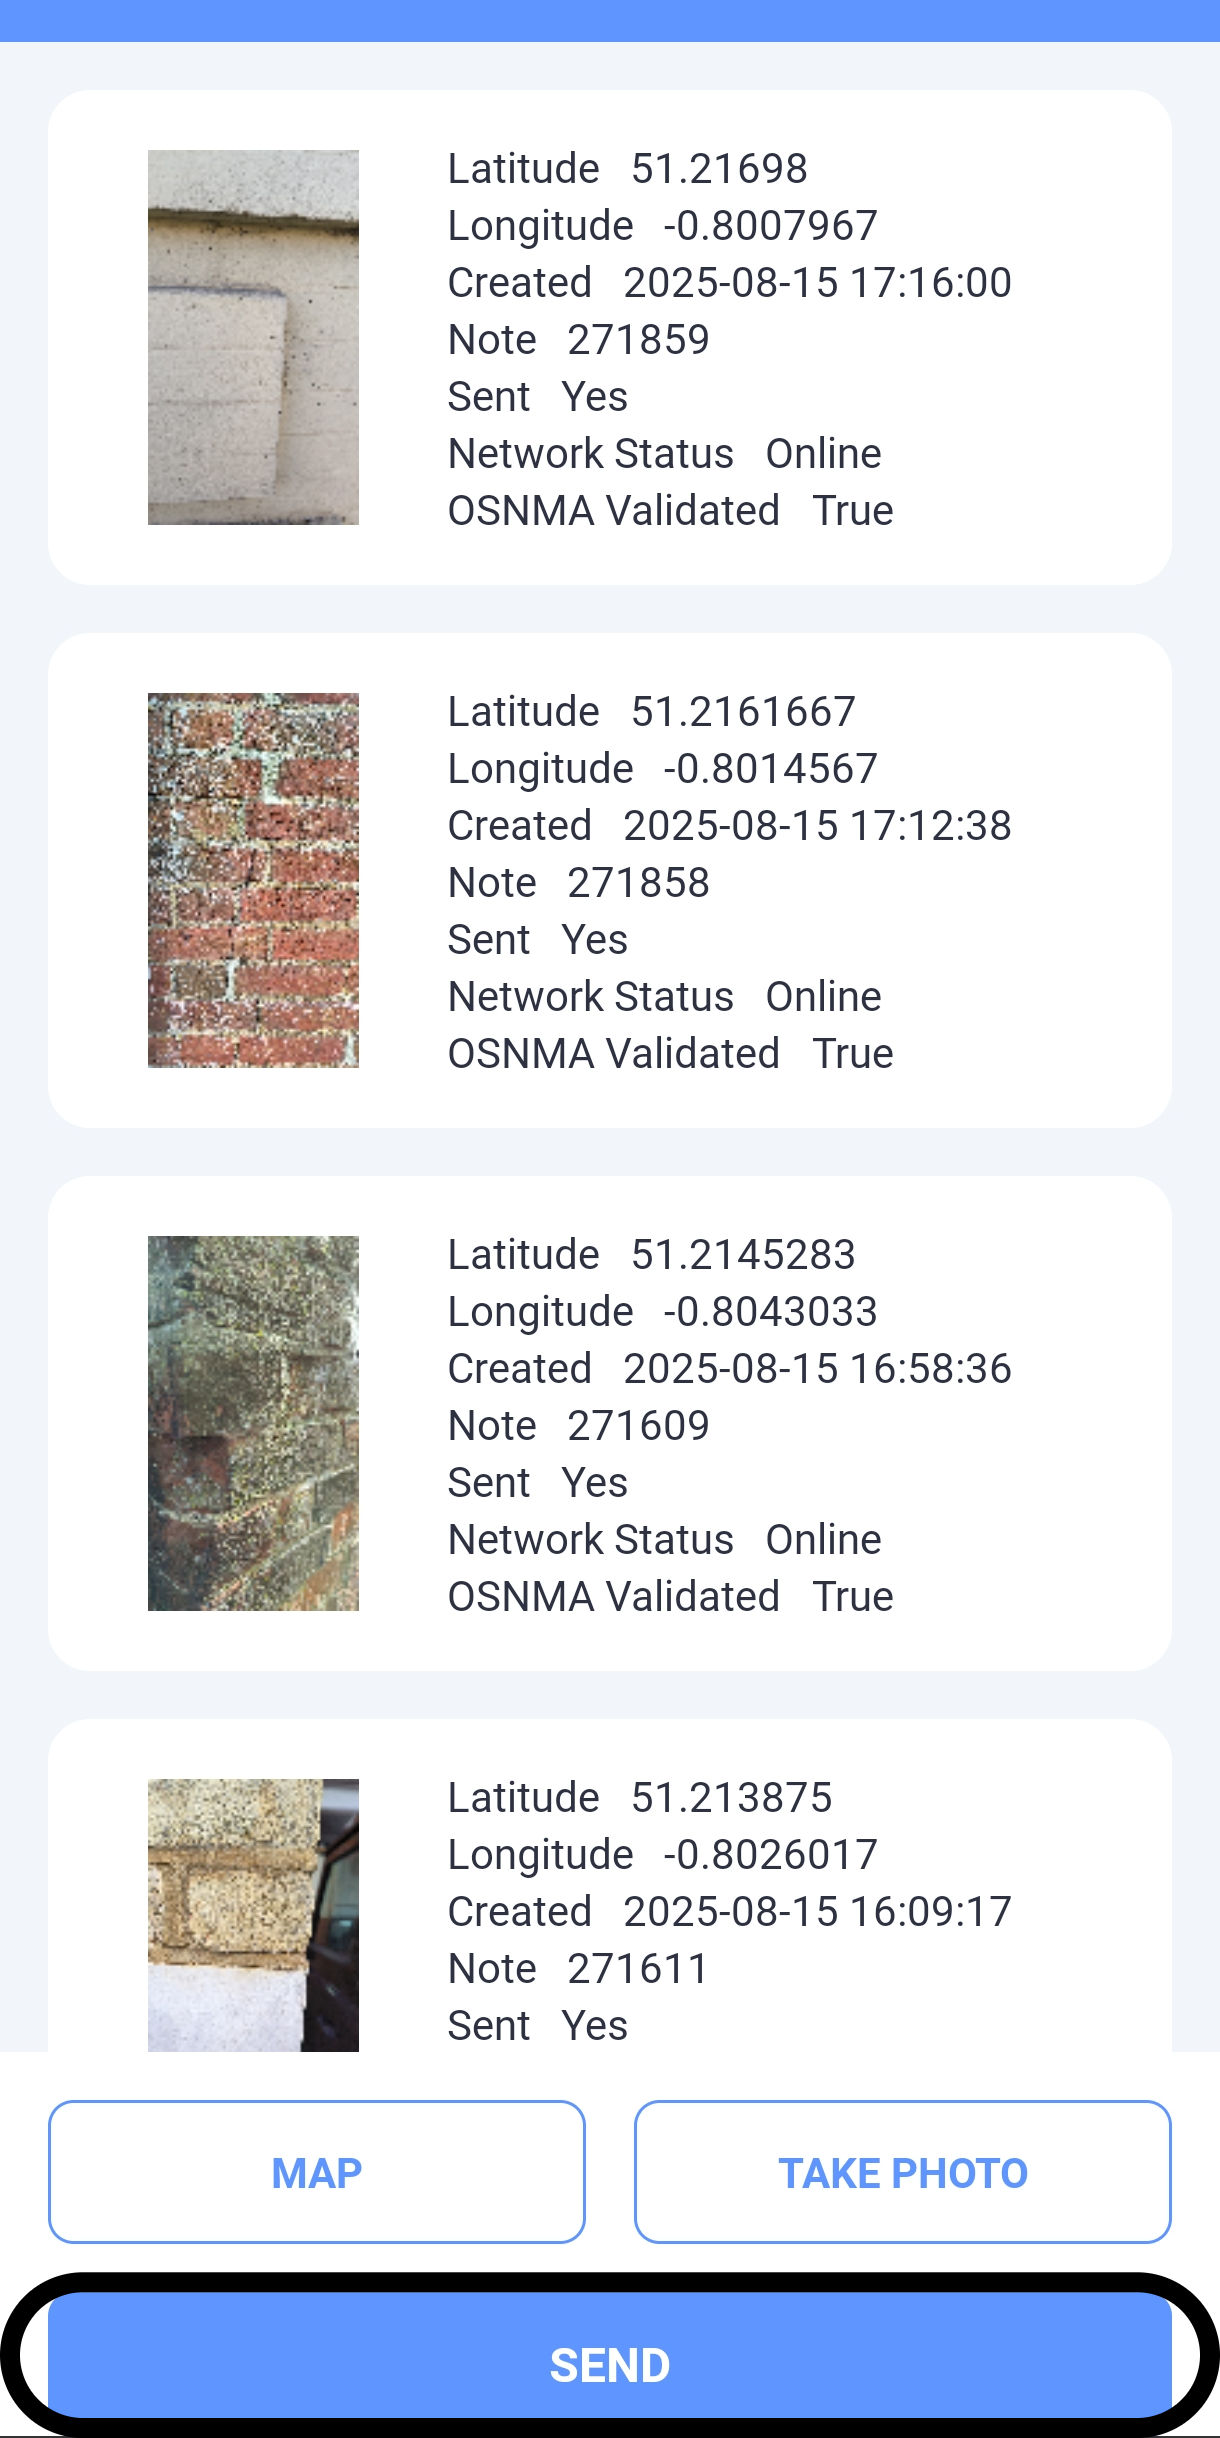
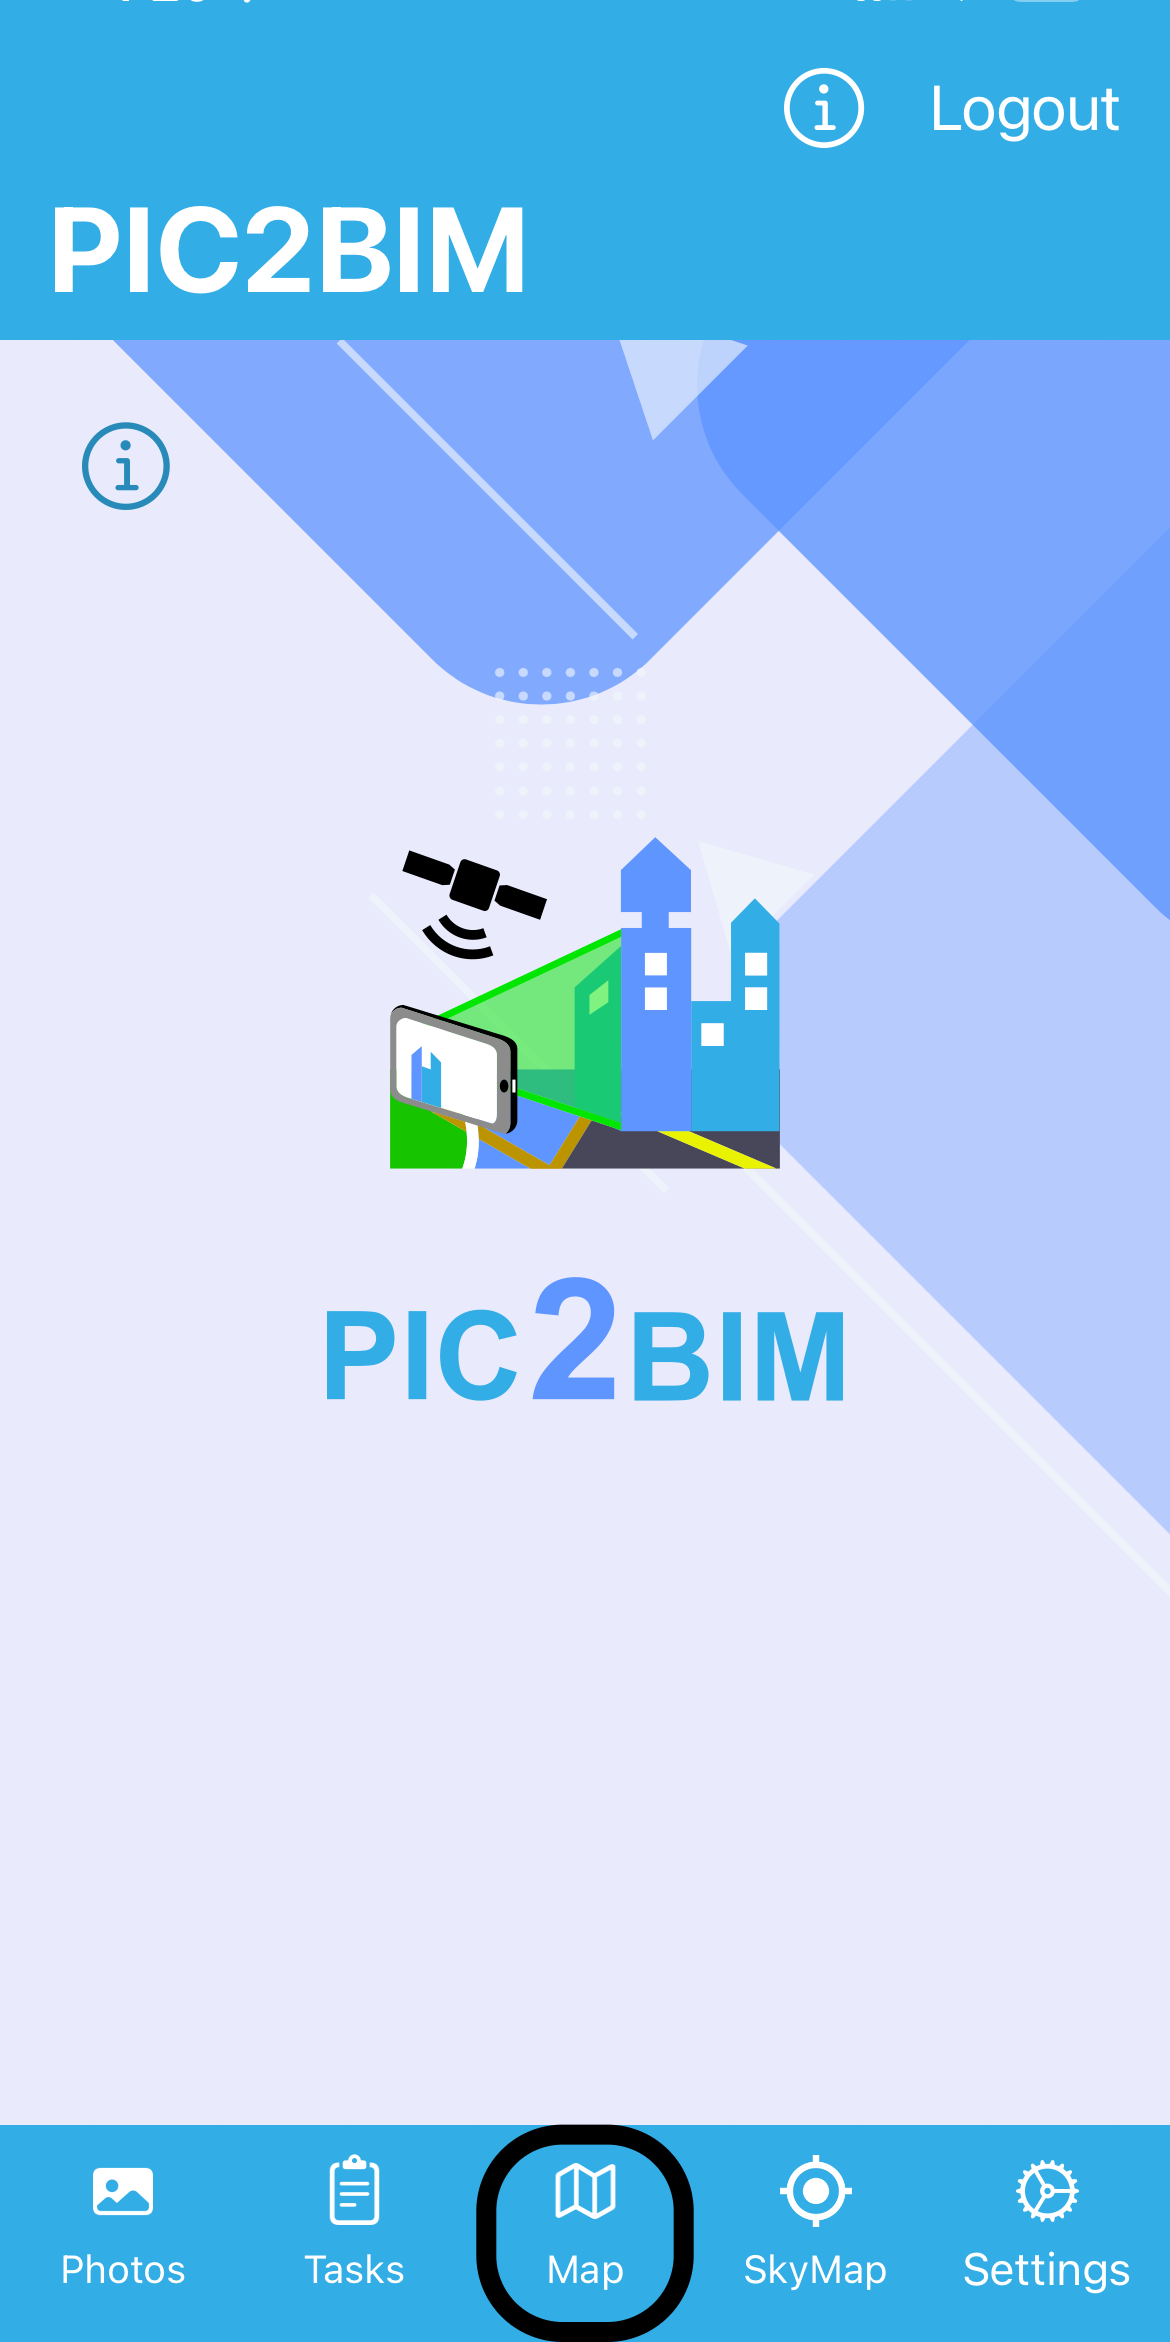
How to View Your Photos#
On both Android and iOS, tap MAP to see your photos displayed at their geotagged locations.

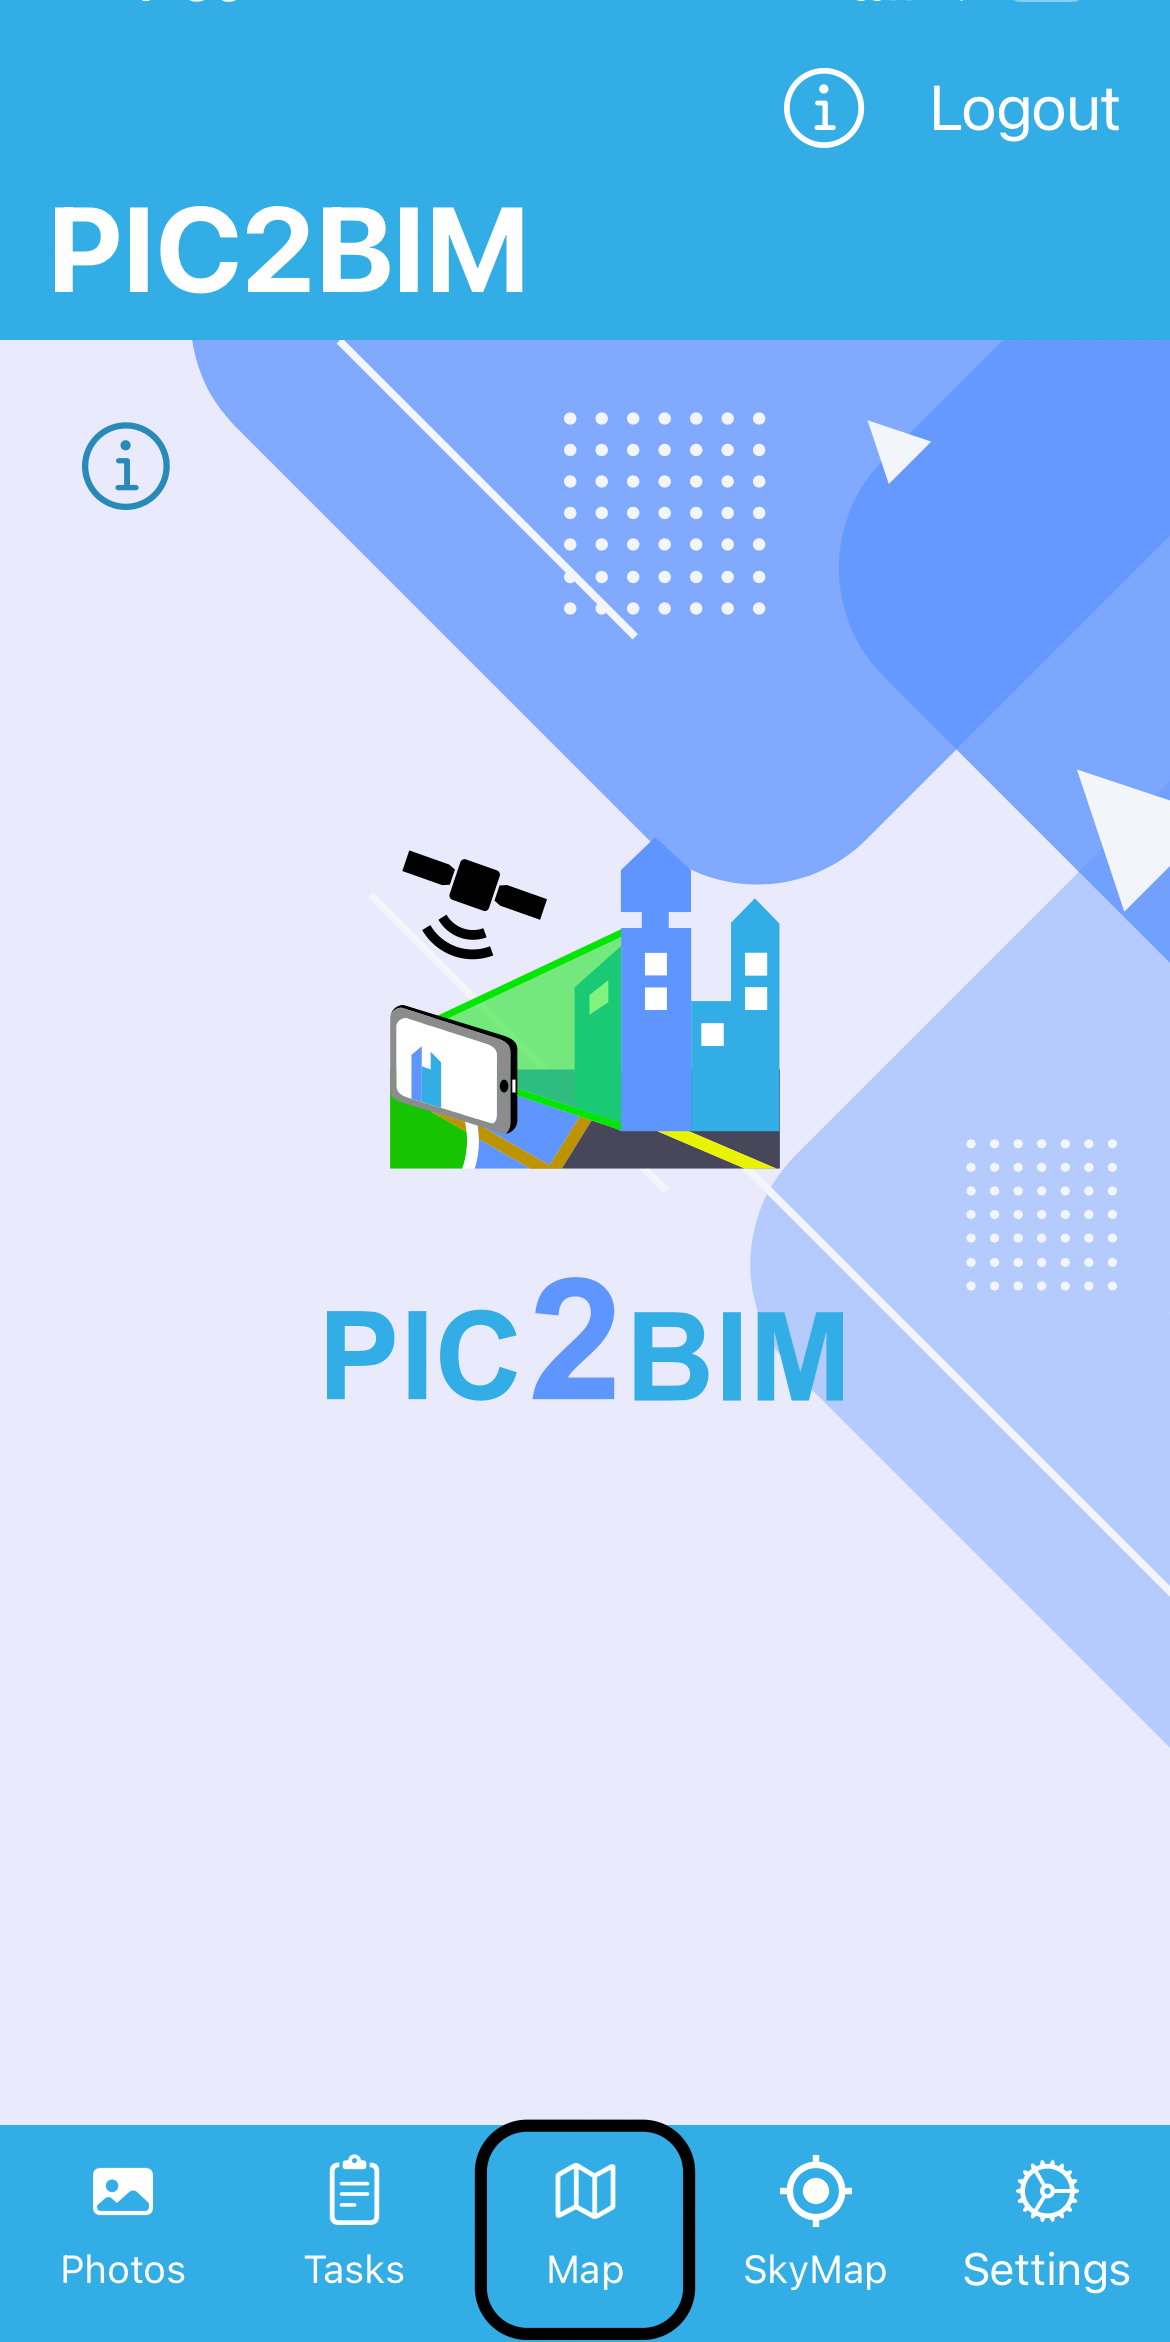

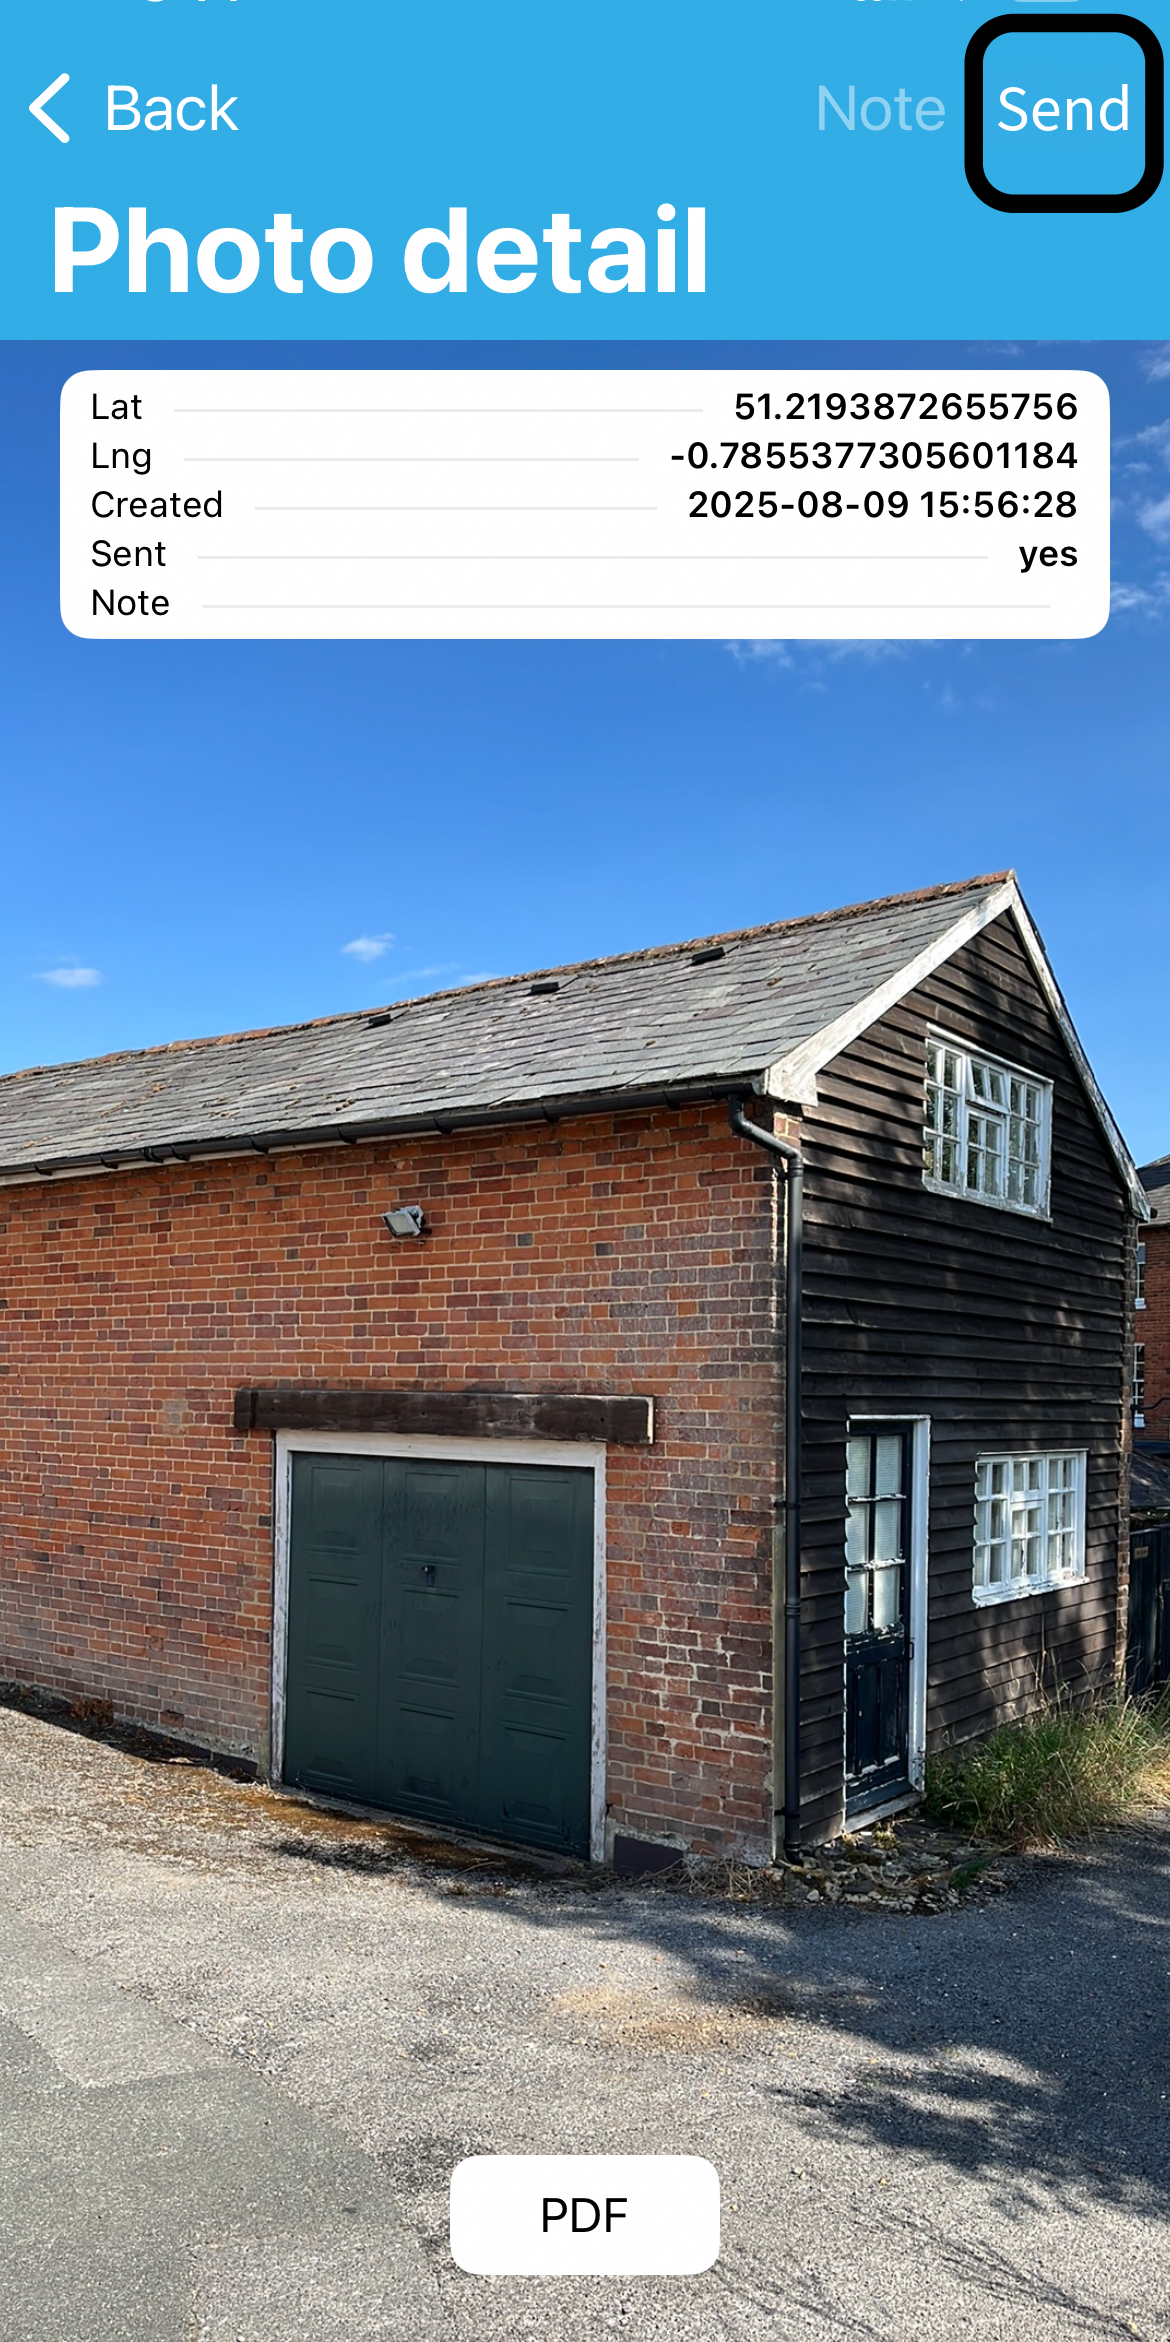
How to Send or Save Photos to PDF#
On both Android and iOS, tap SEND to upload your photos to the GeoBIM Portal.
You can also save your geotagged photos to a PDF for record keeping.
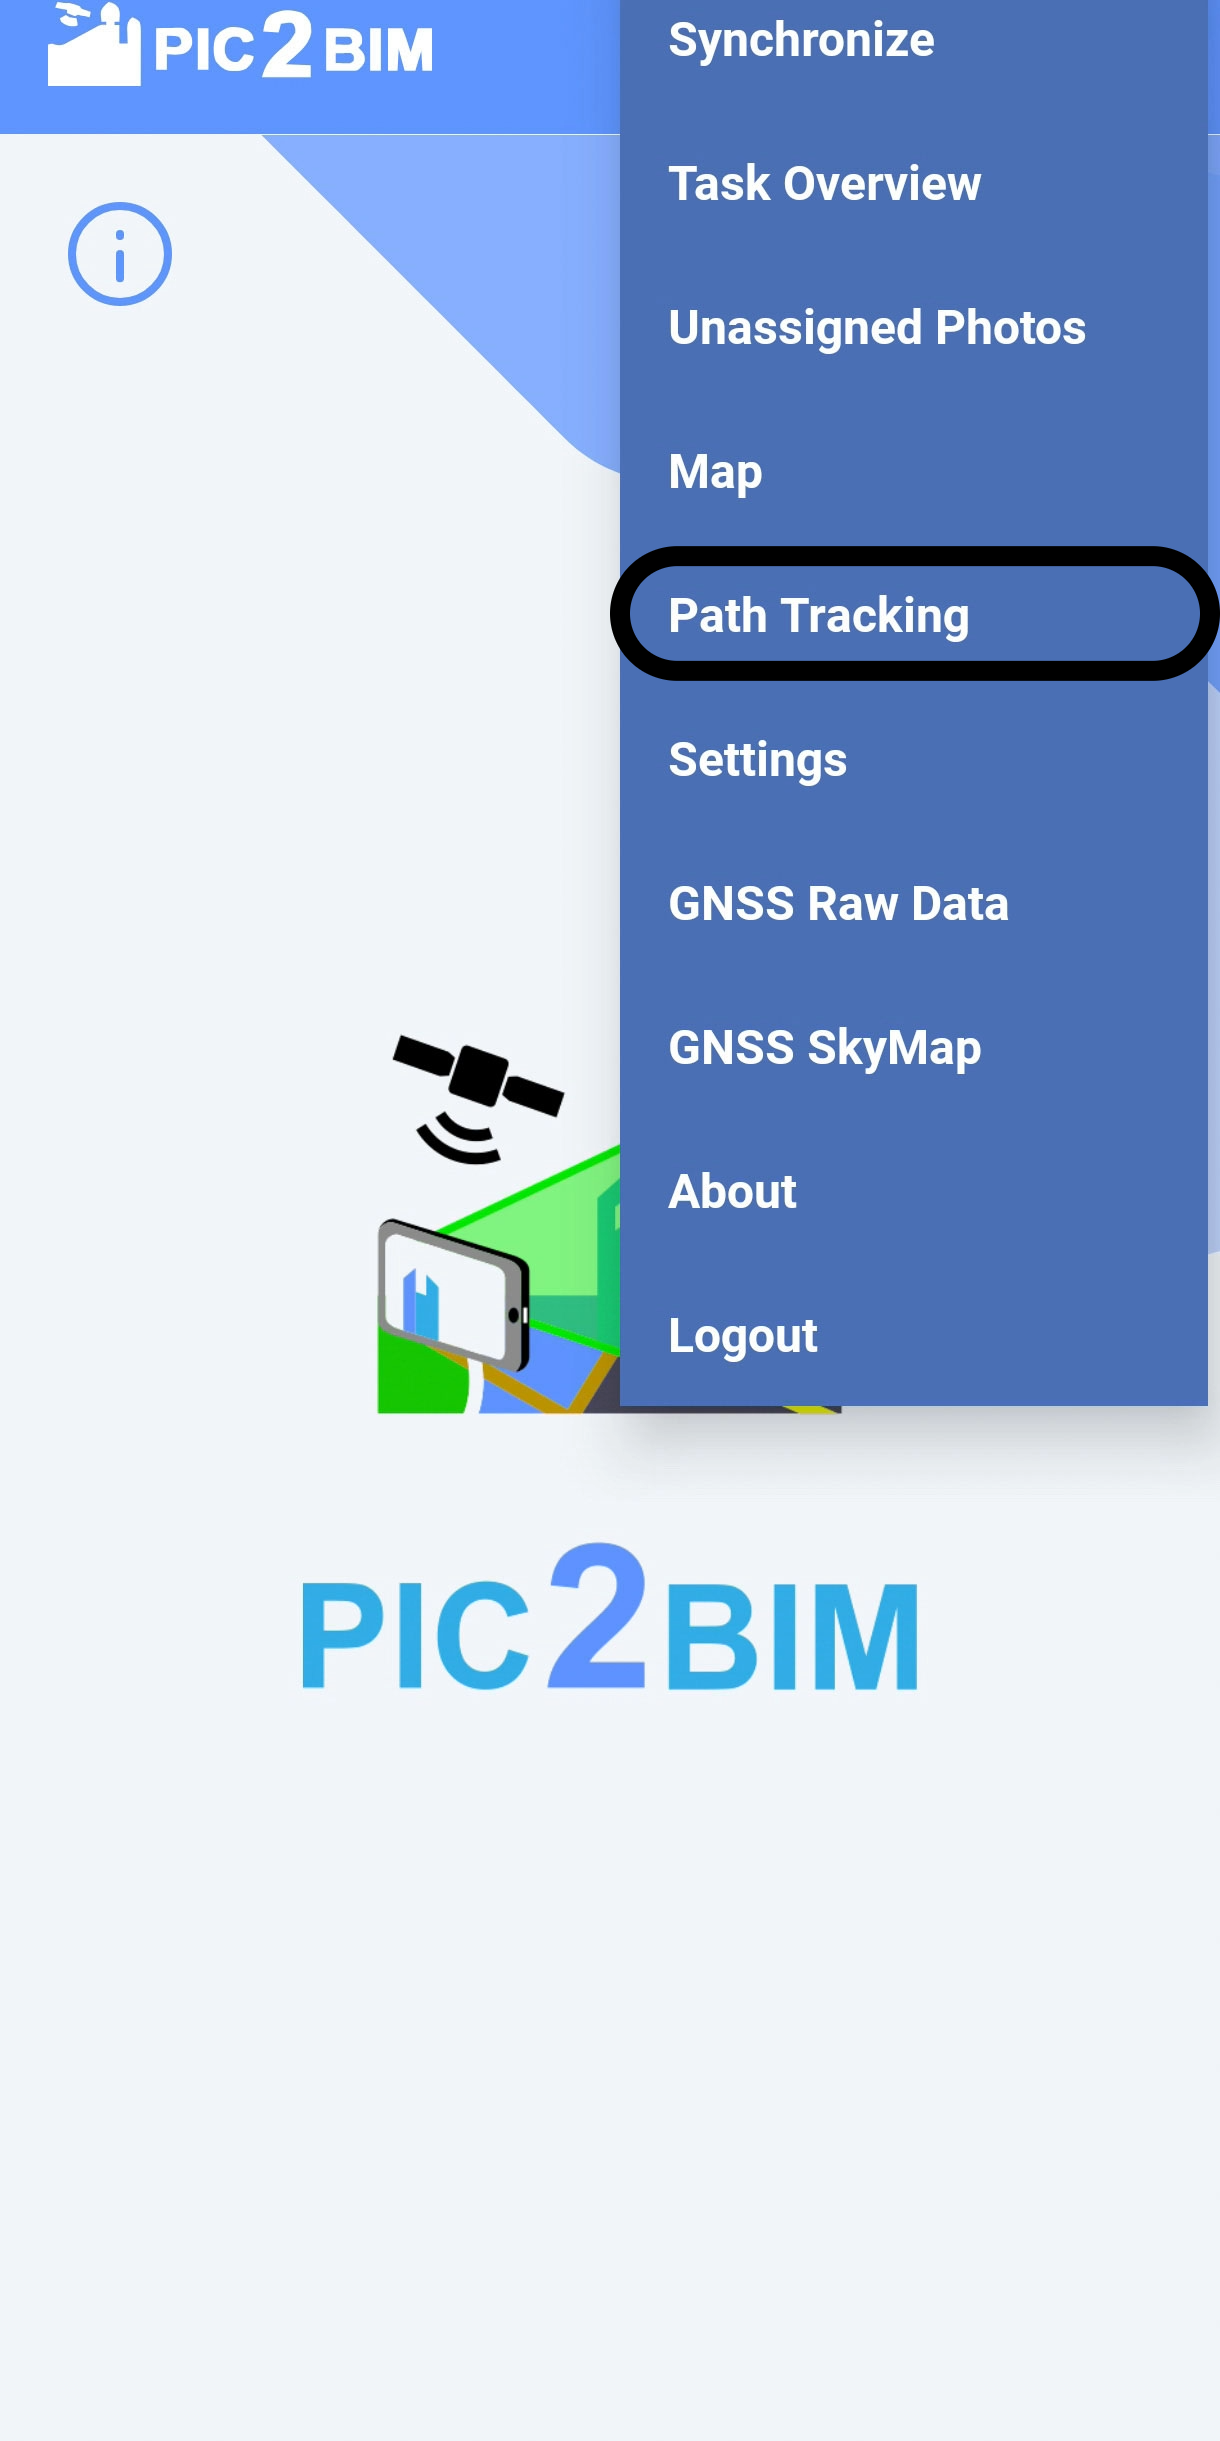
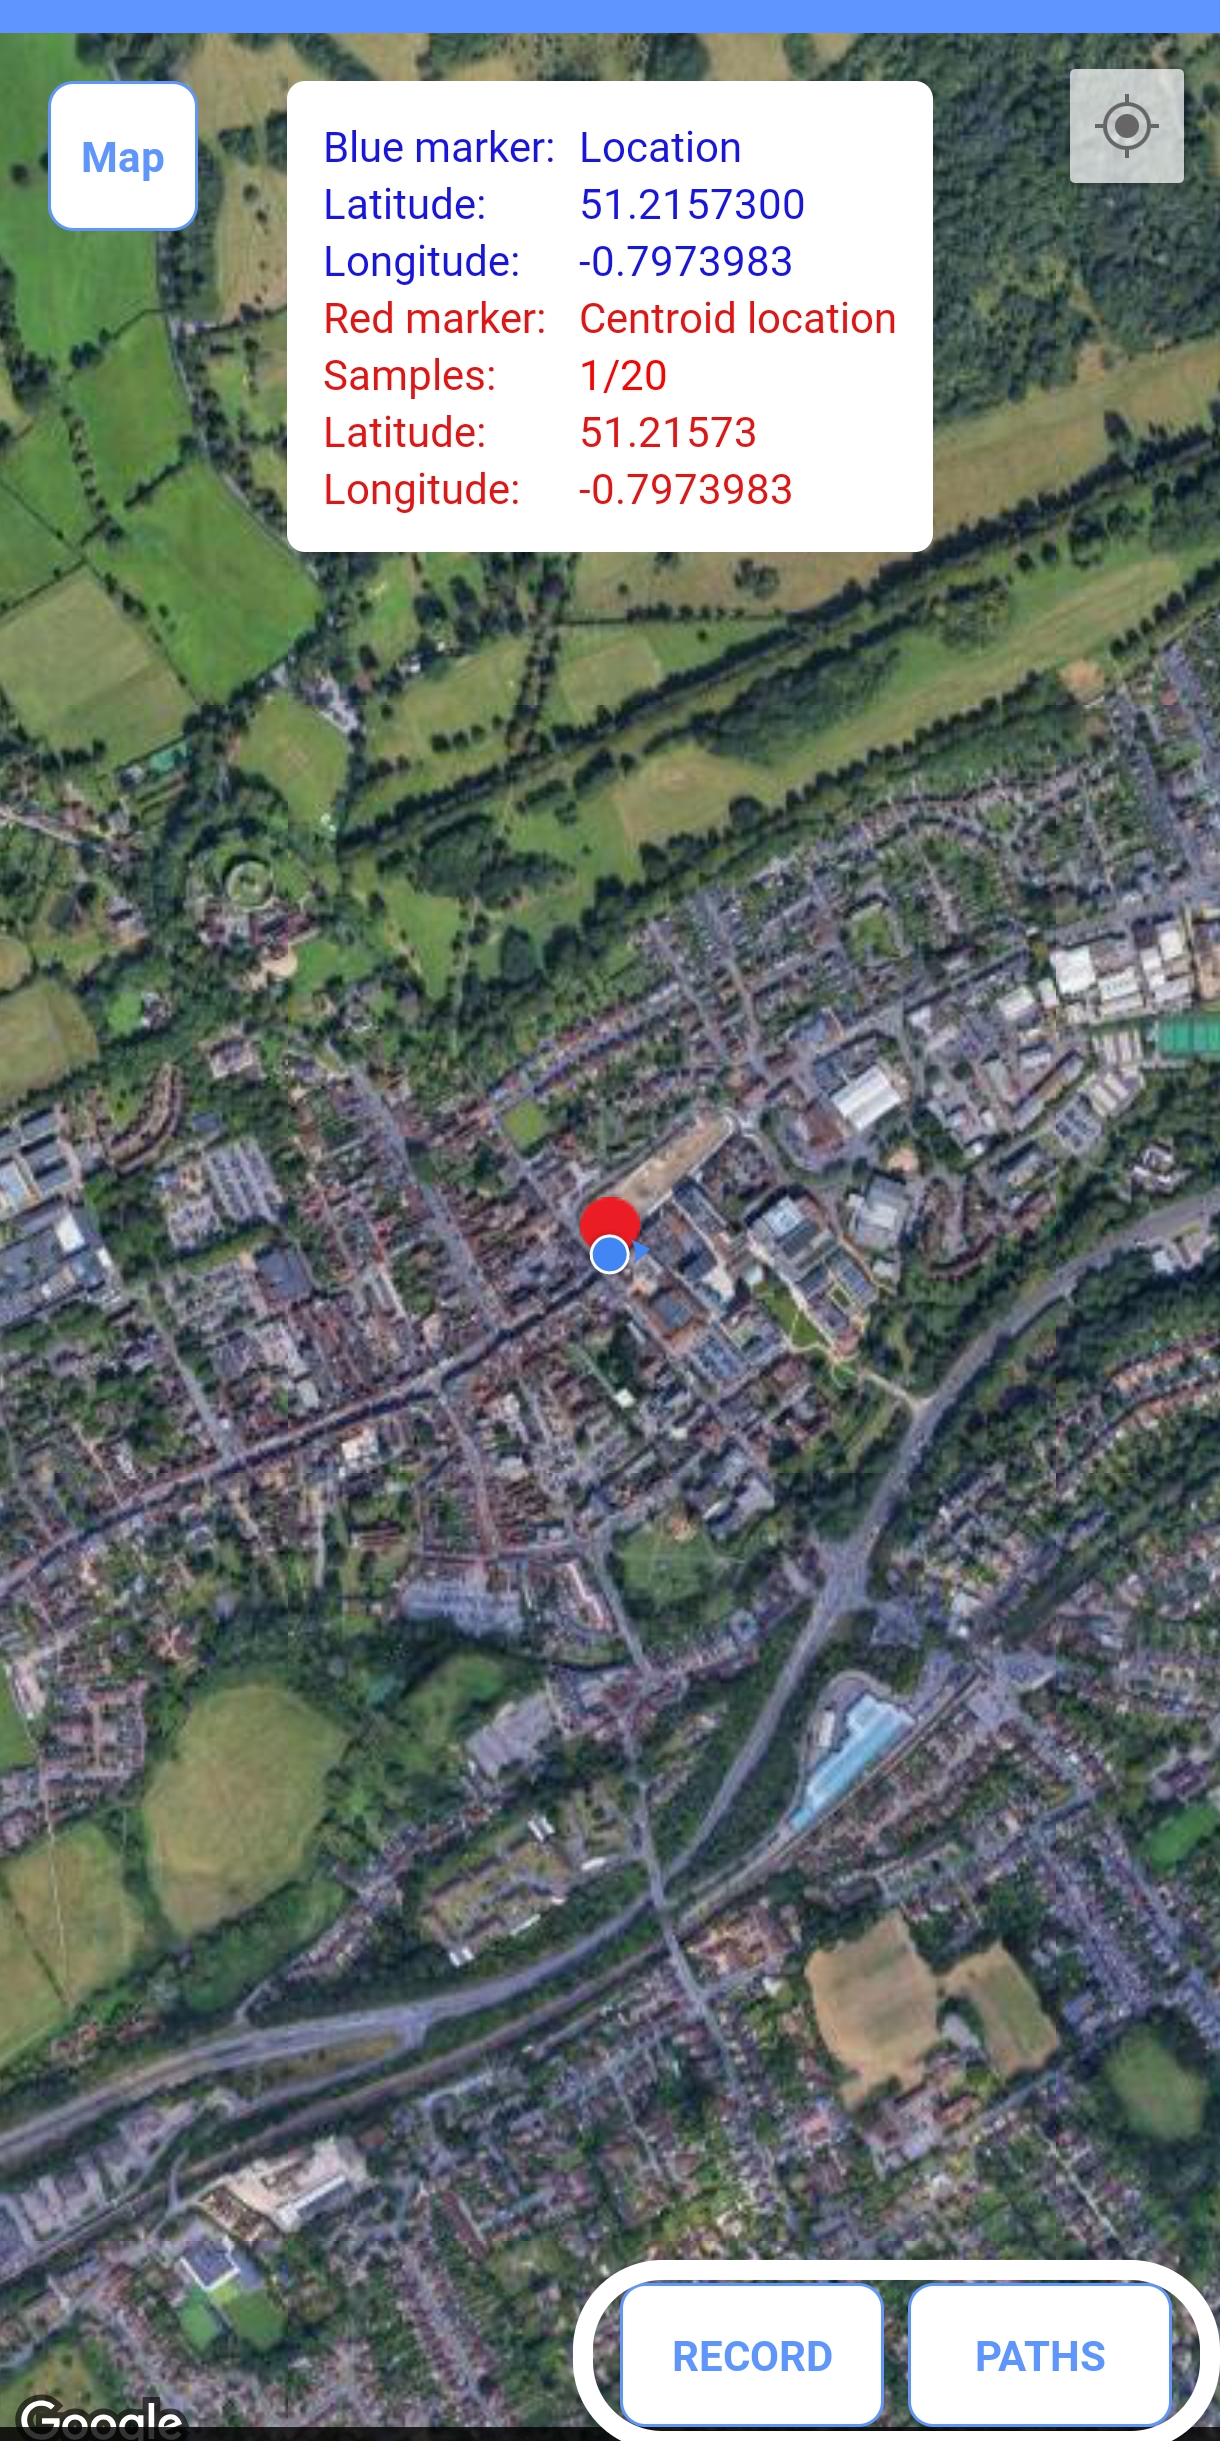
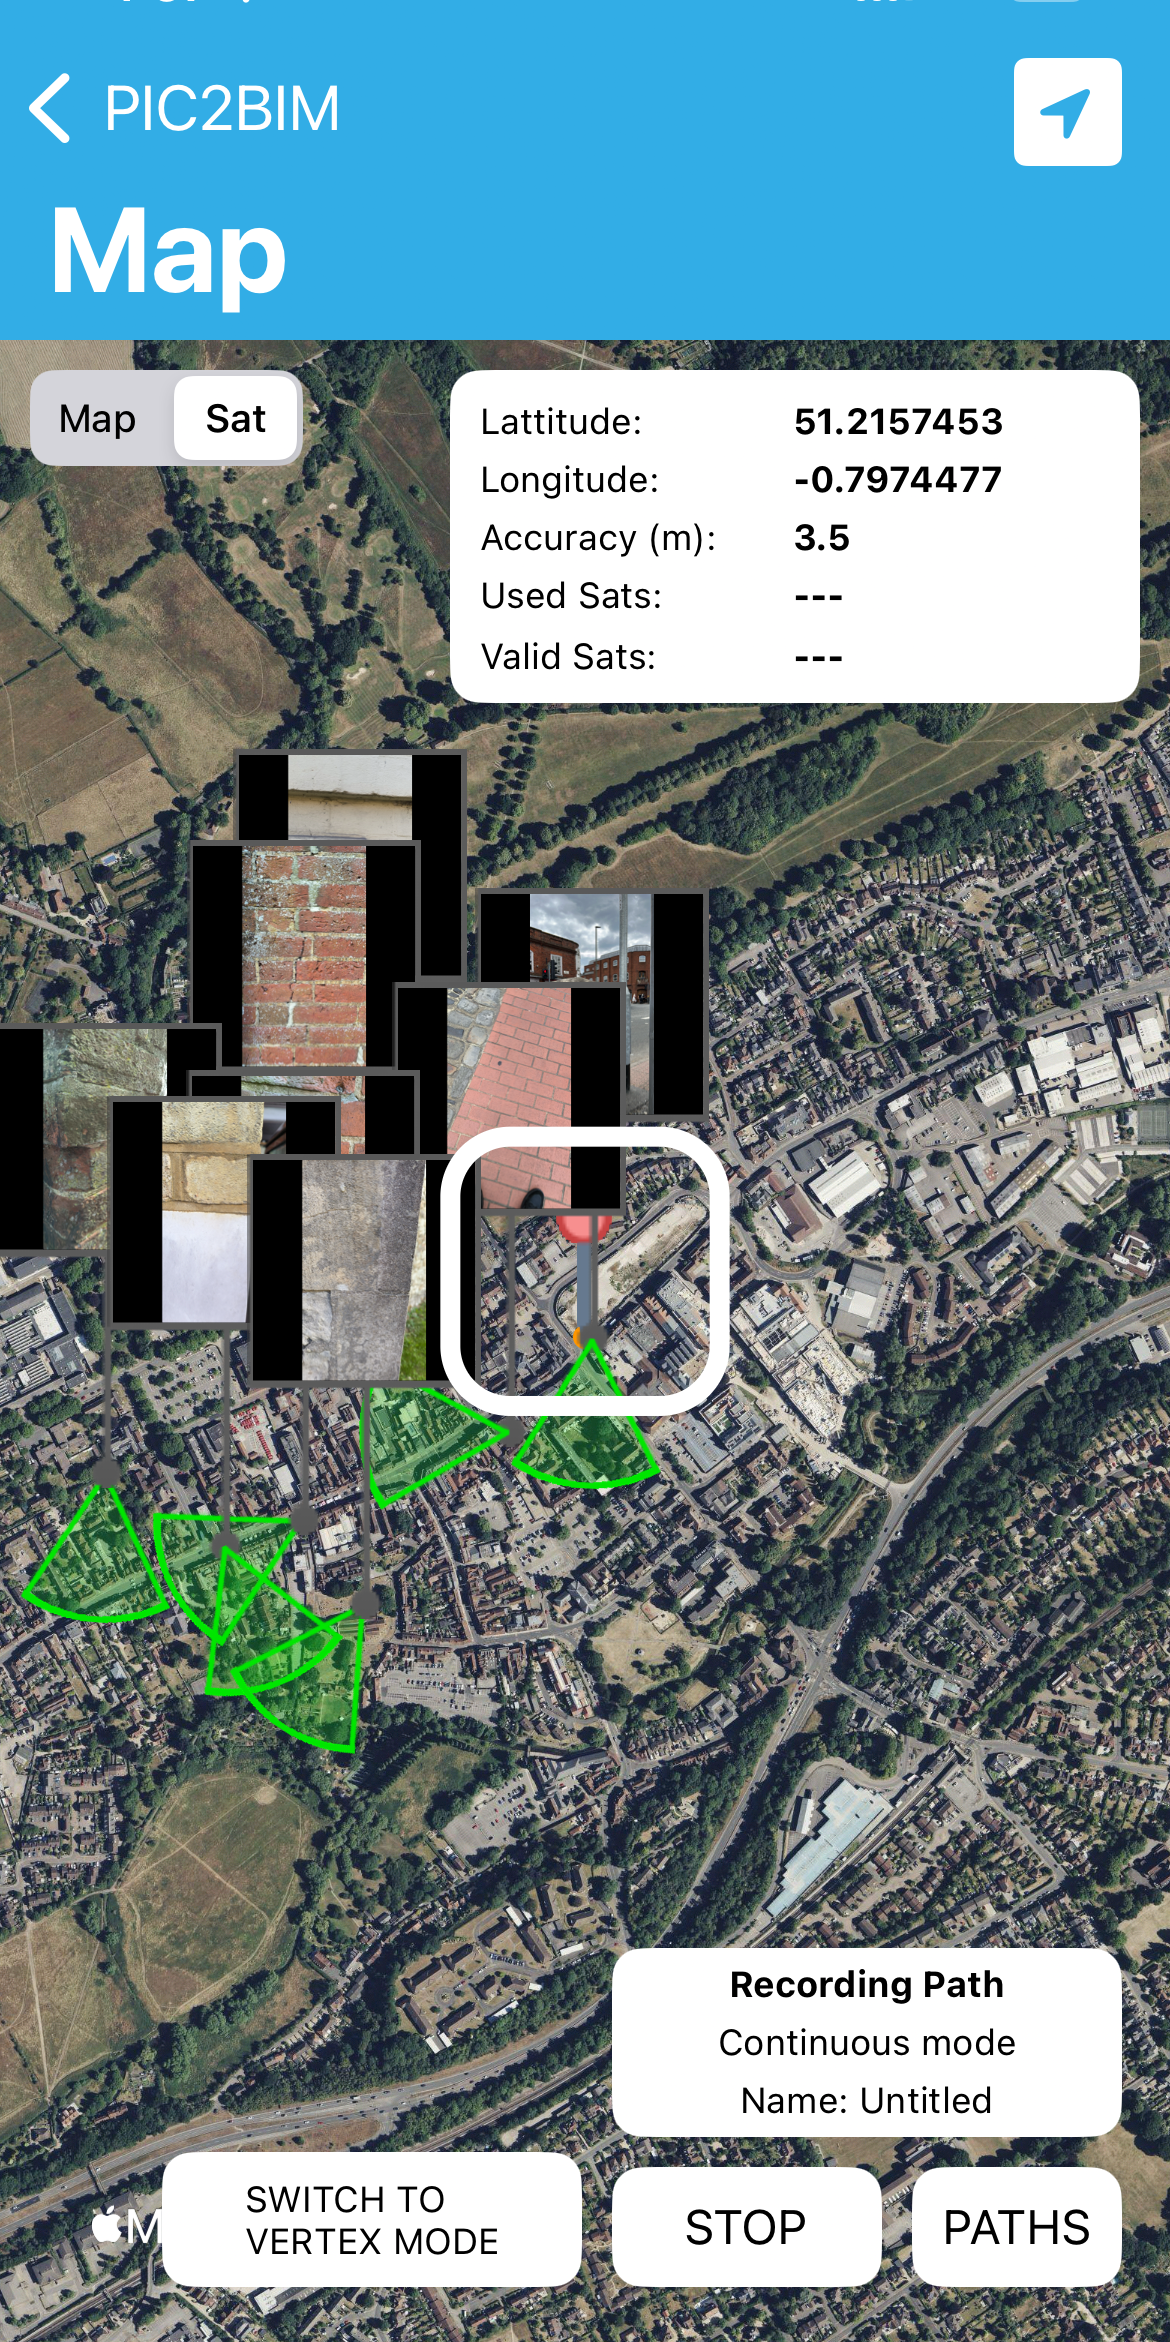
How to Track a Path or Create a Polygon#
Click on Path Tracking. Choose to either record a new path or browse previously recorded paths, which can be sent to the GeoBIM Portal or exported to a KML file.
Learn more in Path and Route Recording.
How to Use the GeoBIM Portal#
Log in to the GeoBIM Portal with the same credentials you use for the mobile app.
👉 If you don’t yet have an account, you can log in with the demo credentials: demo/demo.
Open https://pic2bim.co.uk/ in your browser to access the platform.
In the portal, you can:
- Review photos and recorded paths uploaded from your smartphone (iOS or Android)
- Switch between map view and satellite view
- Filter tasks to focus on specific work items (see Task Management)
- Open photo details, including geolocation and attributes
- See how each photo is linked to its building footprint (see Building and Site Data)
Why it matters: By linking every photo to its building footprint, the portal gives you a project-wide perspective.
This makes it easier to manage assets, track progress, and ensure data integrity across your team.
Views: Photo Gallery#
- Photo Gallery – Browse all uploaded and unassigned photos.
![]()
![]()
![]()
![]()
![]()
![]()
![]()
![]()
![]()
Views: 3D Building with Lidar Terrain#
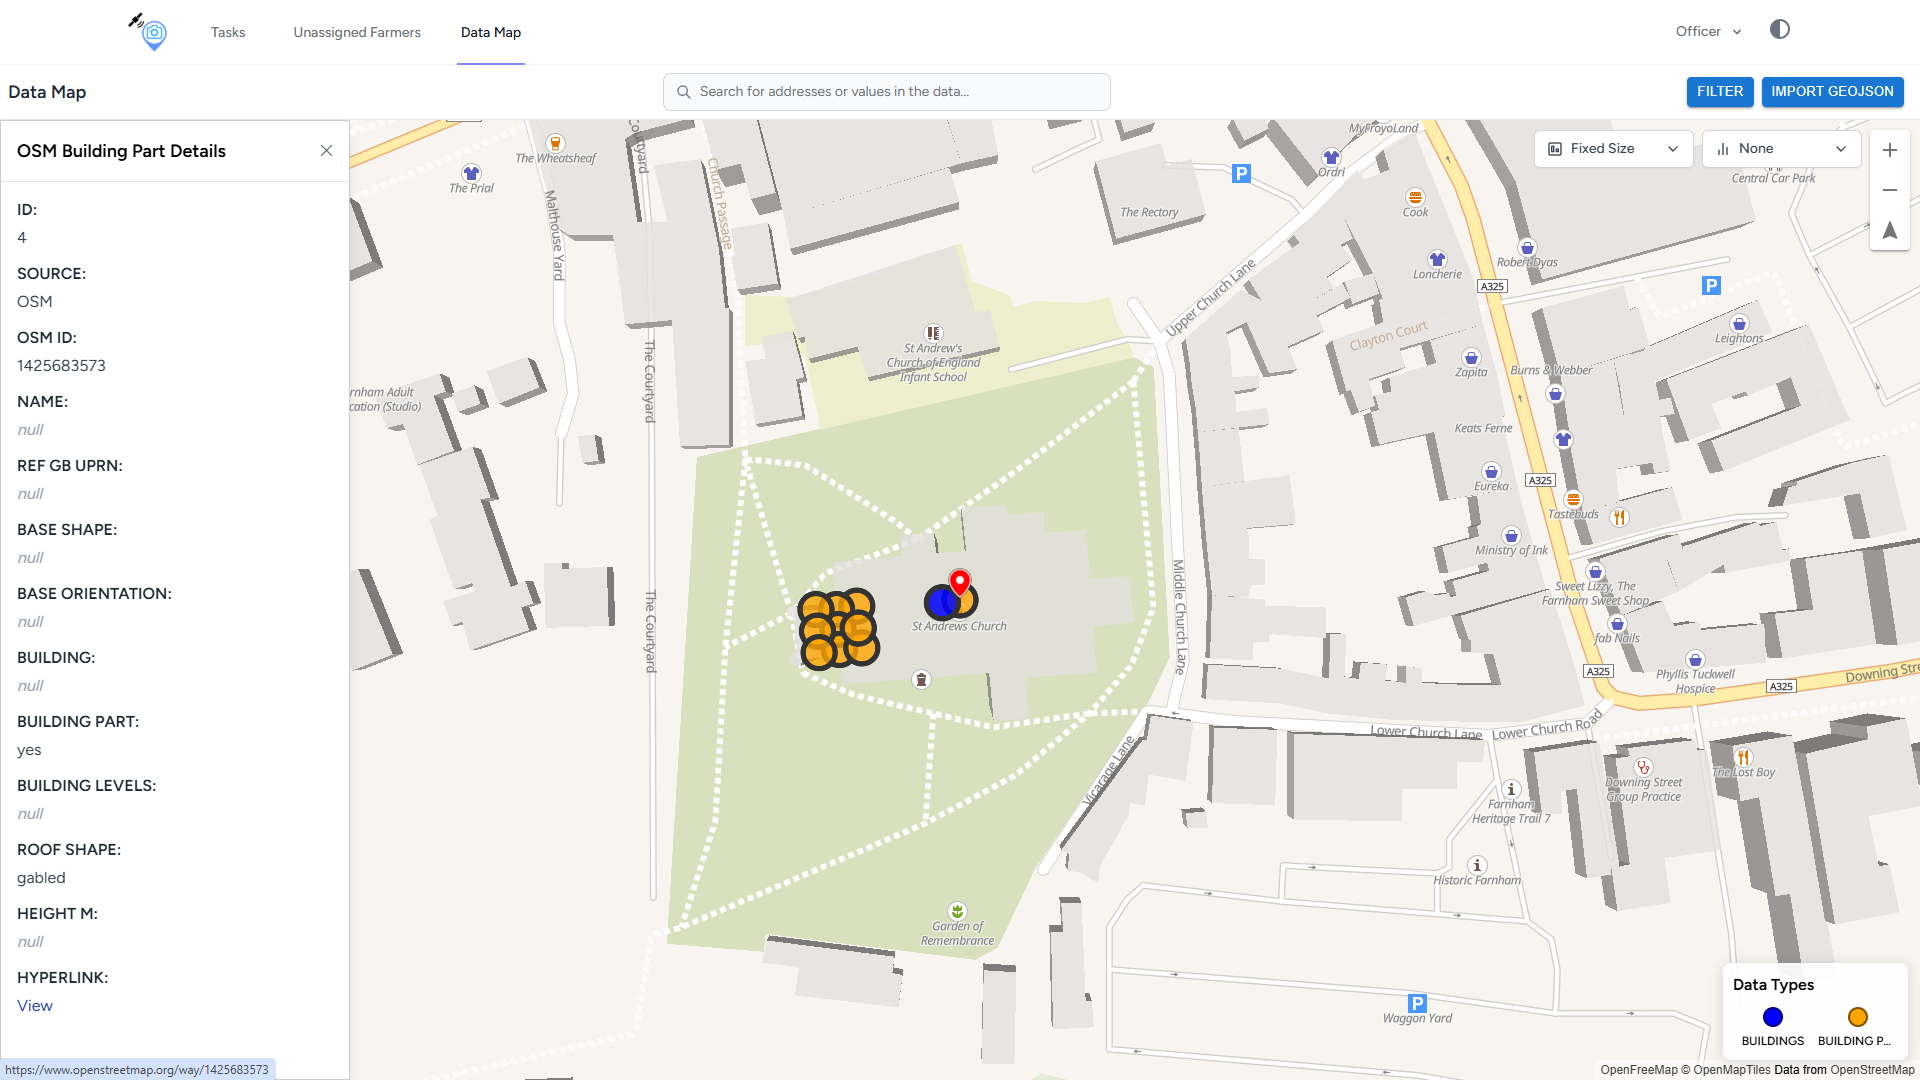
- Building Attributes – View data at the building or building-part level.
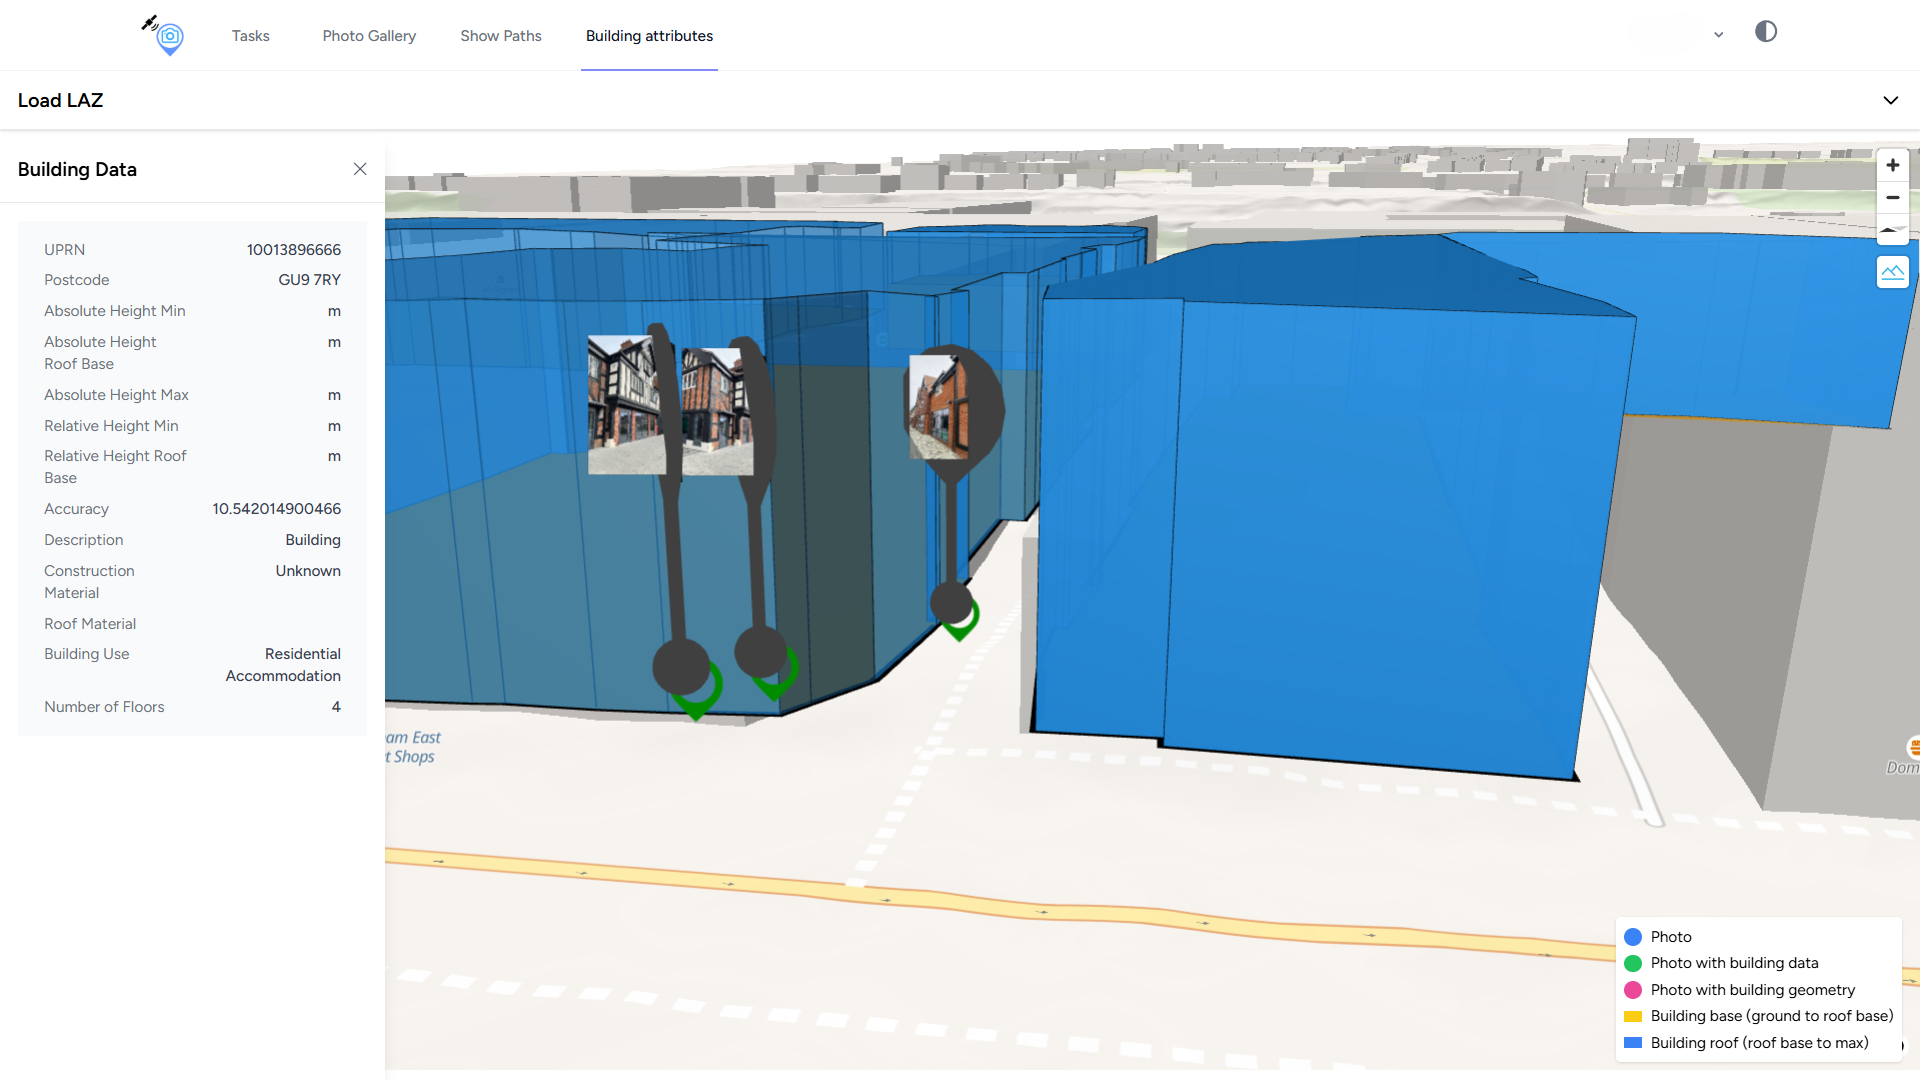
Image caption
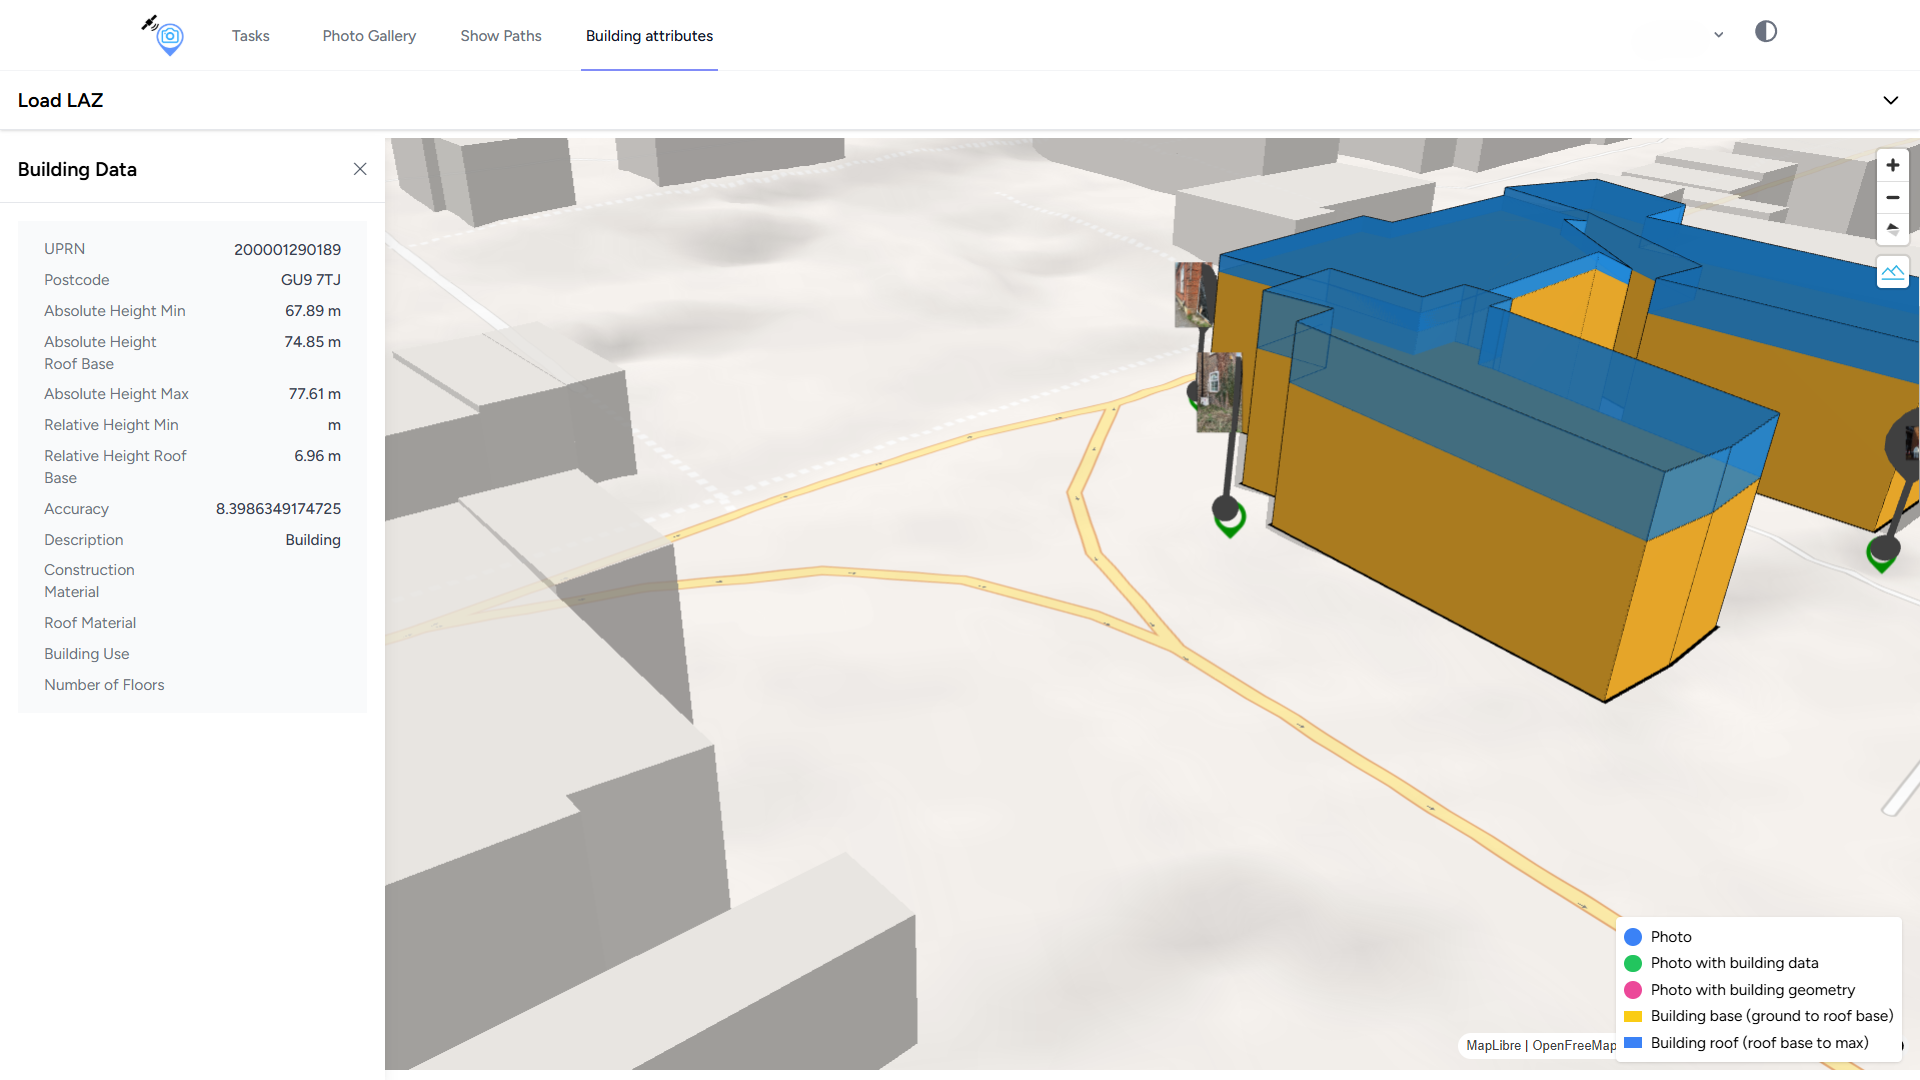
Image caption
Views: Task & Paths#
- Tasks & Paths – Monitor user tasks and review recorded paths.
![]()
![]()
Views: Import#
- Map Views – Functions Import and Filter
![]()
![]()
![]()
![]()
Views: Photos#
- Map Views – Photo data overlays.
![]()
![]()
![]()
- Map Views – Photo data connections.
![]()
![]()
![]()
![]()
![]()
Views: Connections#
- Map Views – Photo Site Building Building Part data connections.
![]()
![]()
![]()
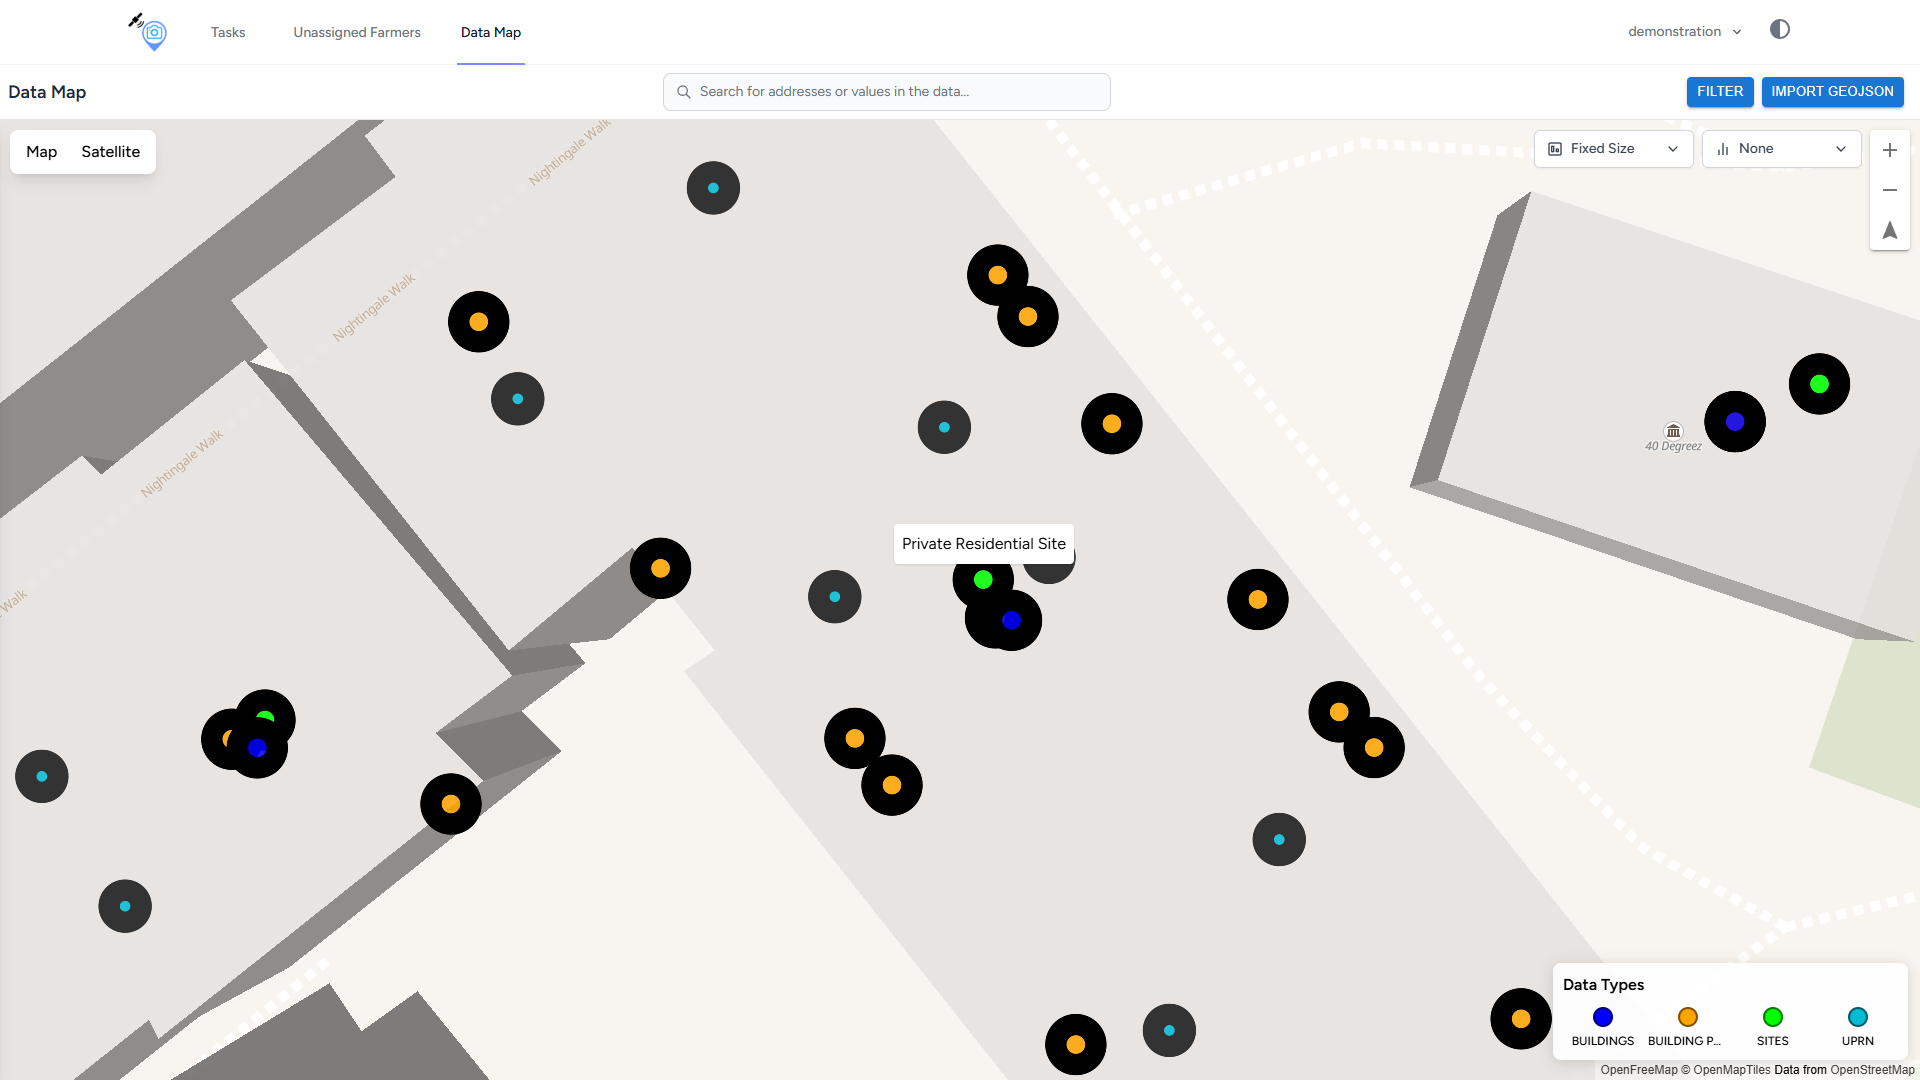
- Map Views – Site data overlays.
![]()
![]()
![]()
Views: Building BuildingPart#
- Map Views – Building data overlays.
![]()
![]()
![]()
![]()
![]()
![]()
- Map Views – BuildingPart data overlays.
![]()
![]()
![]()
![]()
Views: Heritage Listing#
- Map Views – NHLE (heritage listing) Search and connections
![]()
![]()
![]()
![]()
![]()
![]()
![]()
- Map Views – NHLE (heritage listing) data overlays.
![]()
![]()
![]()
13th October Development Updates#
- Map Views – 13th October,2025 Updates, Data map add open street map import land and building,energy performance certificate, display connections photo. Building attributes add open street map building parts in 3d
Views: Energy Performance Certificates#
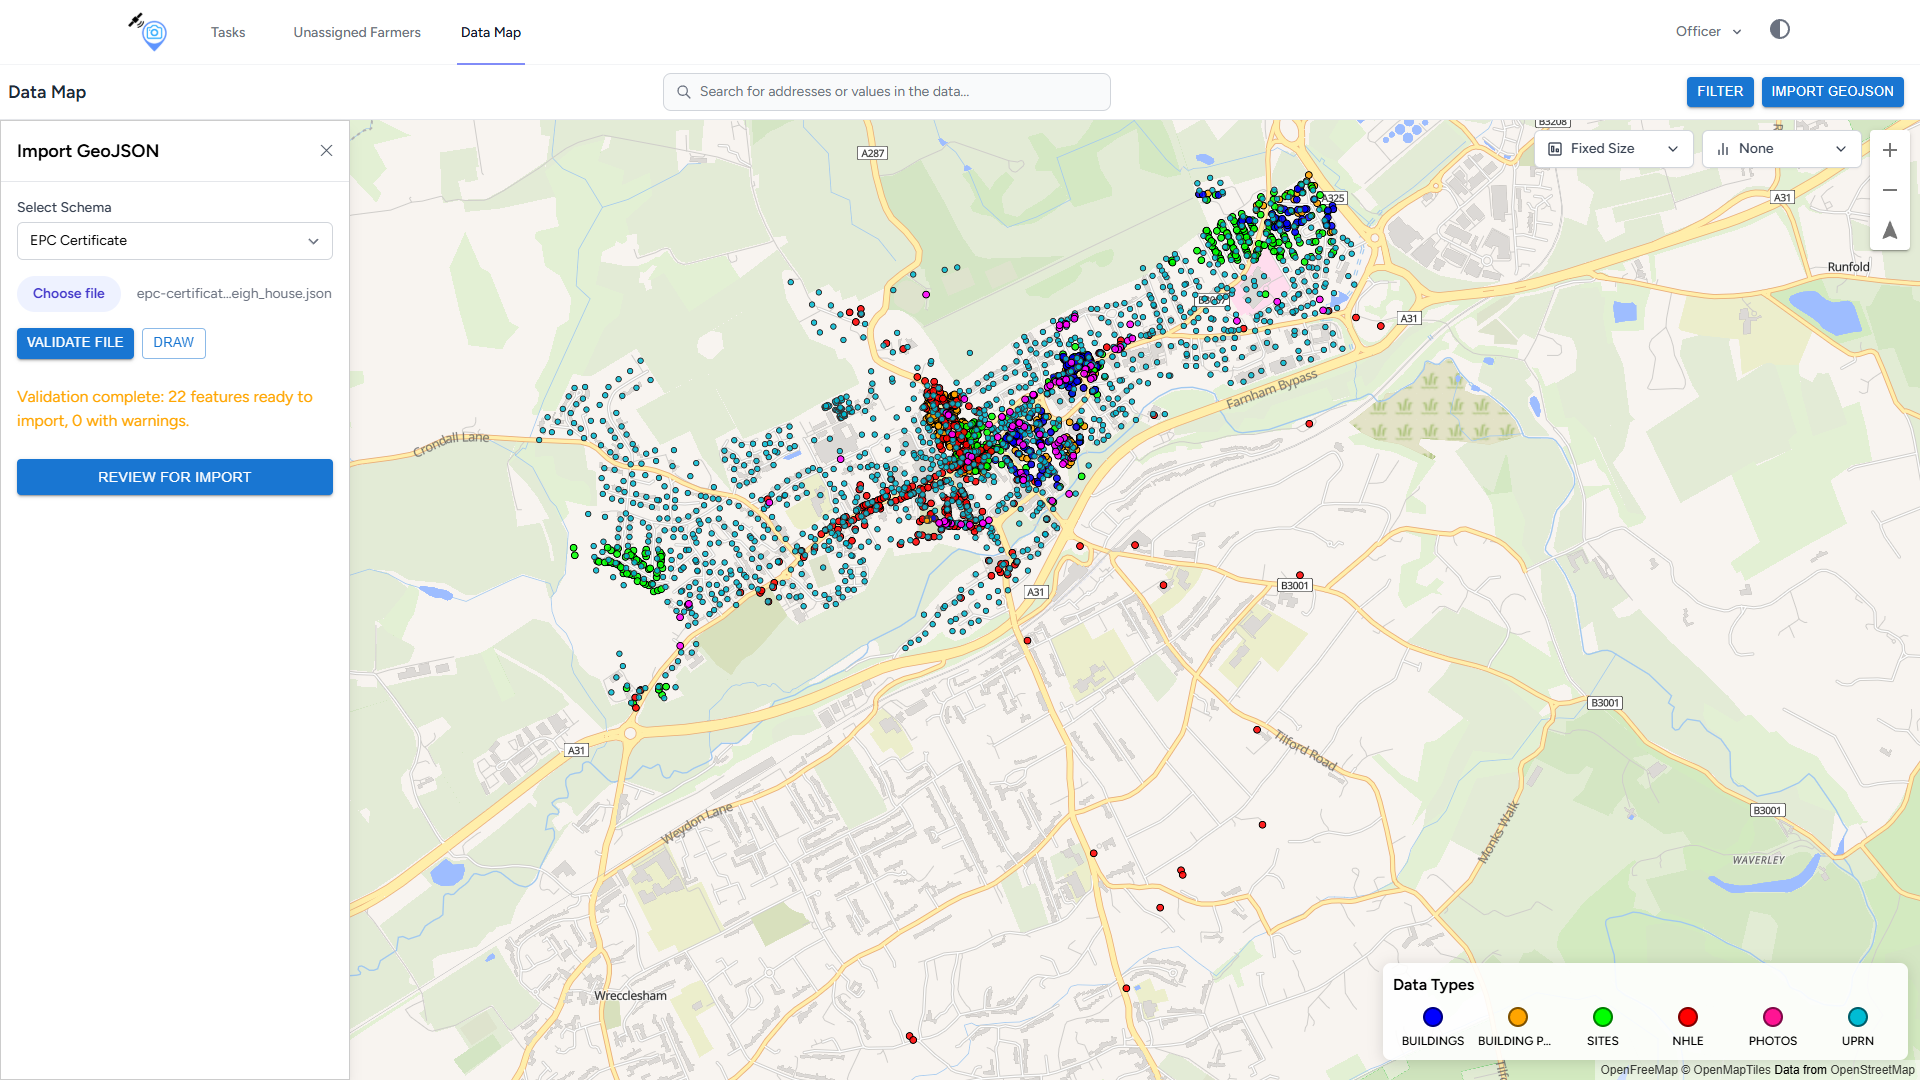
Import UPRN improve connections → EPC
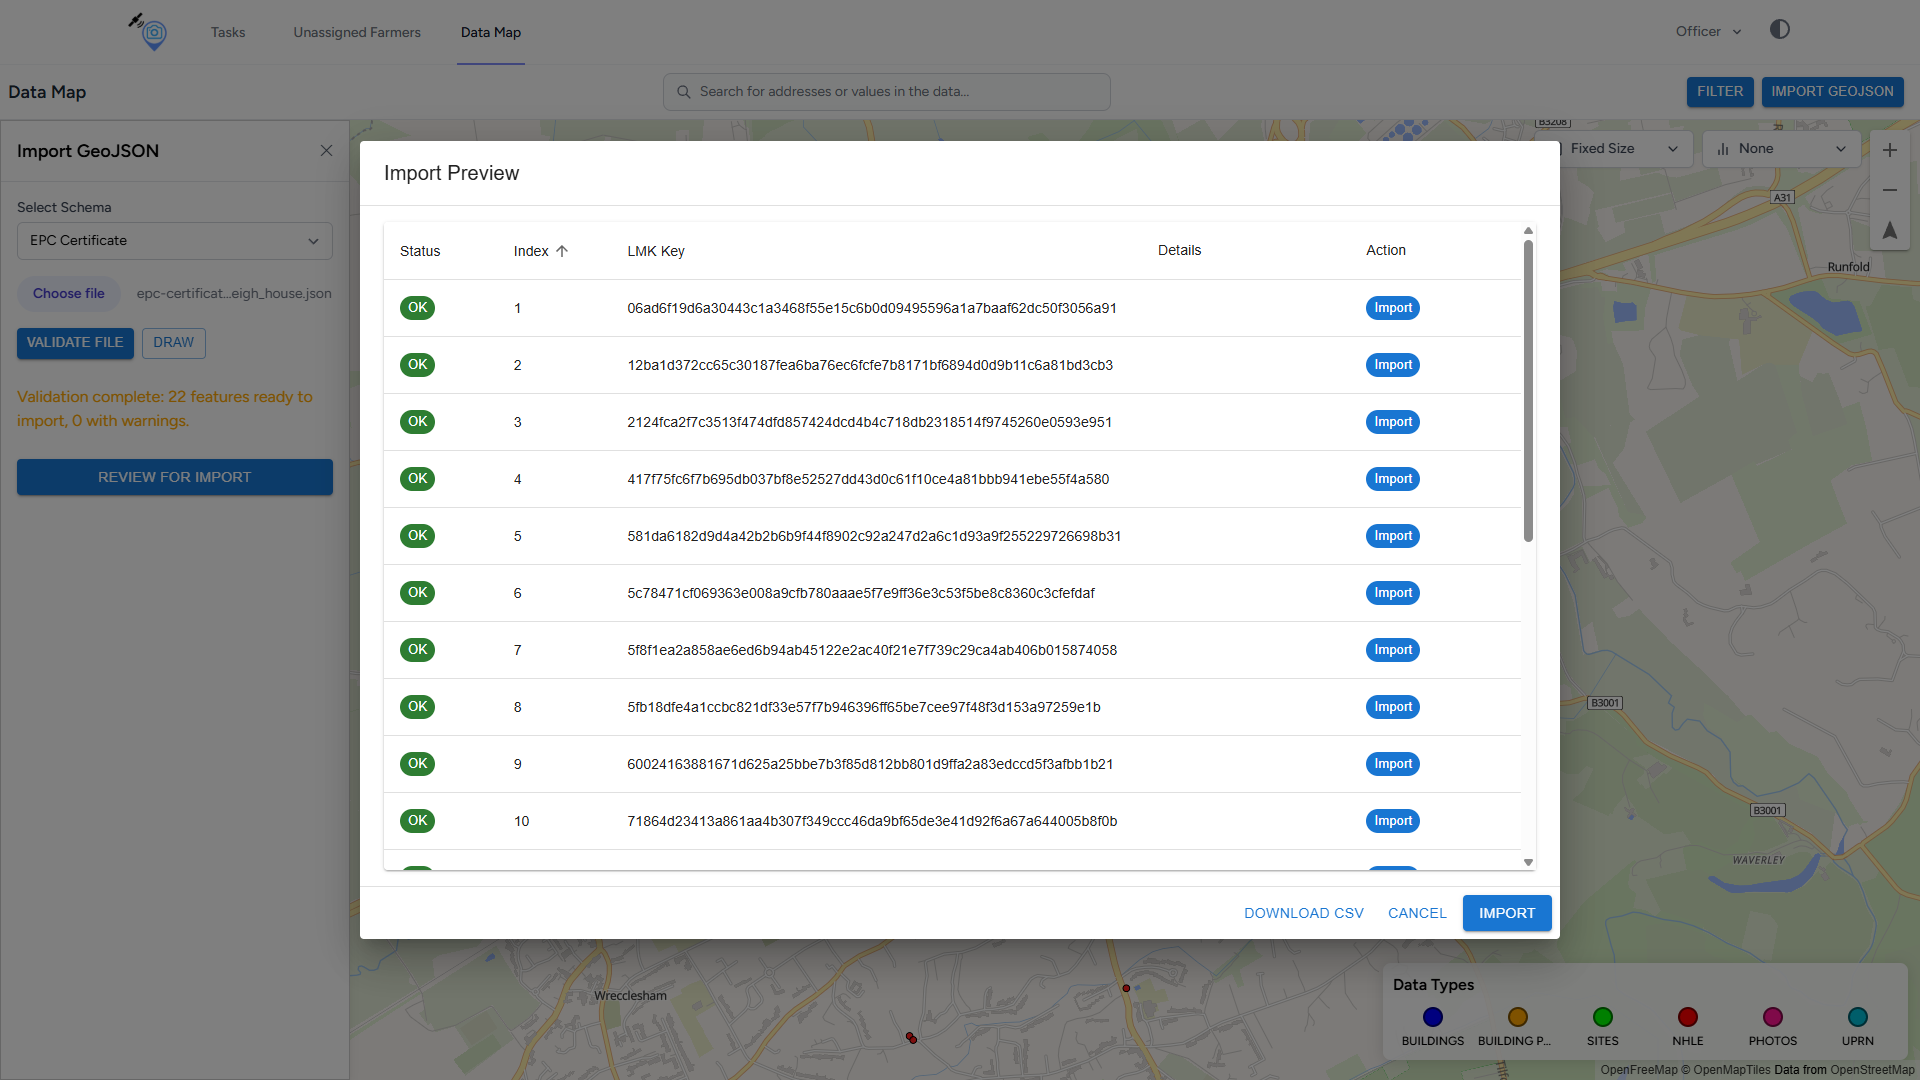
Import preview energy preformance certificate
Views: Open Street Map Building#
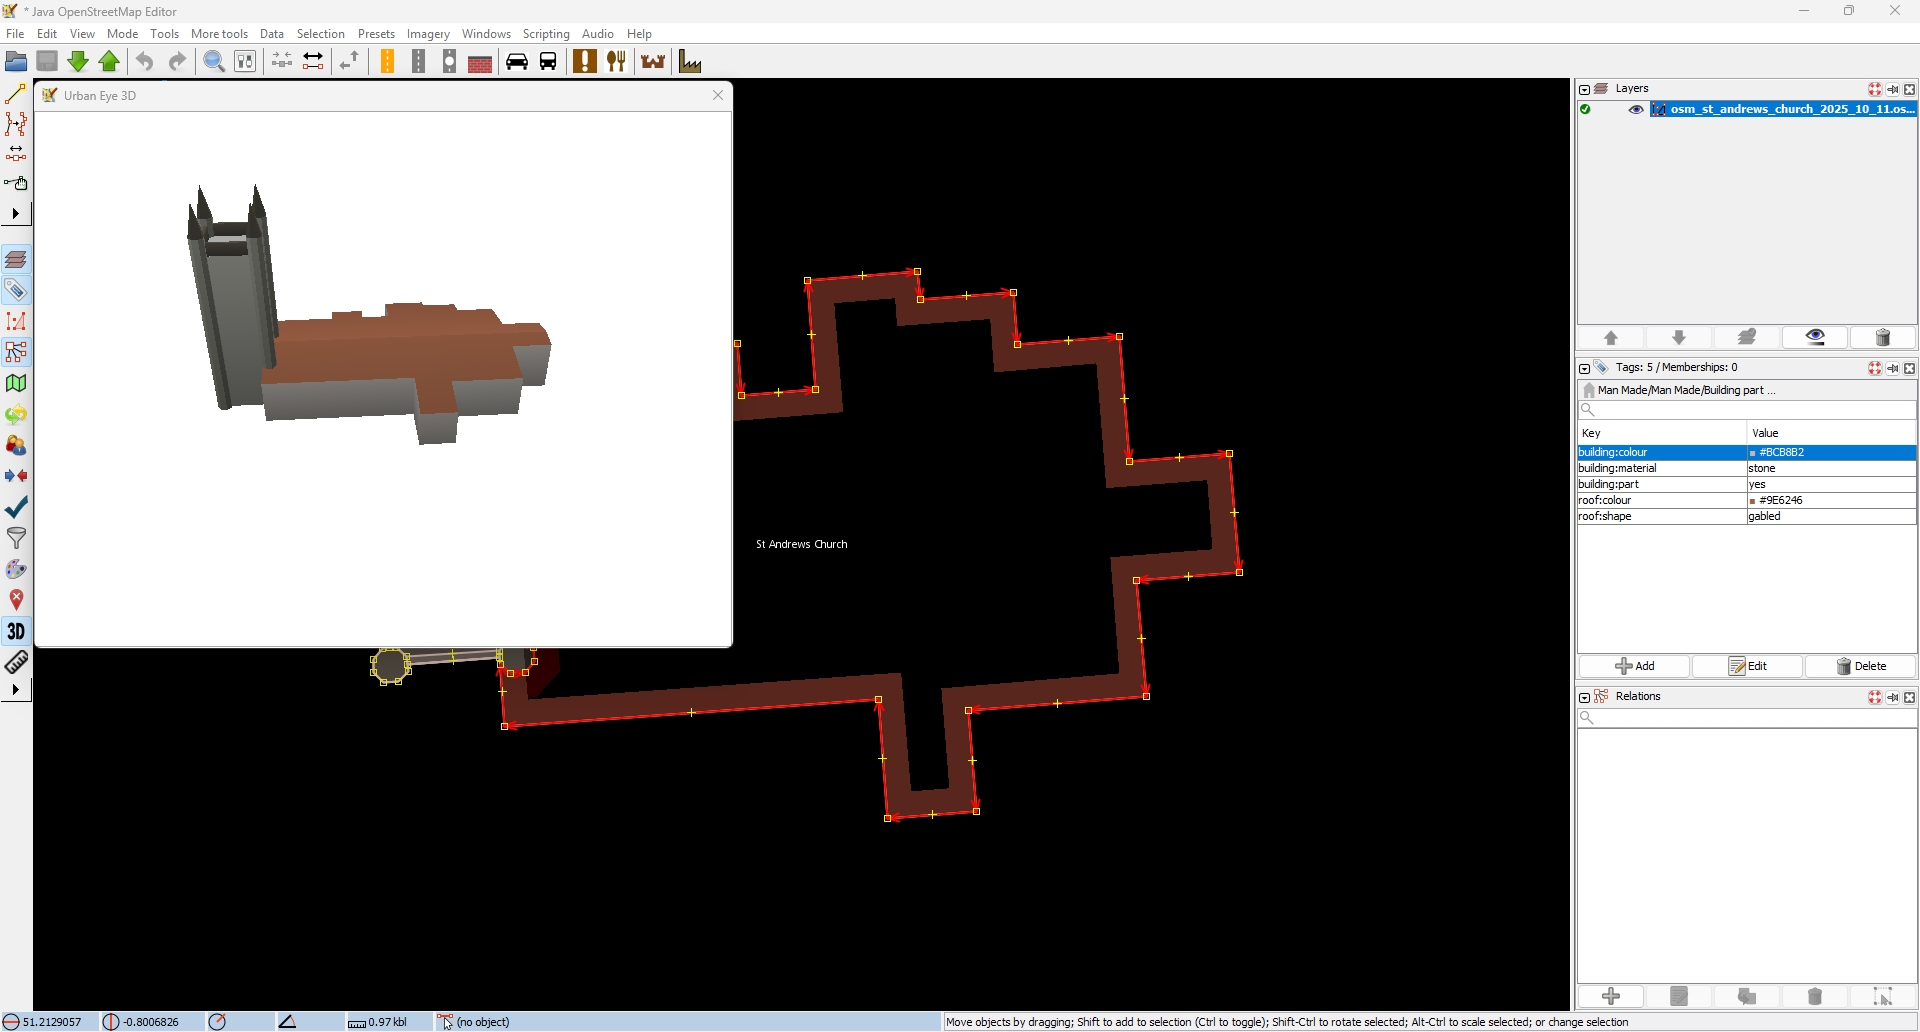
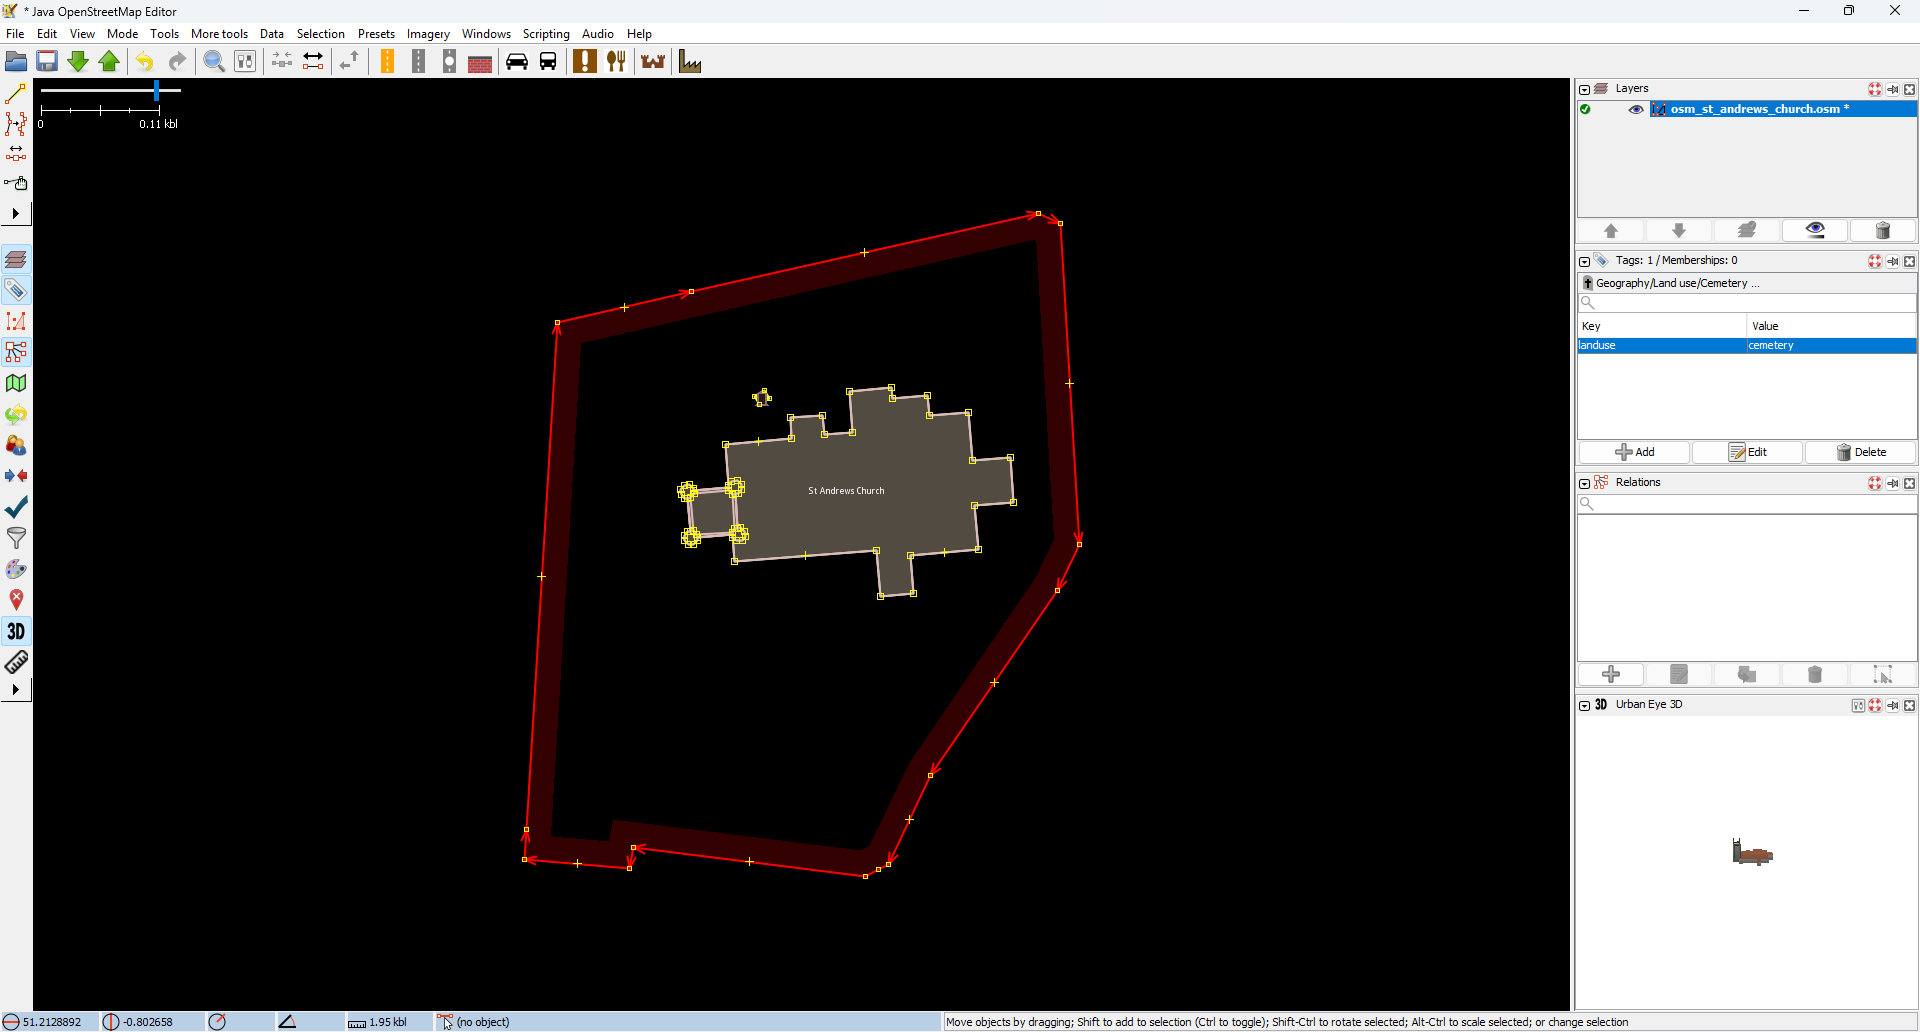
Building Tags in JOSM
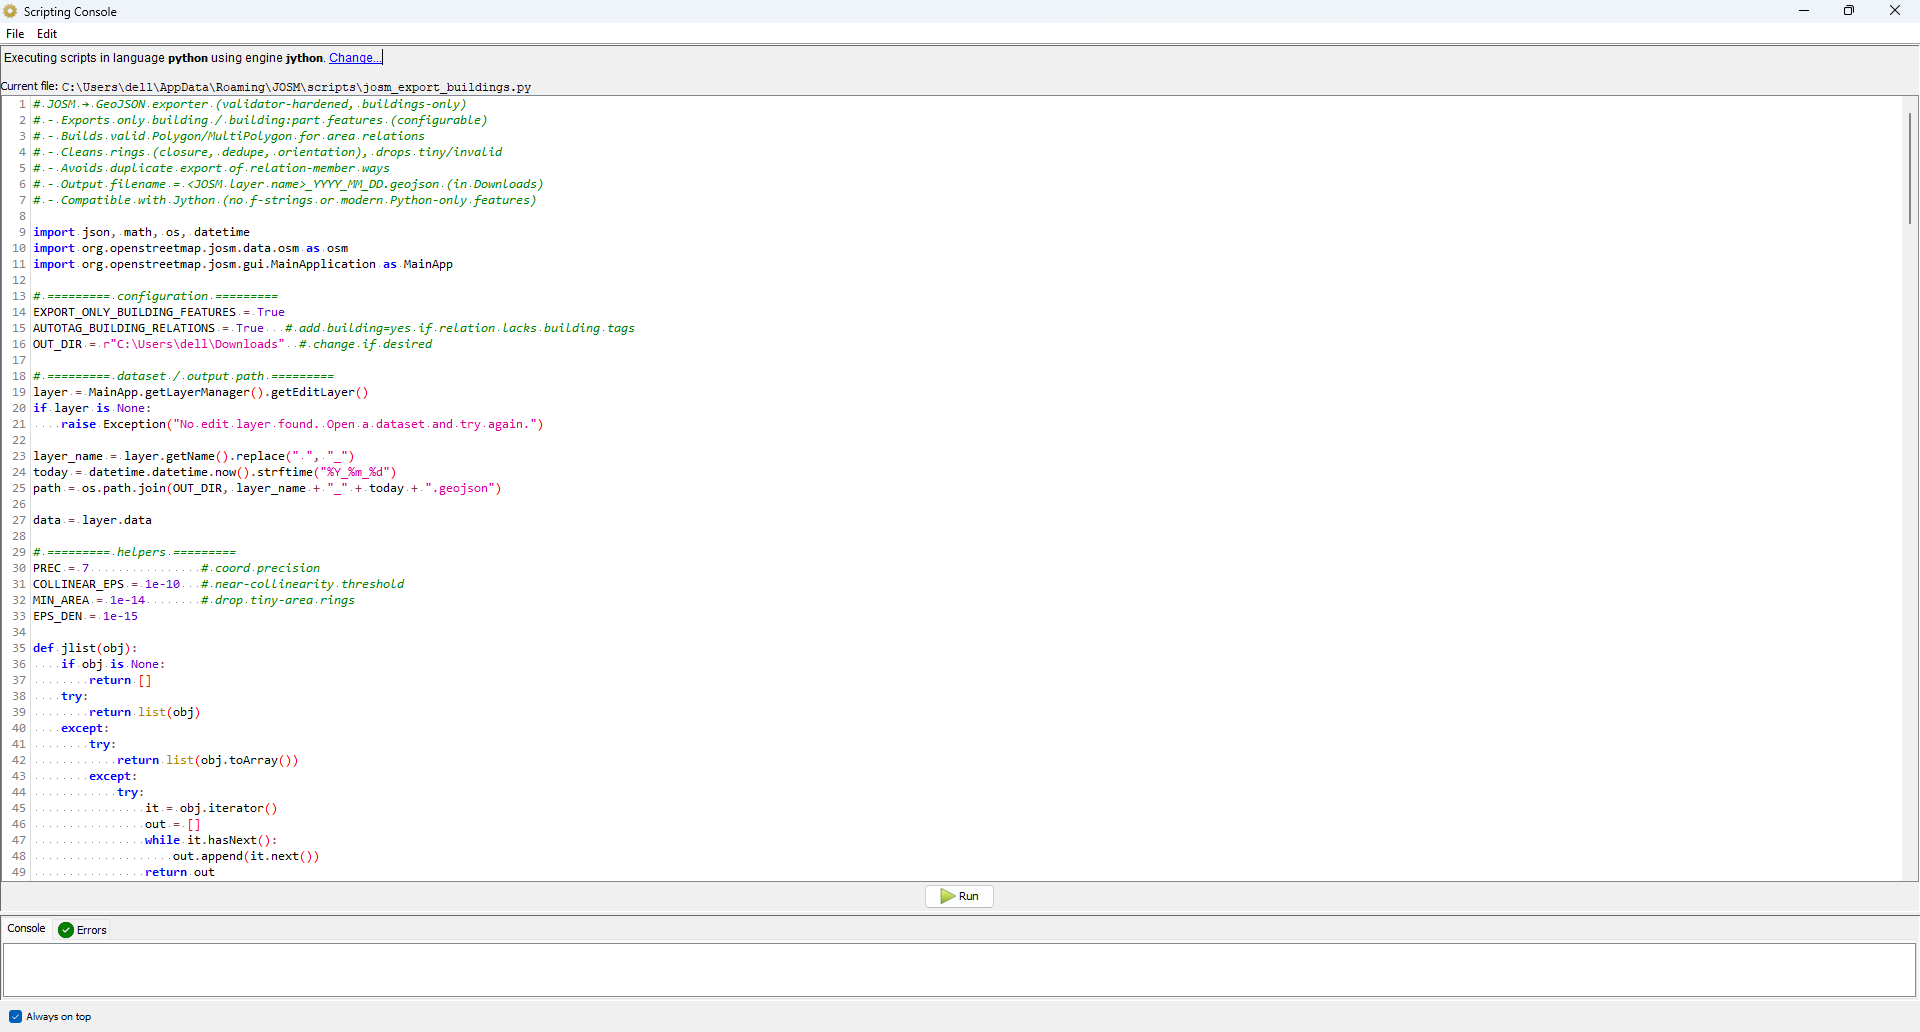
JOSM Export Building → Import Portal
Building → OSM
OSM Building
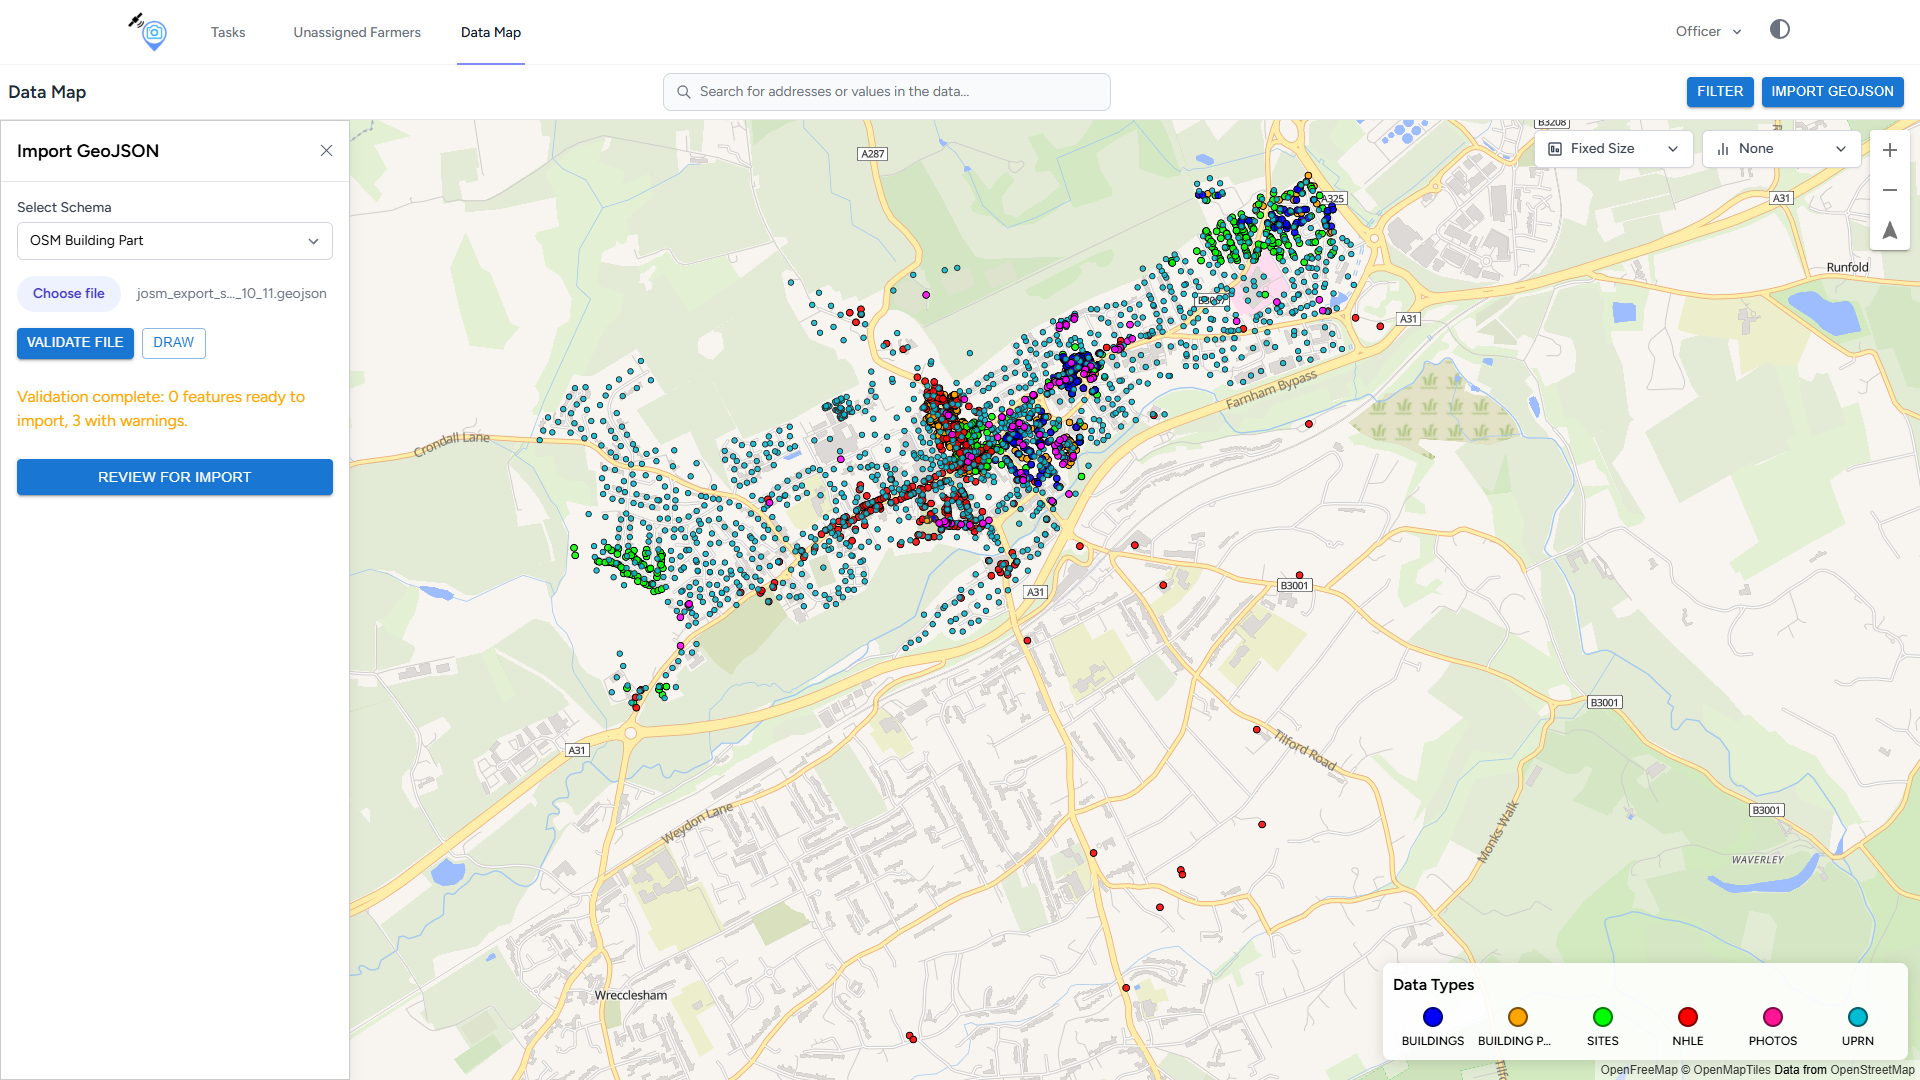
Import open street map building part
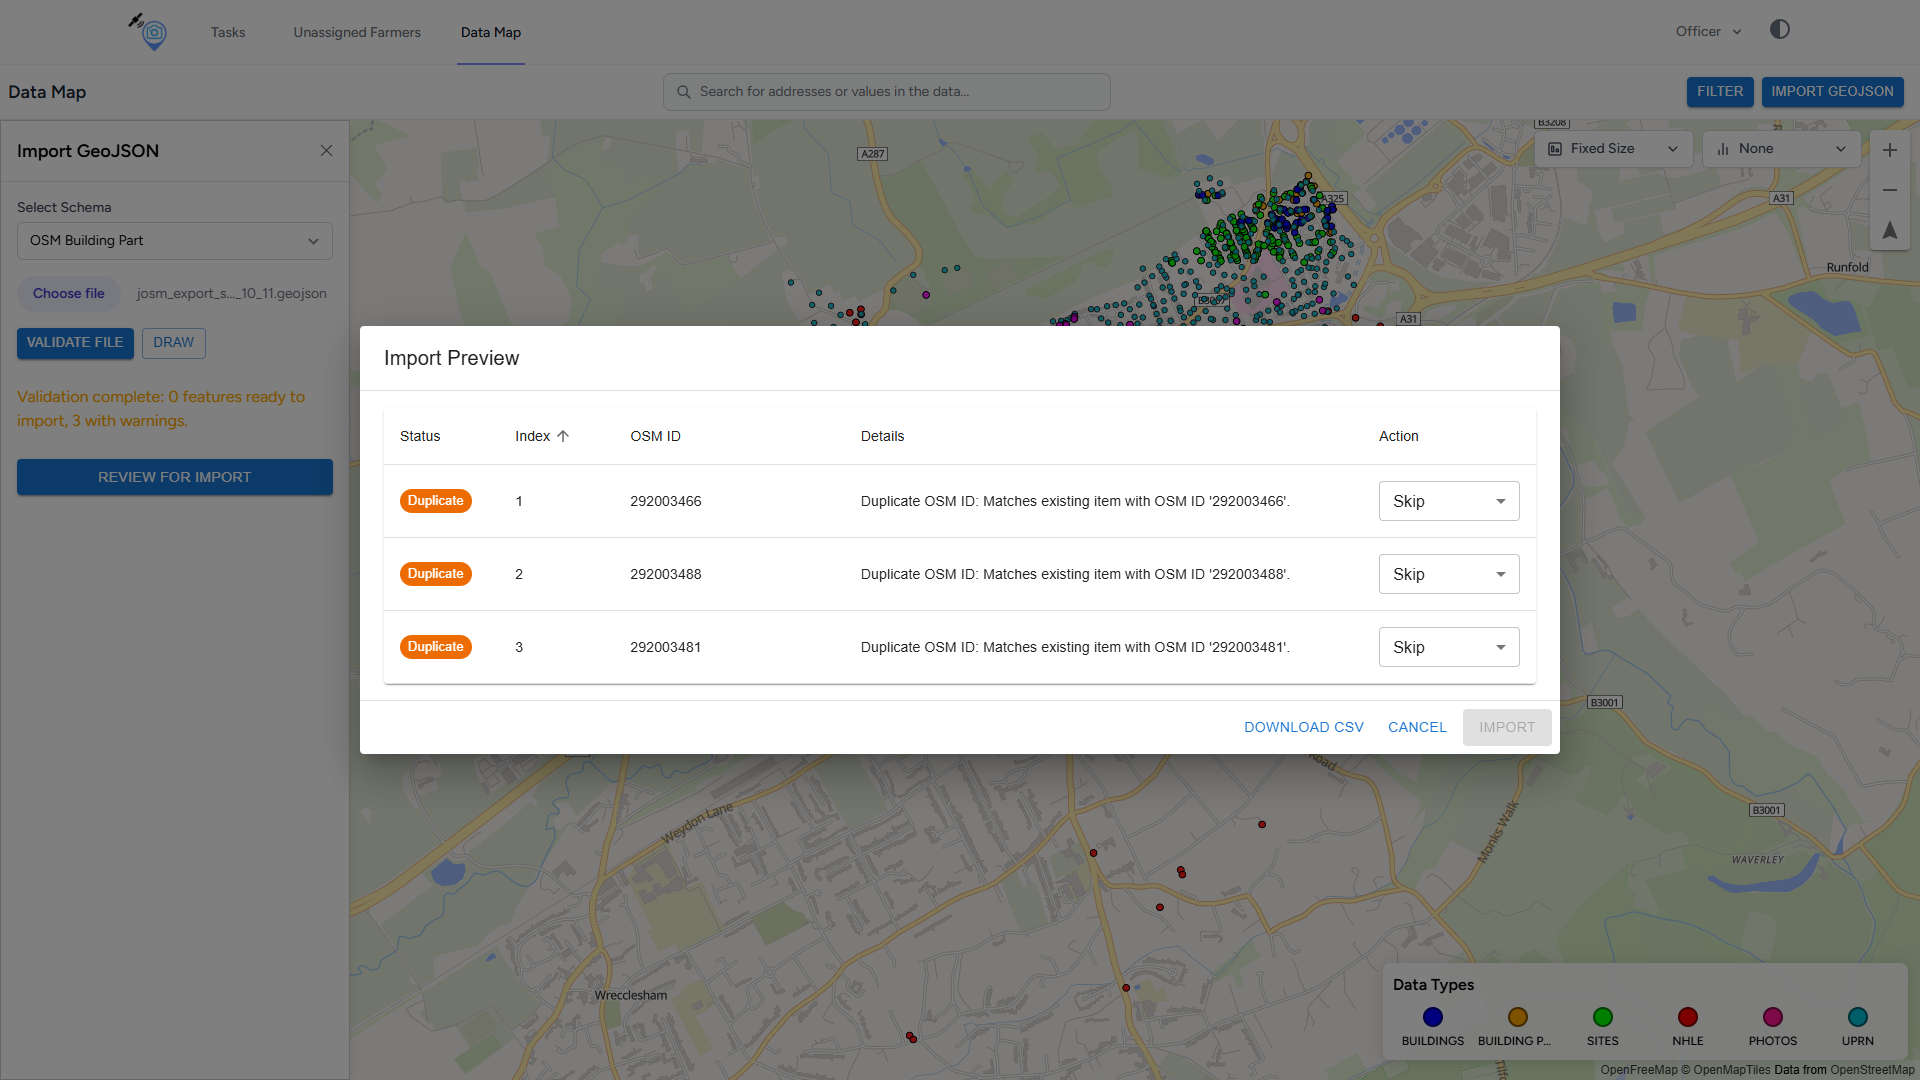
Import preview open street map building part
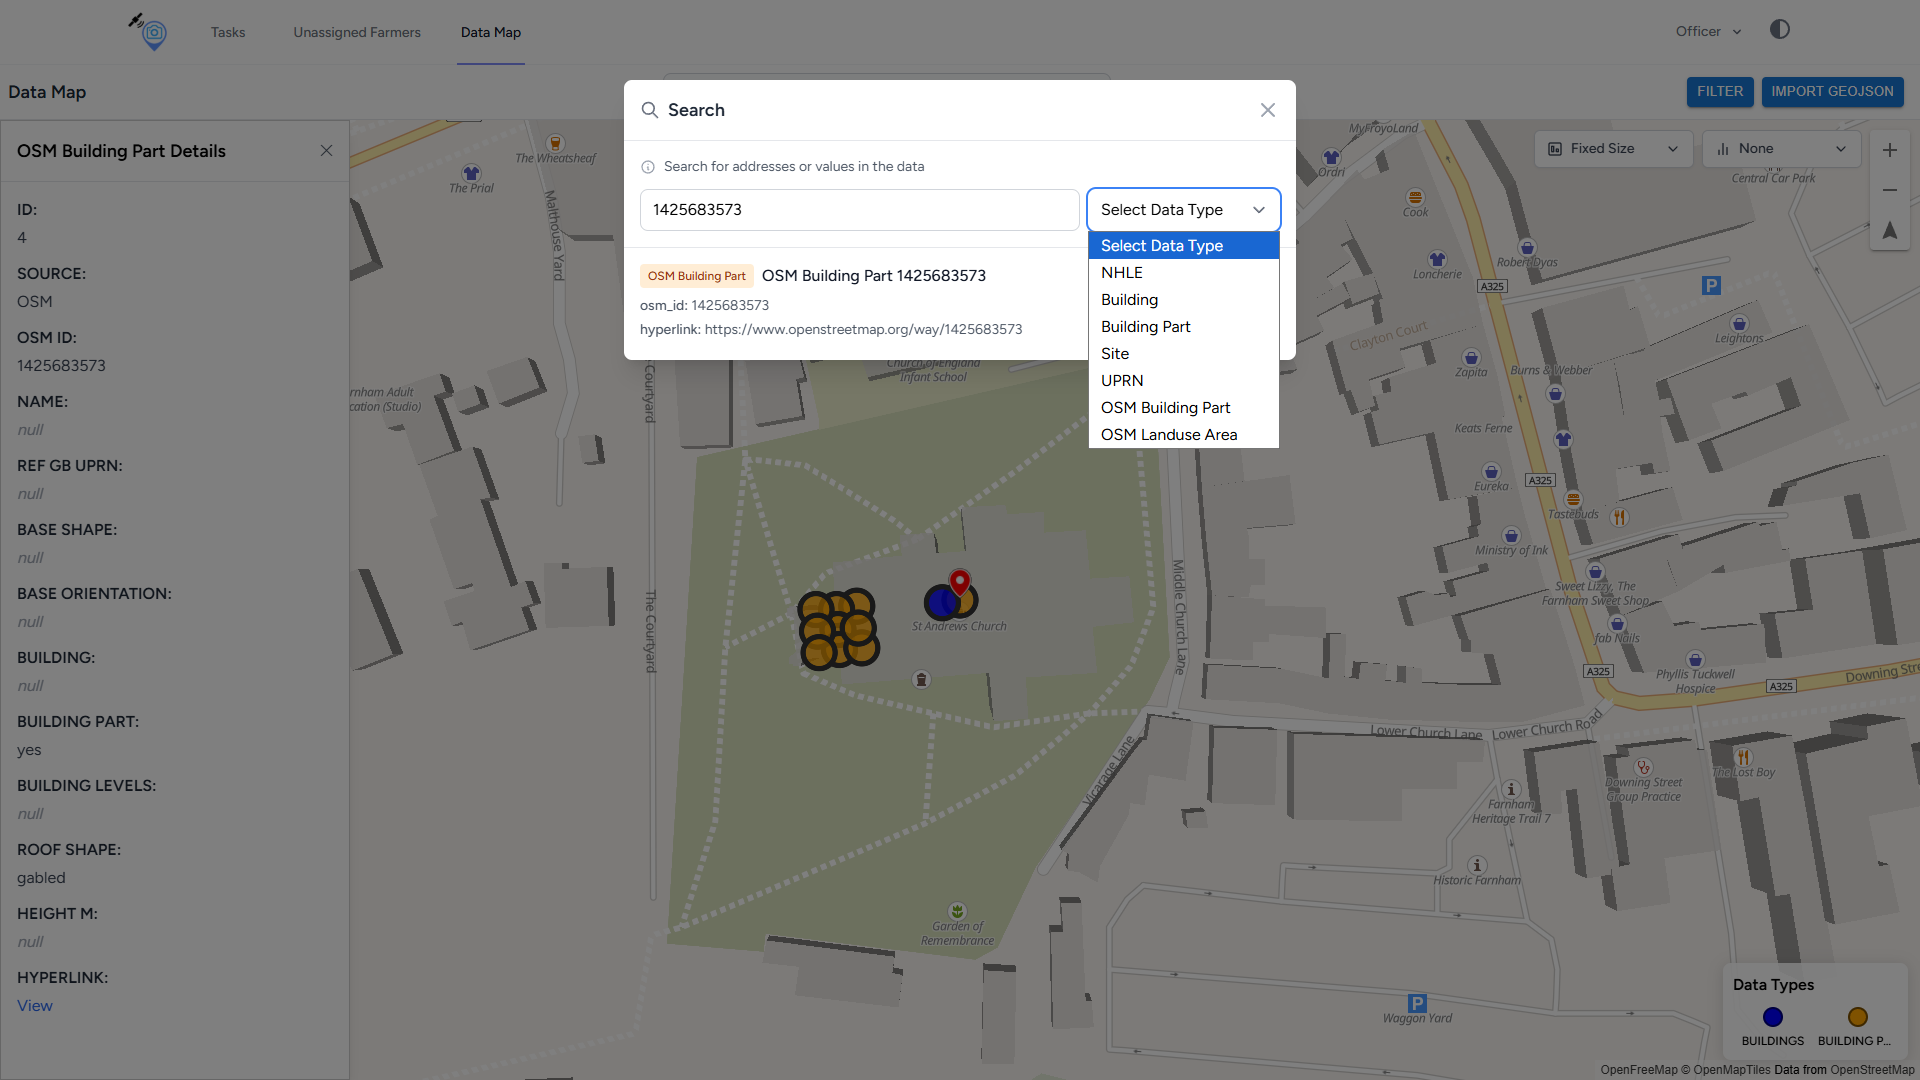
Search open street map building part ID
Views: Open Street Map Land#
Landuse Tags in JOSM
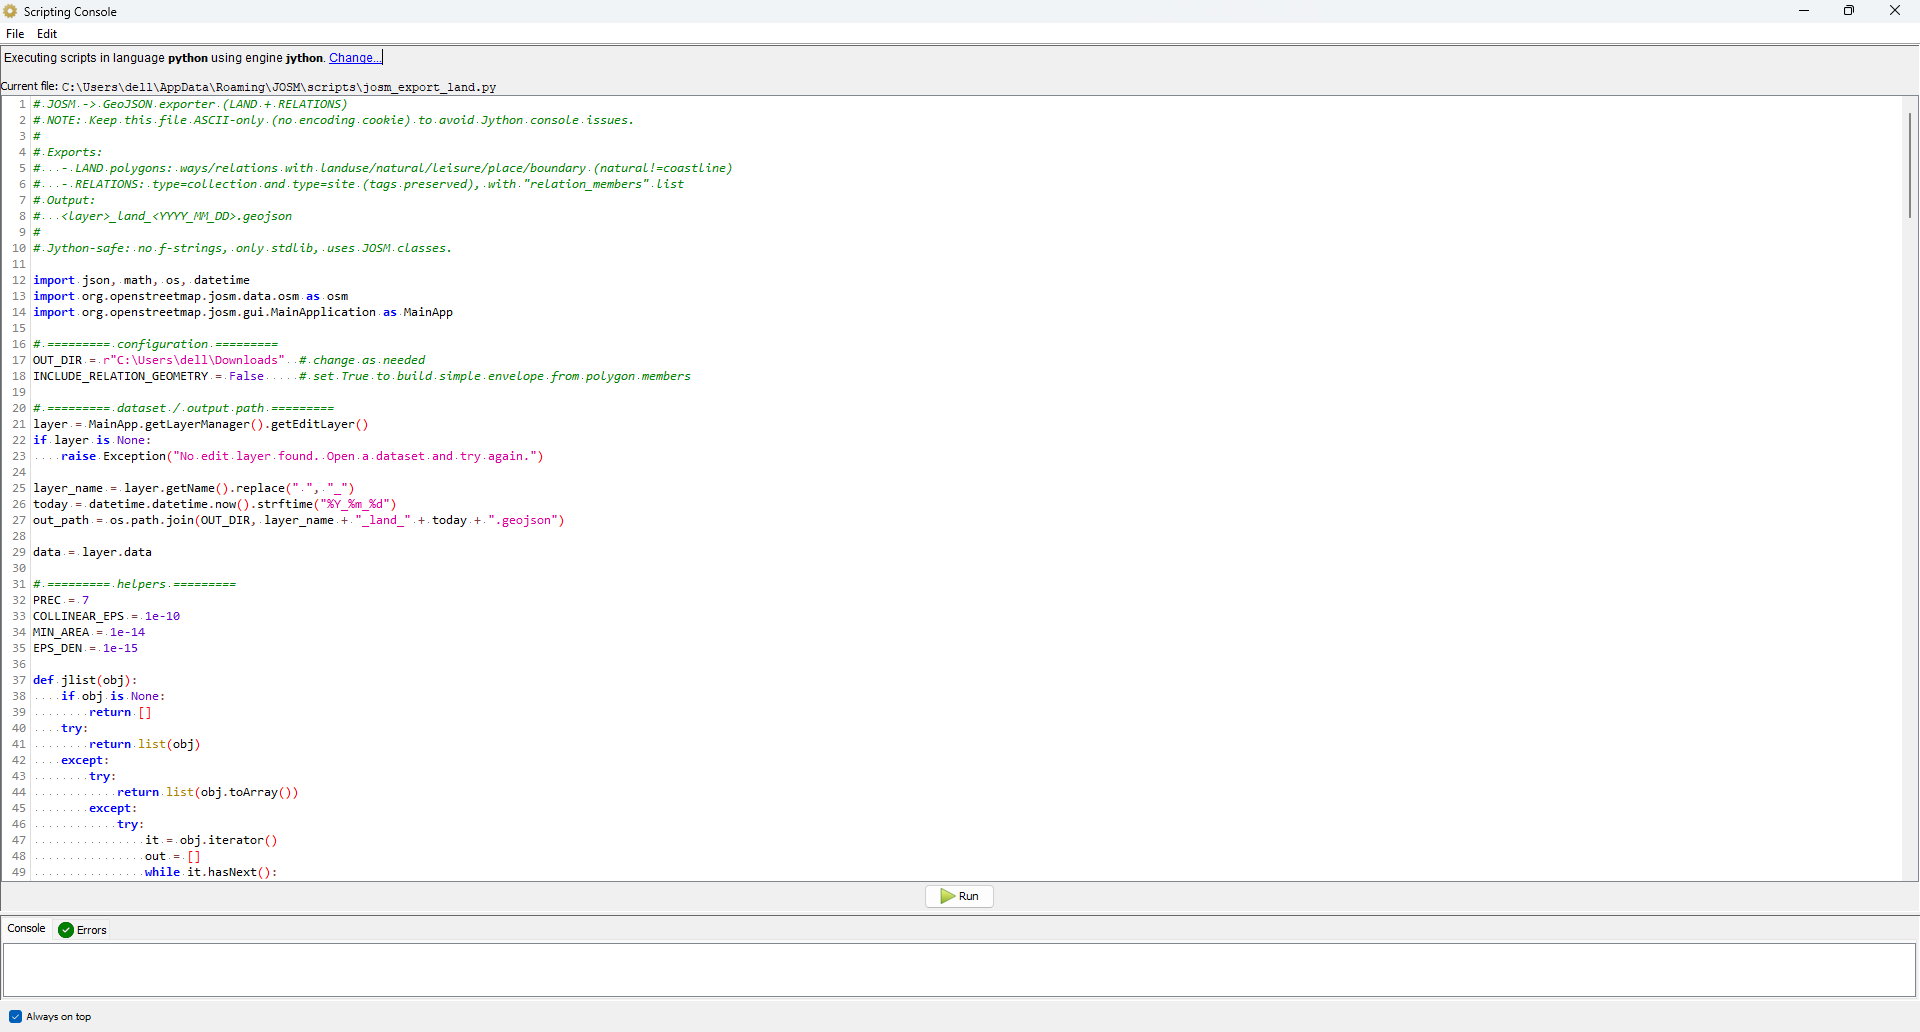
JOSM Export Land → Import Portal
Land → OSM
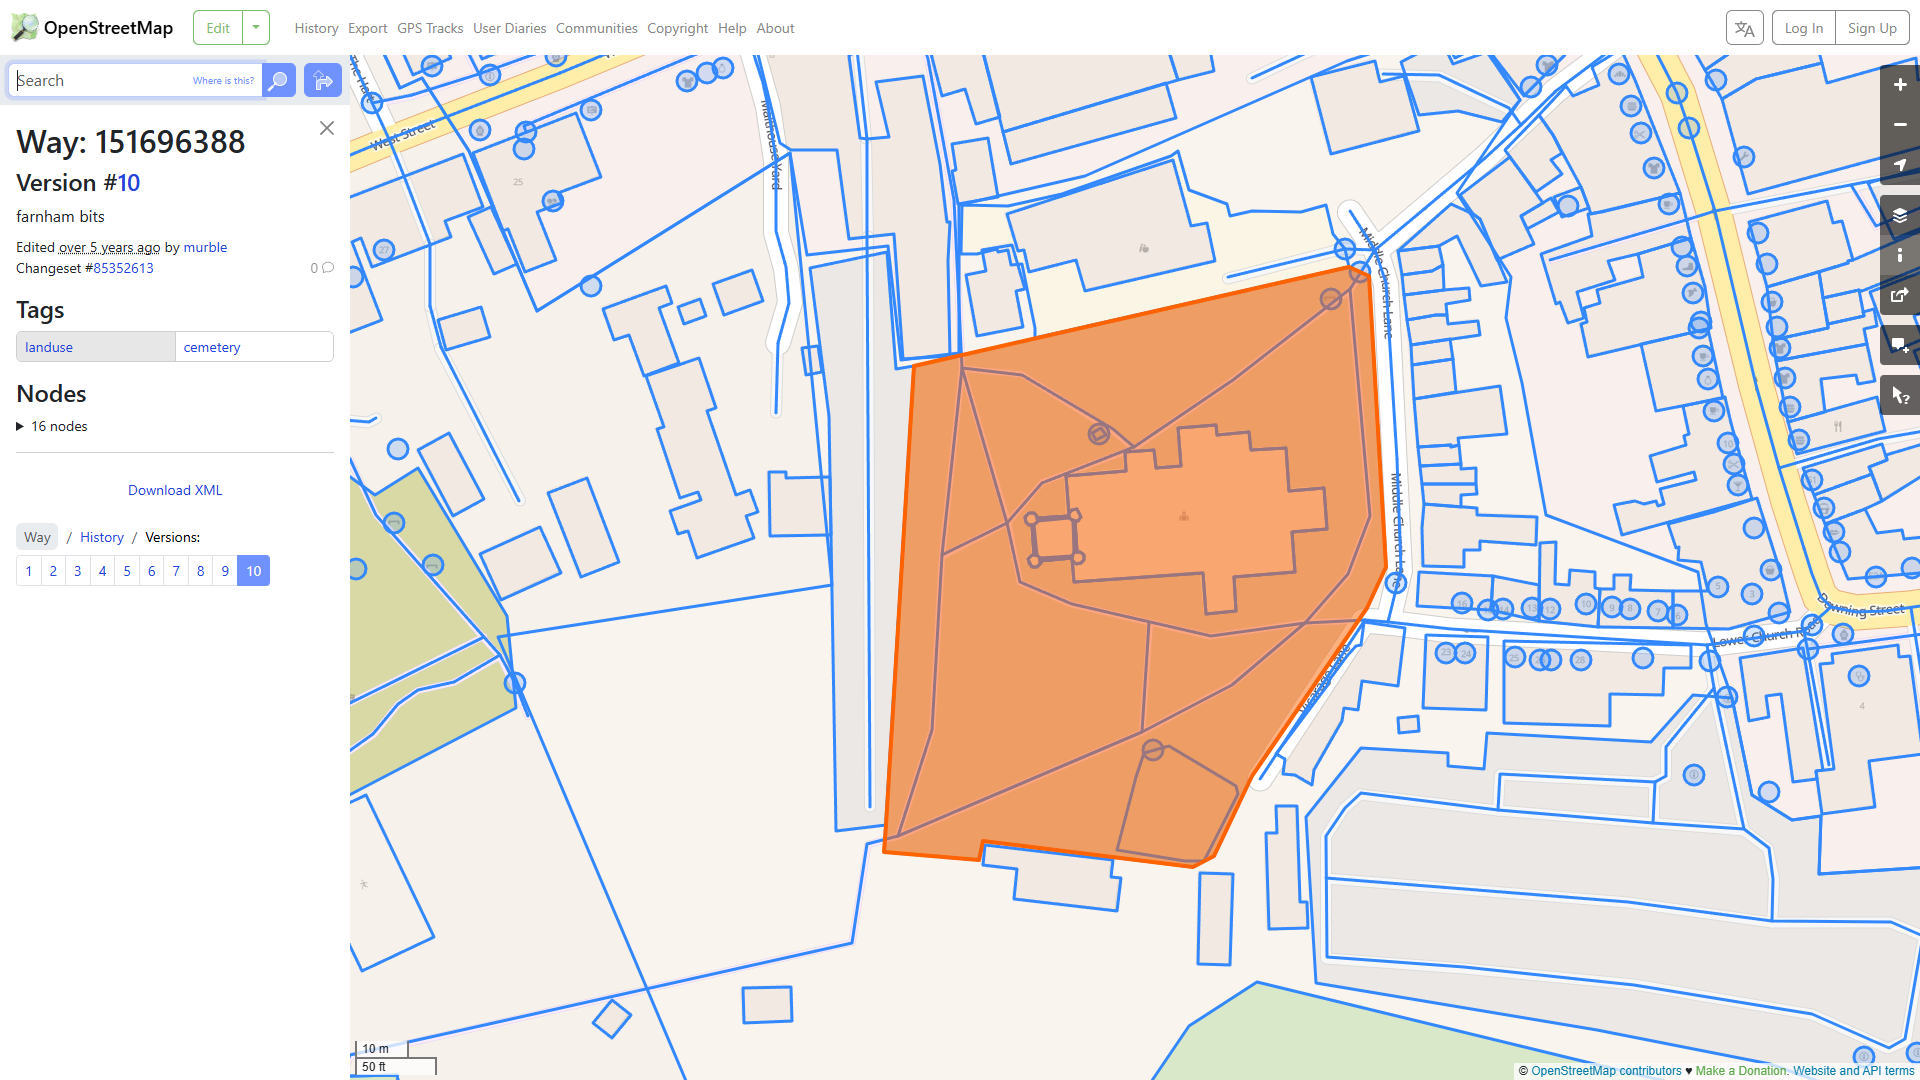
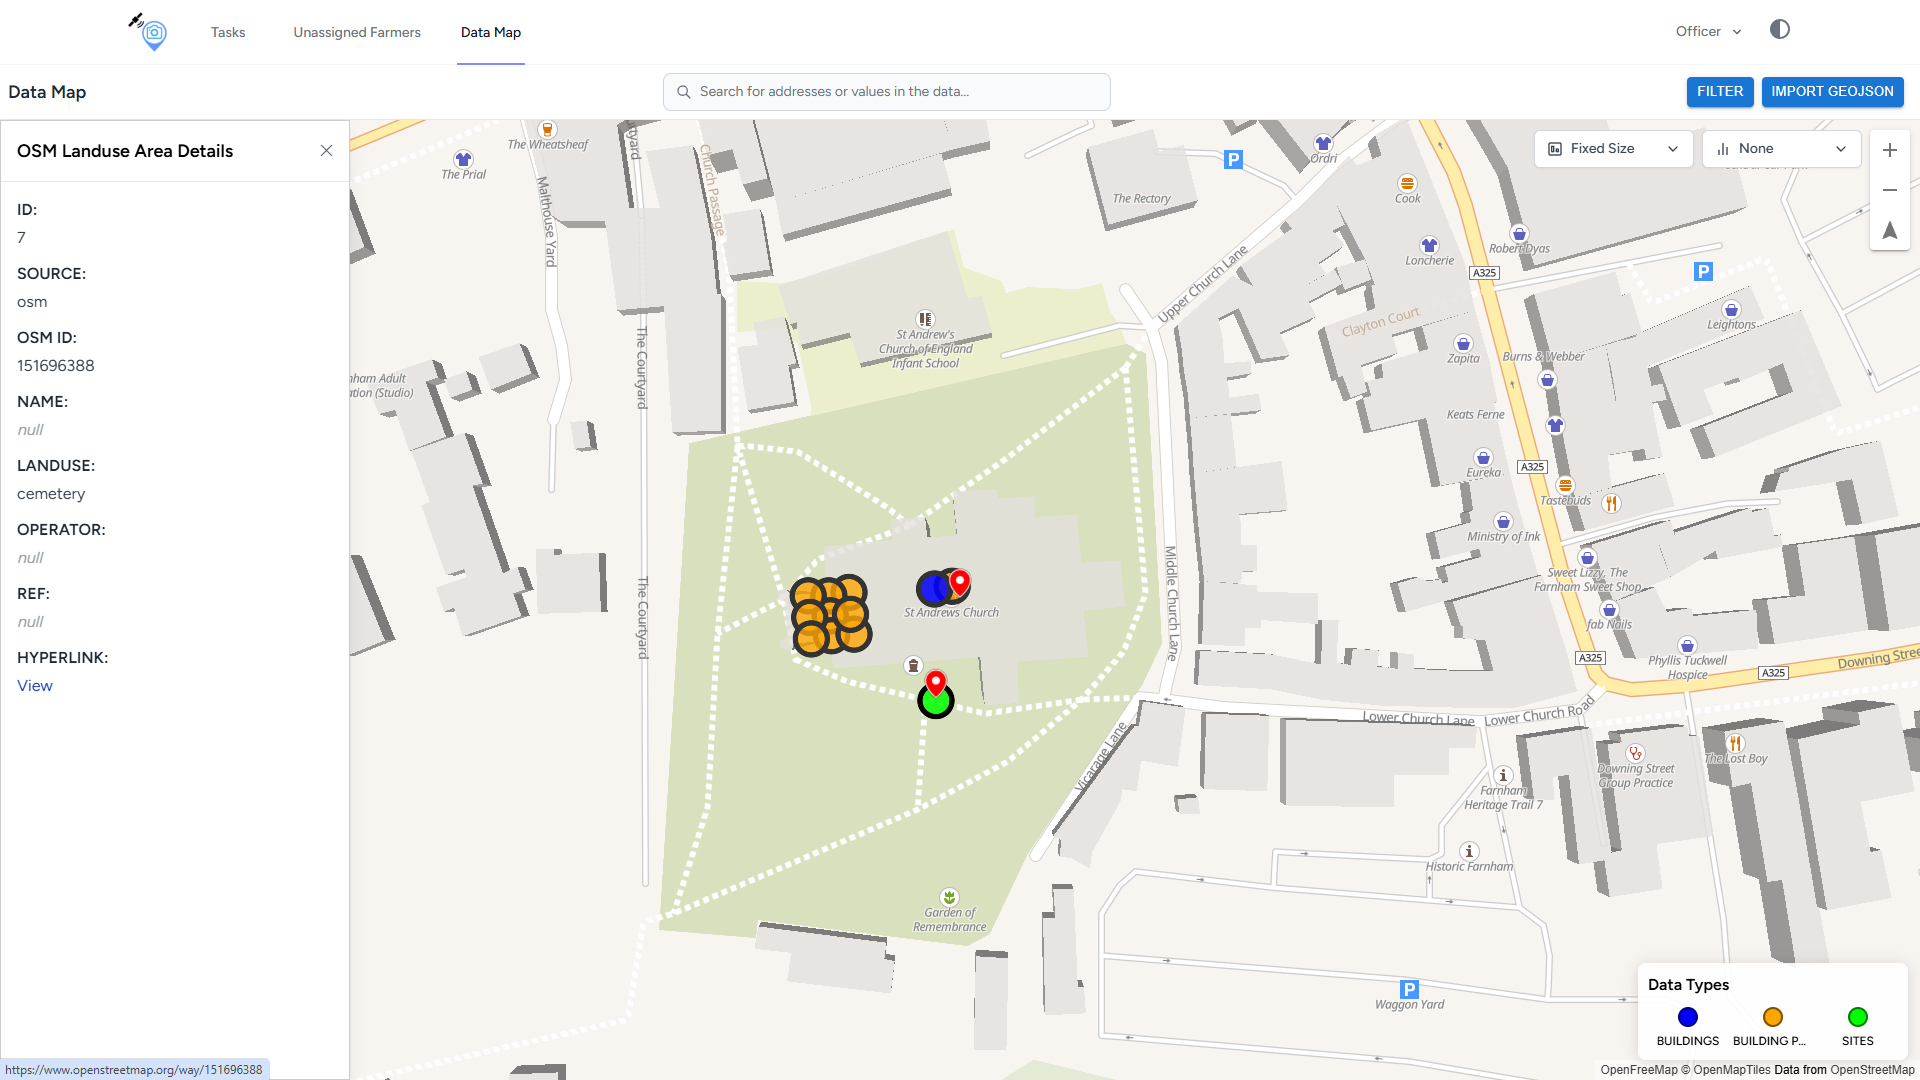
OSM Landuse
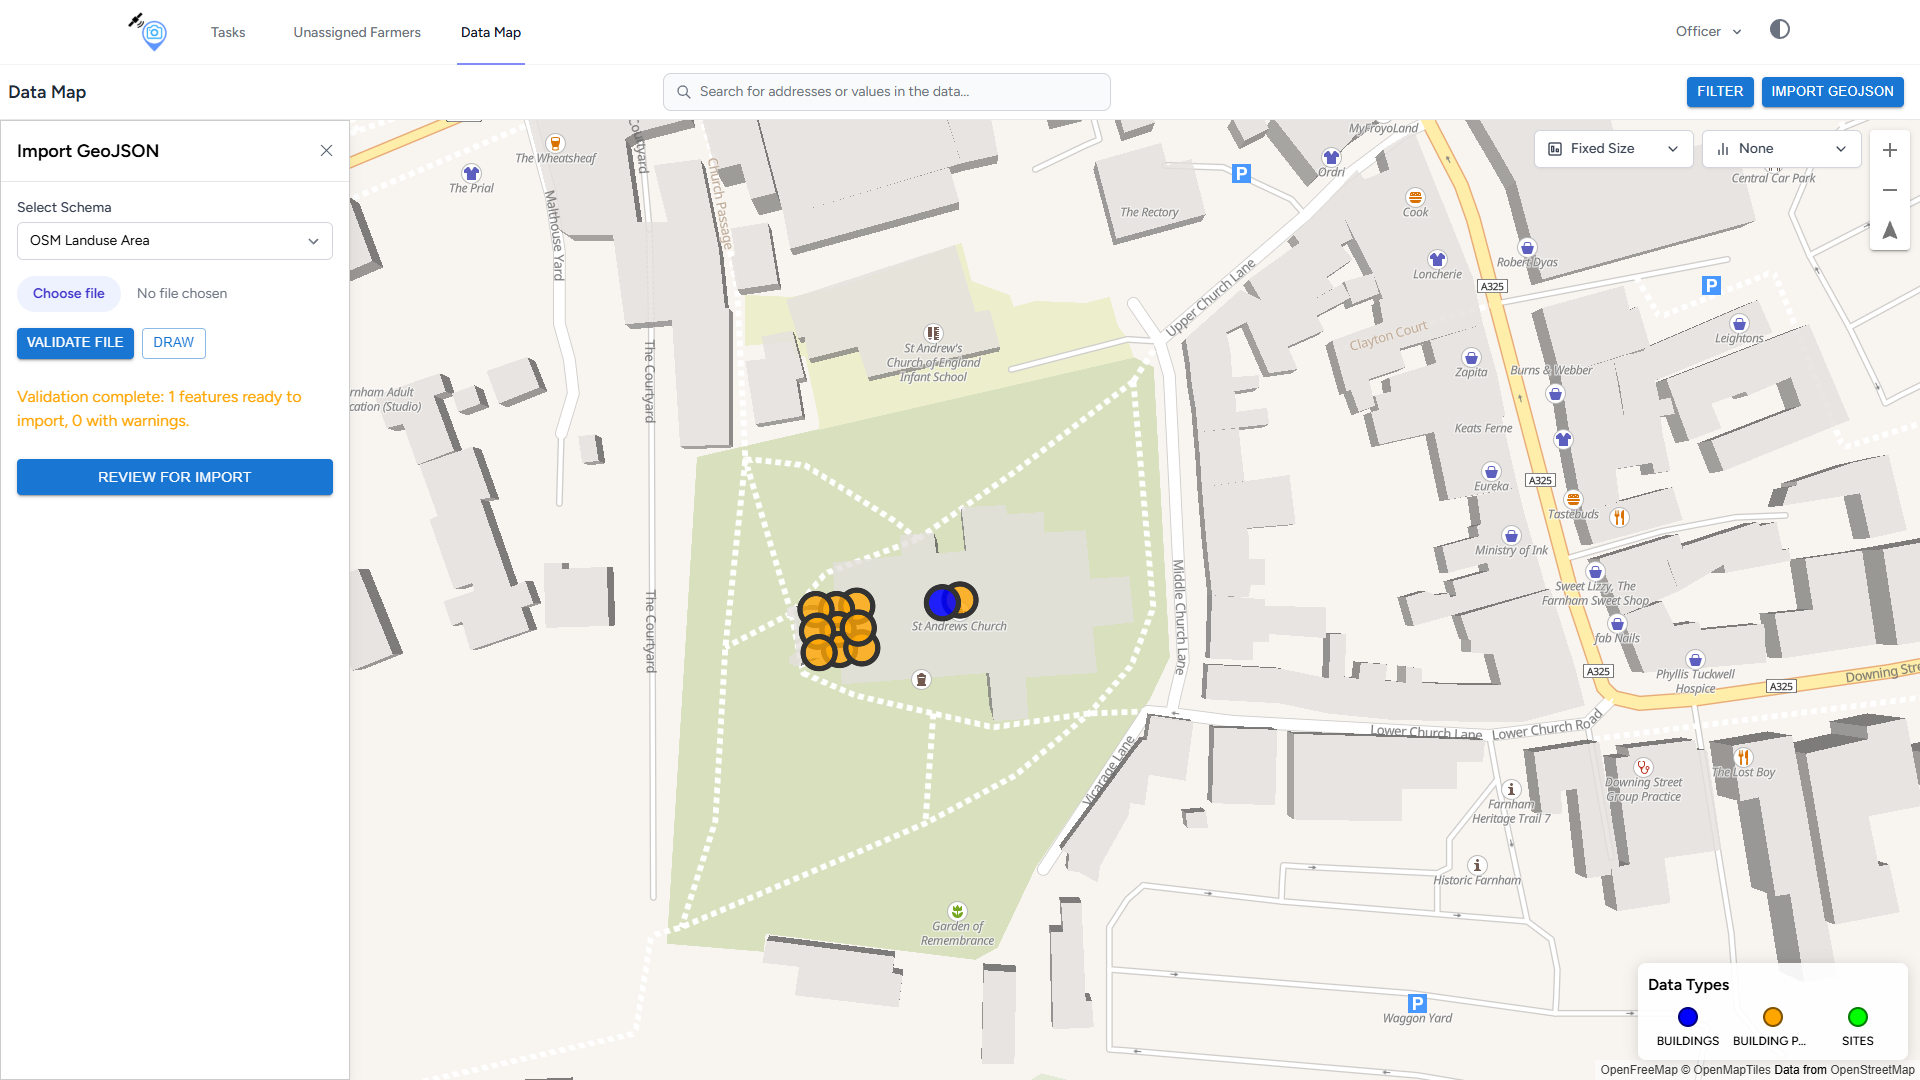
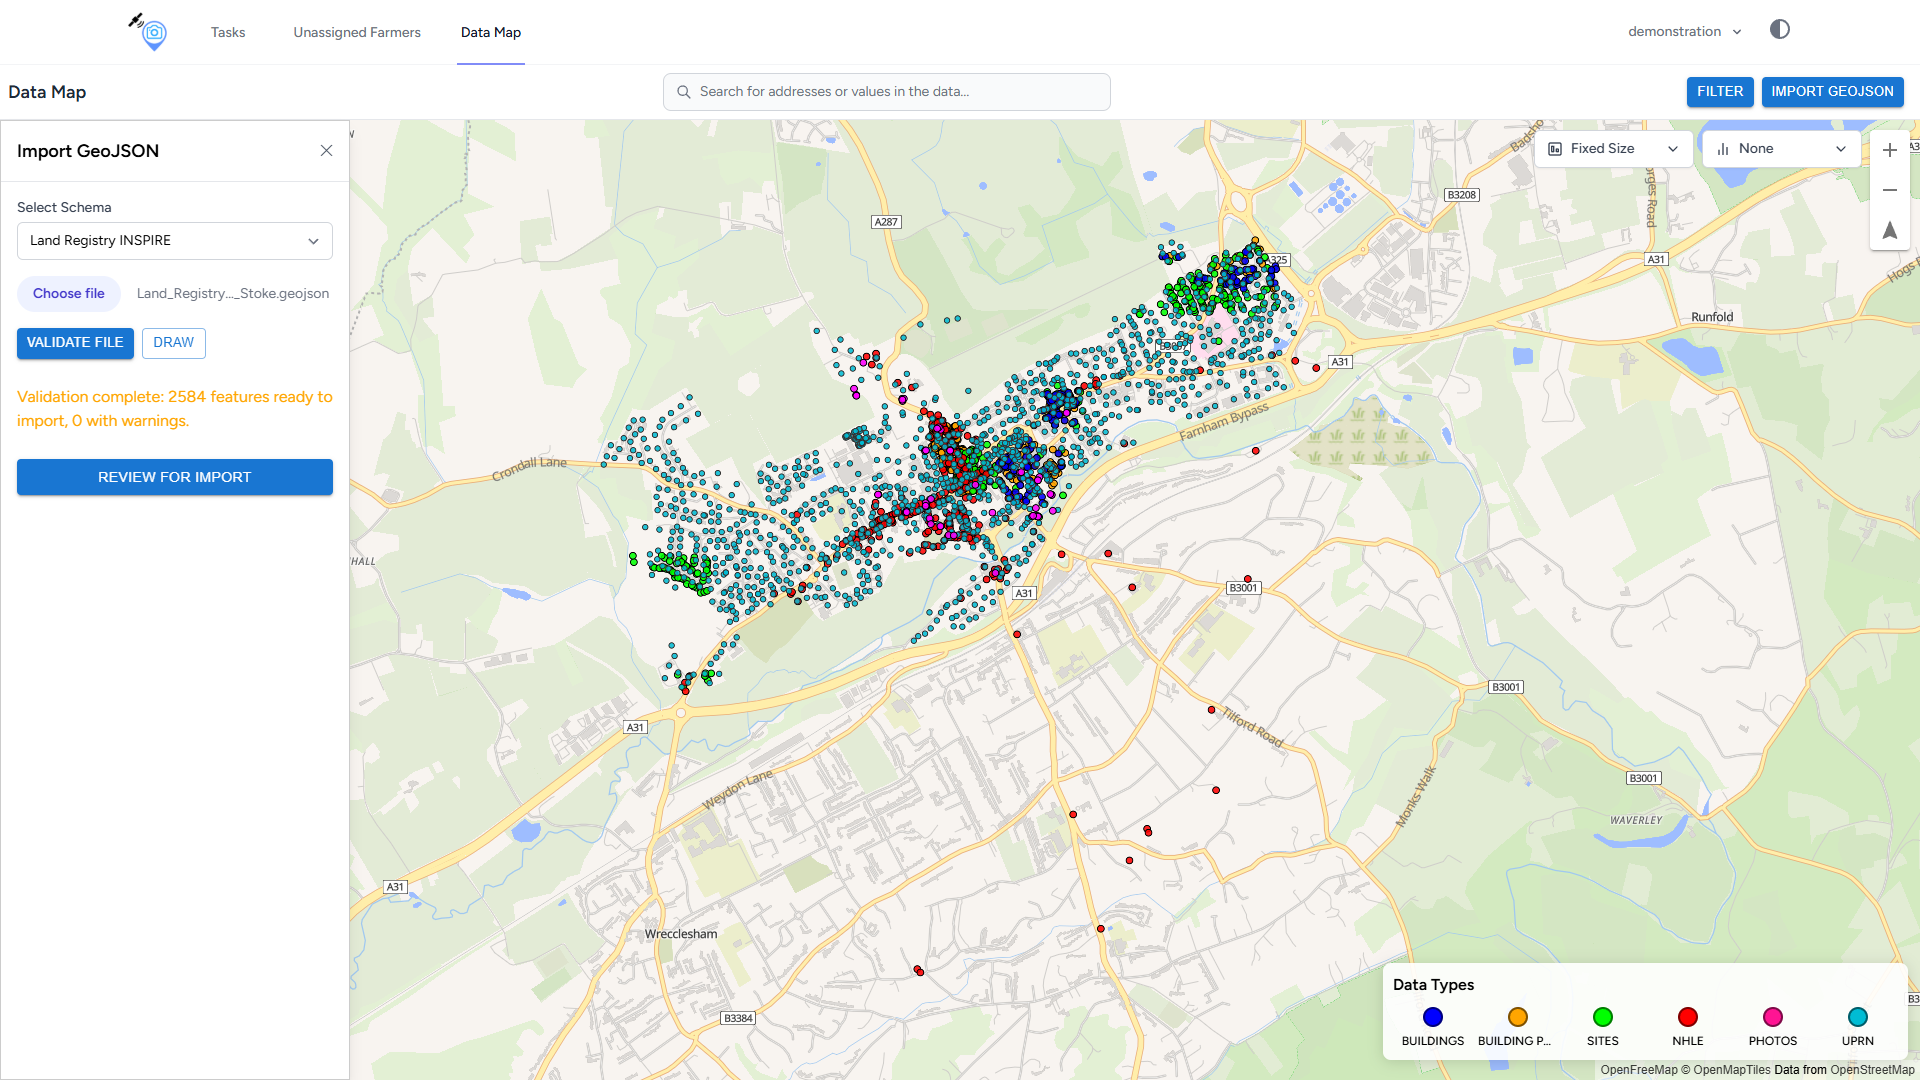
Import open street map land
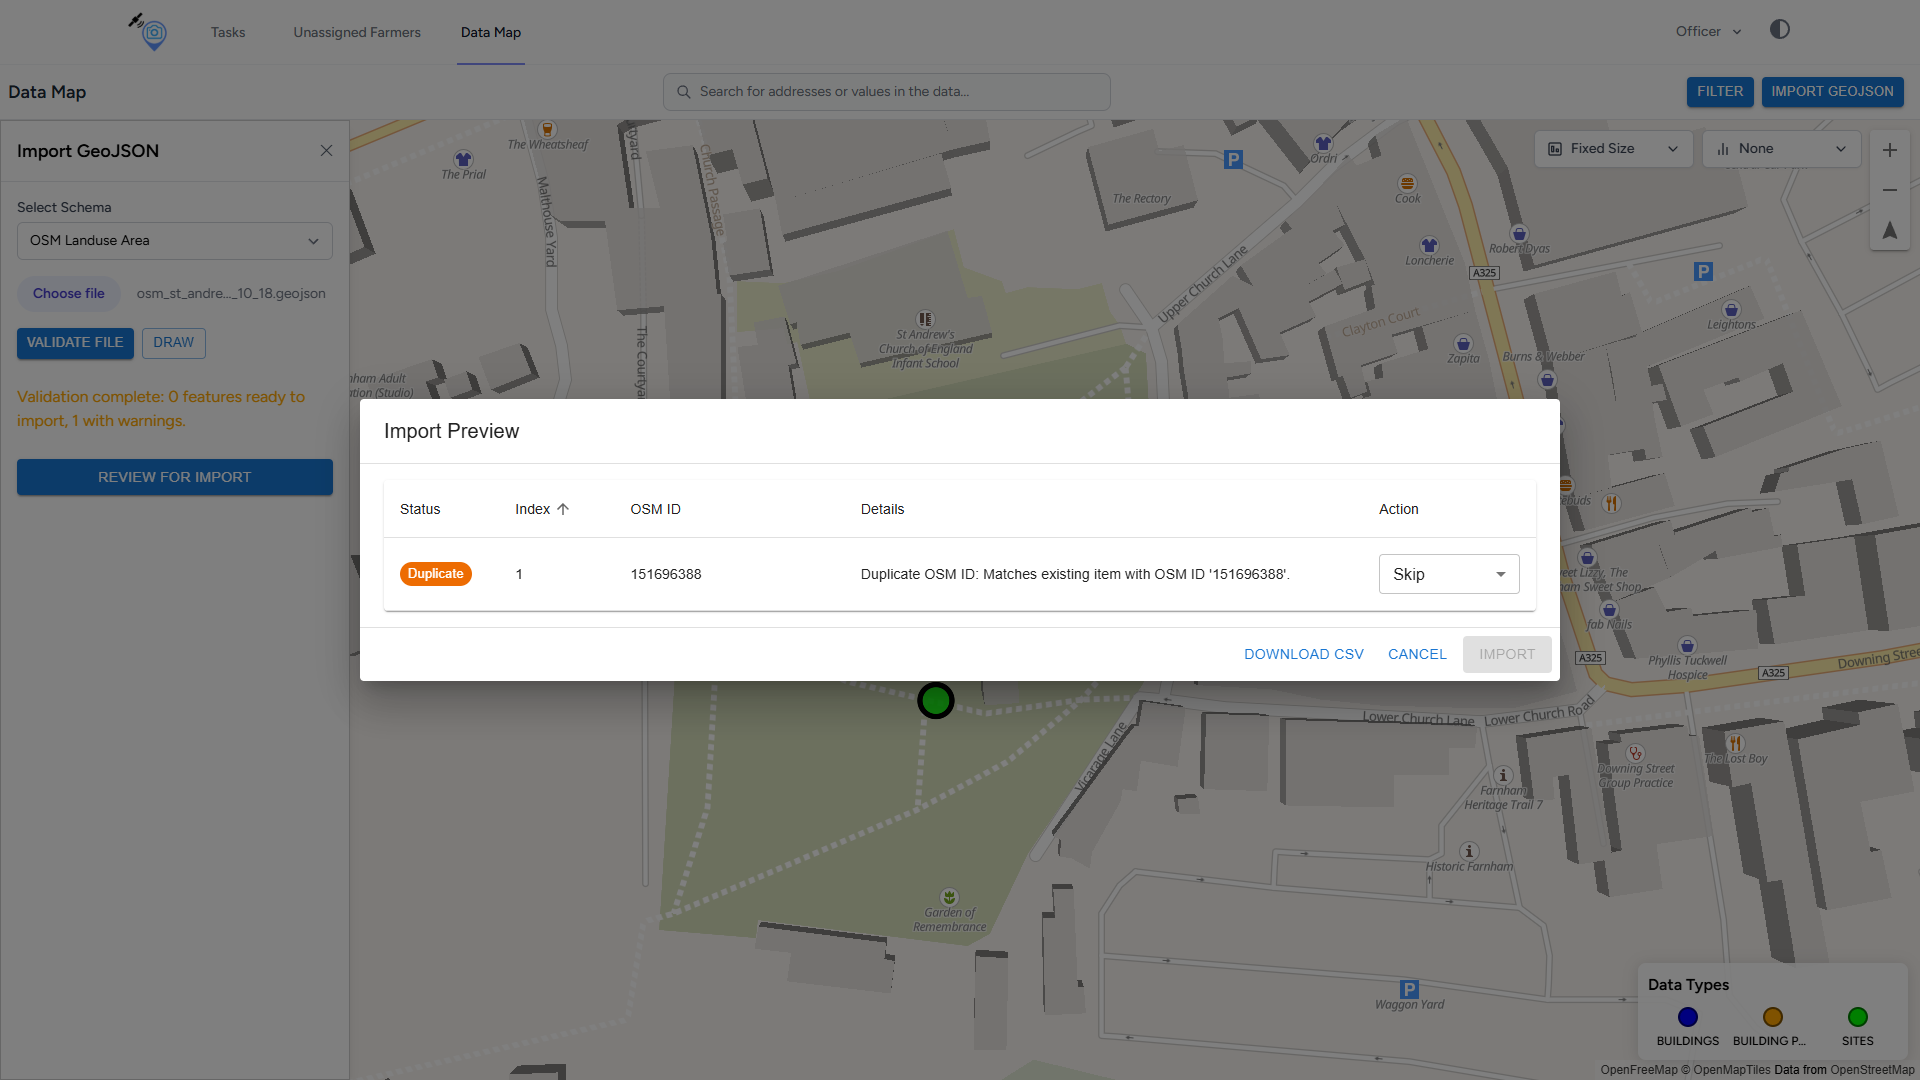
Import preview open street map land
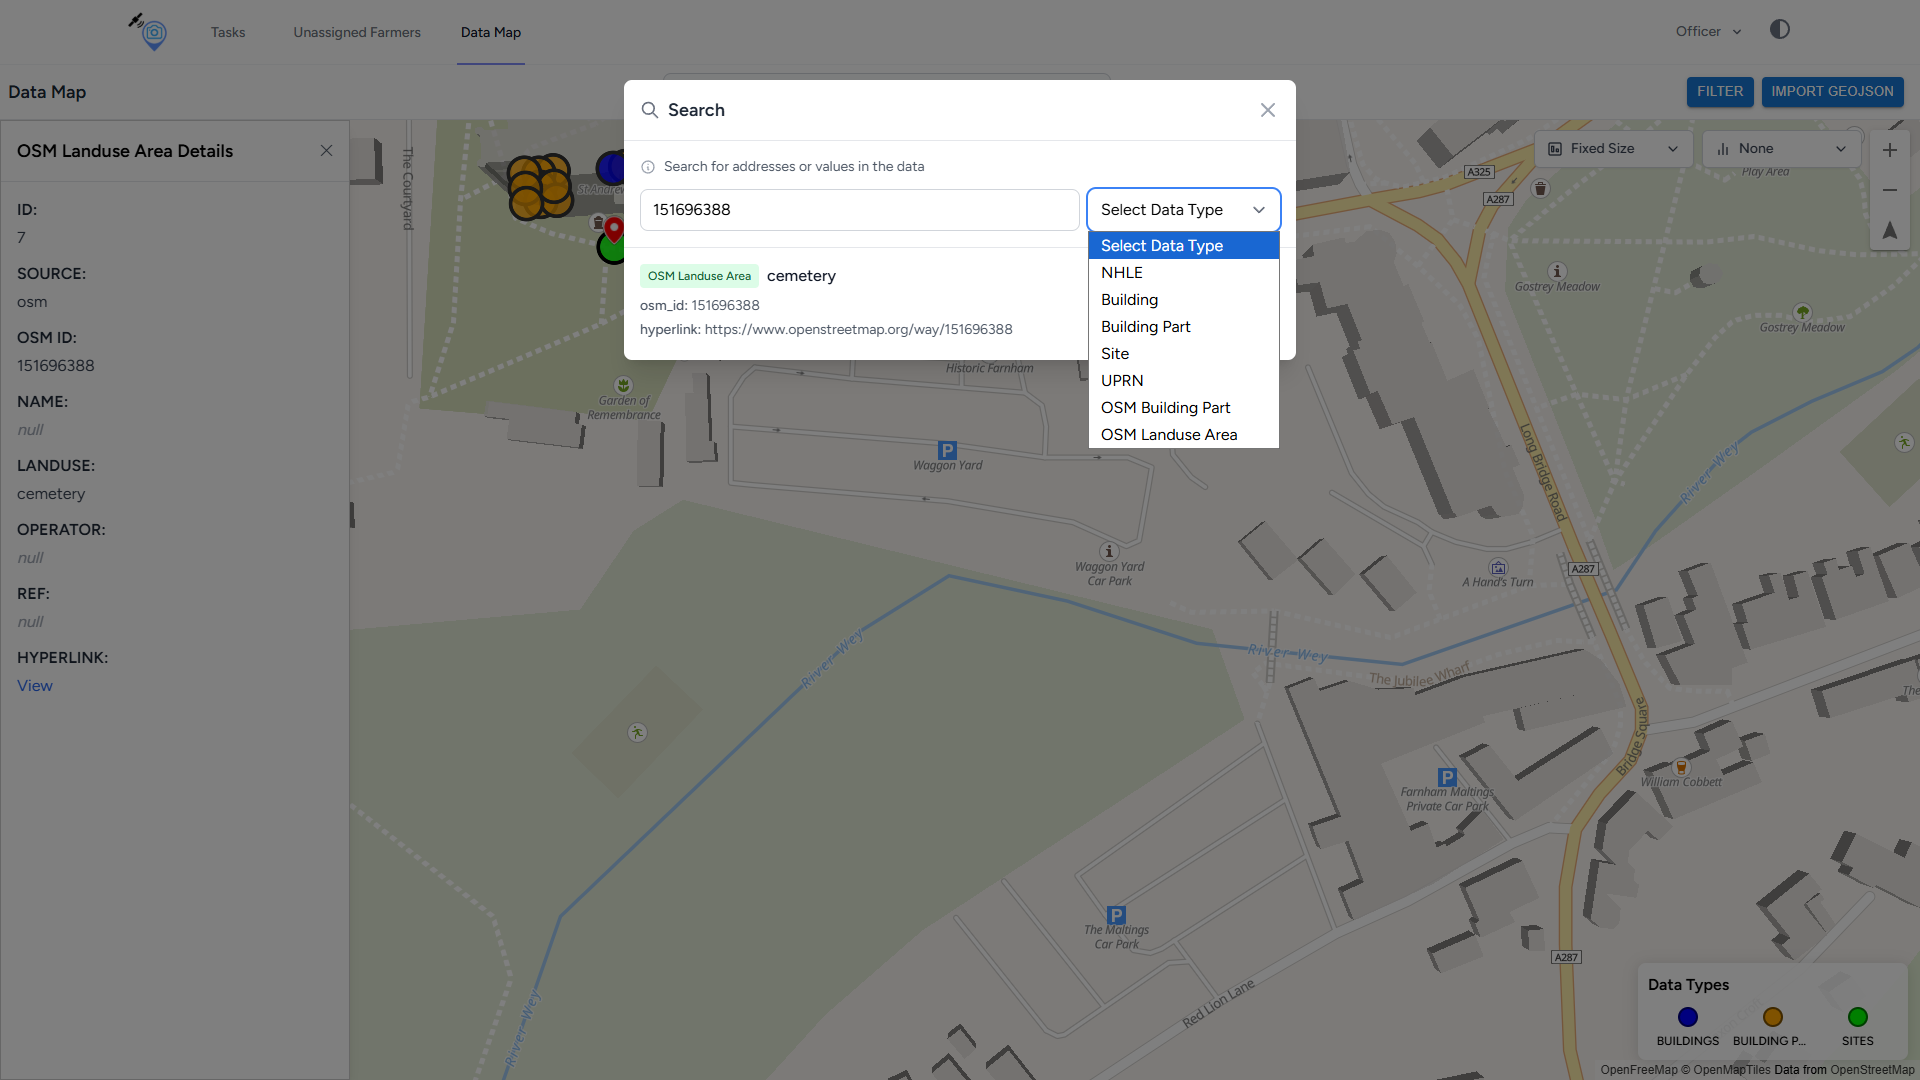
Search open street map landuse ID
29th September,2025 Development Updates#
- Map Views – 29th September,2025 Updates, Data map Global images, Photo image field of view toggle, improve connection between photo and building part using polygon.
Import polygon improve connection → NHLE
Connect Photo → NHLE using Land registry polygon
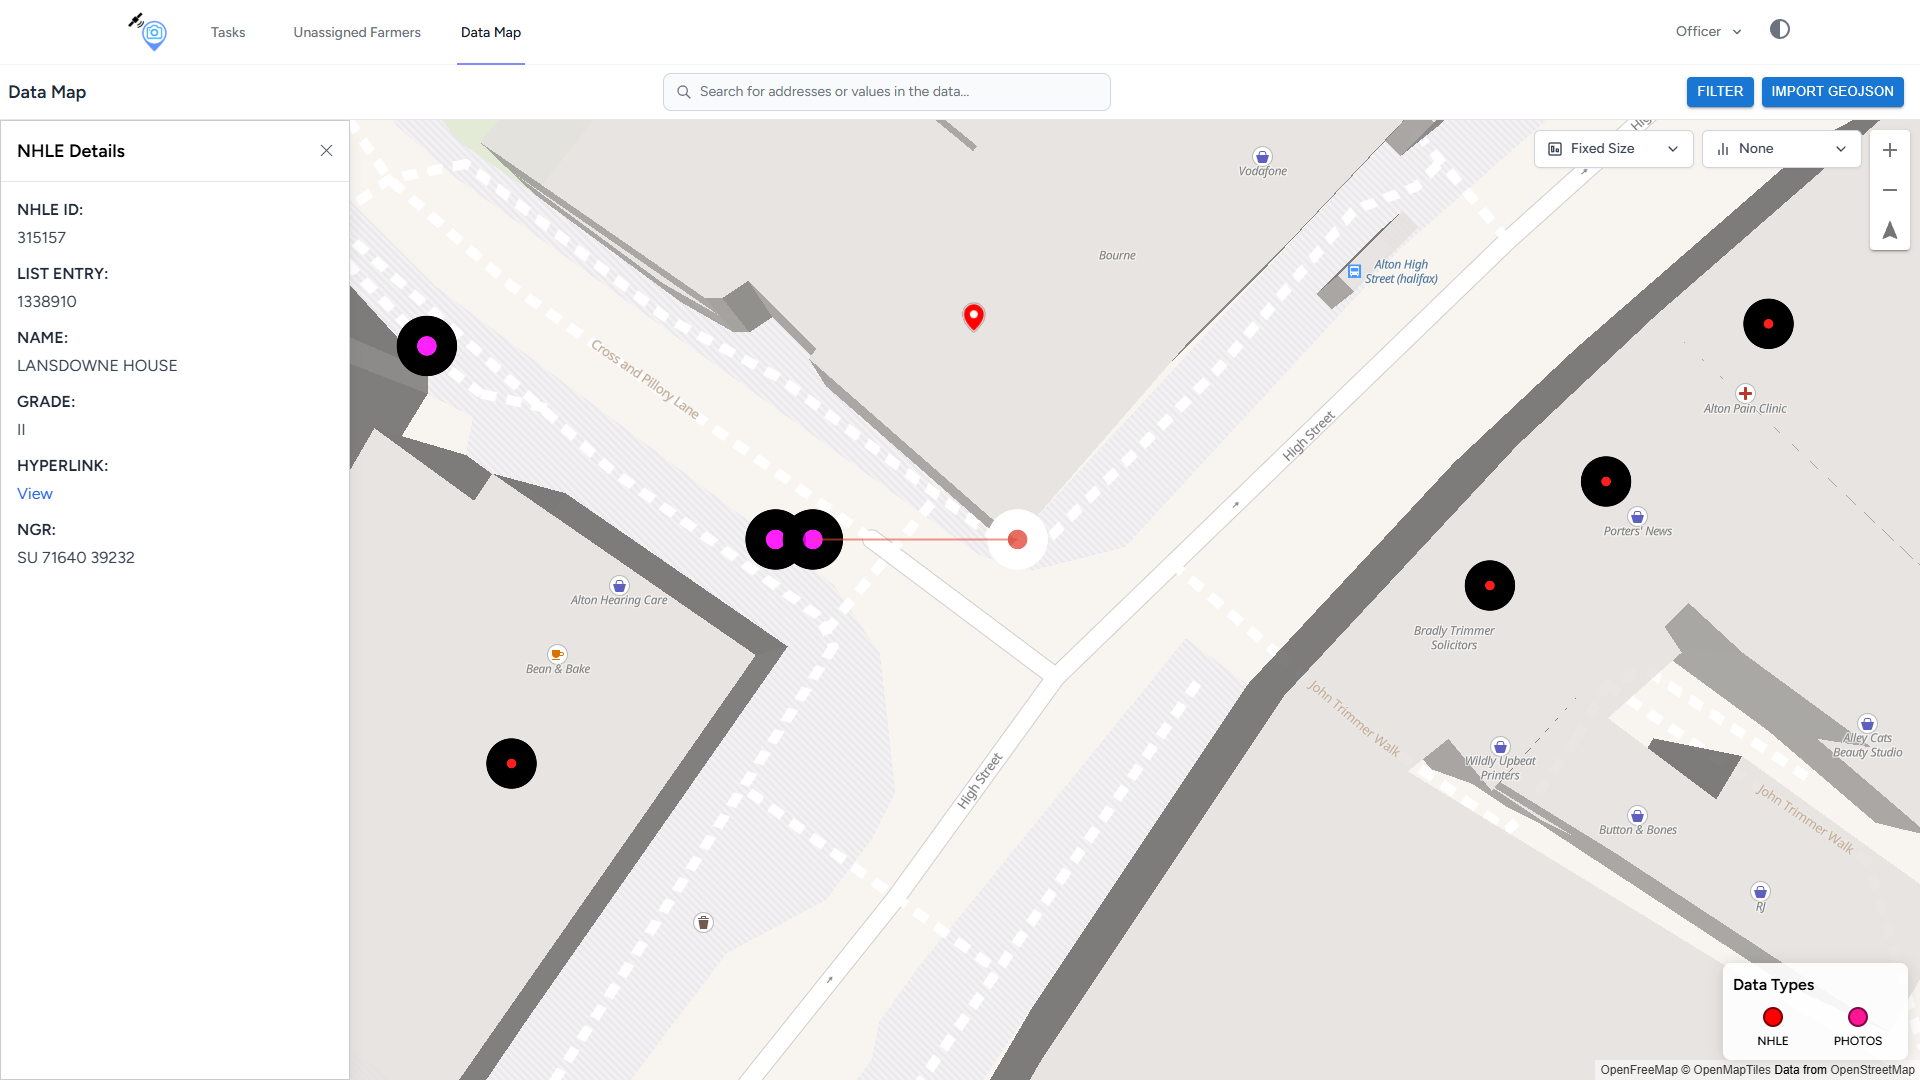
Connect Photo → NHLE data panel
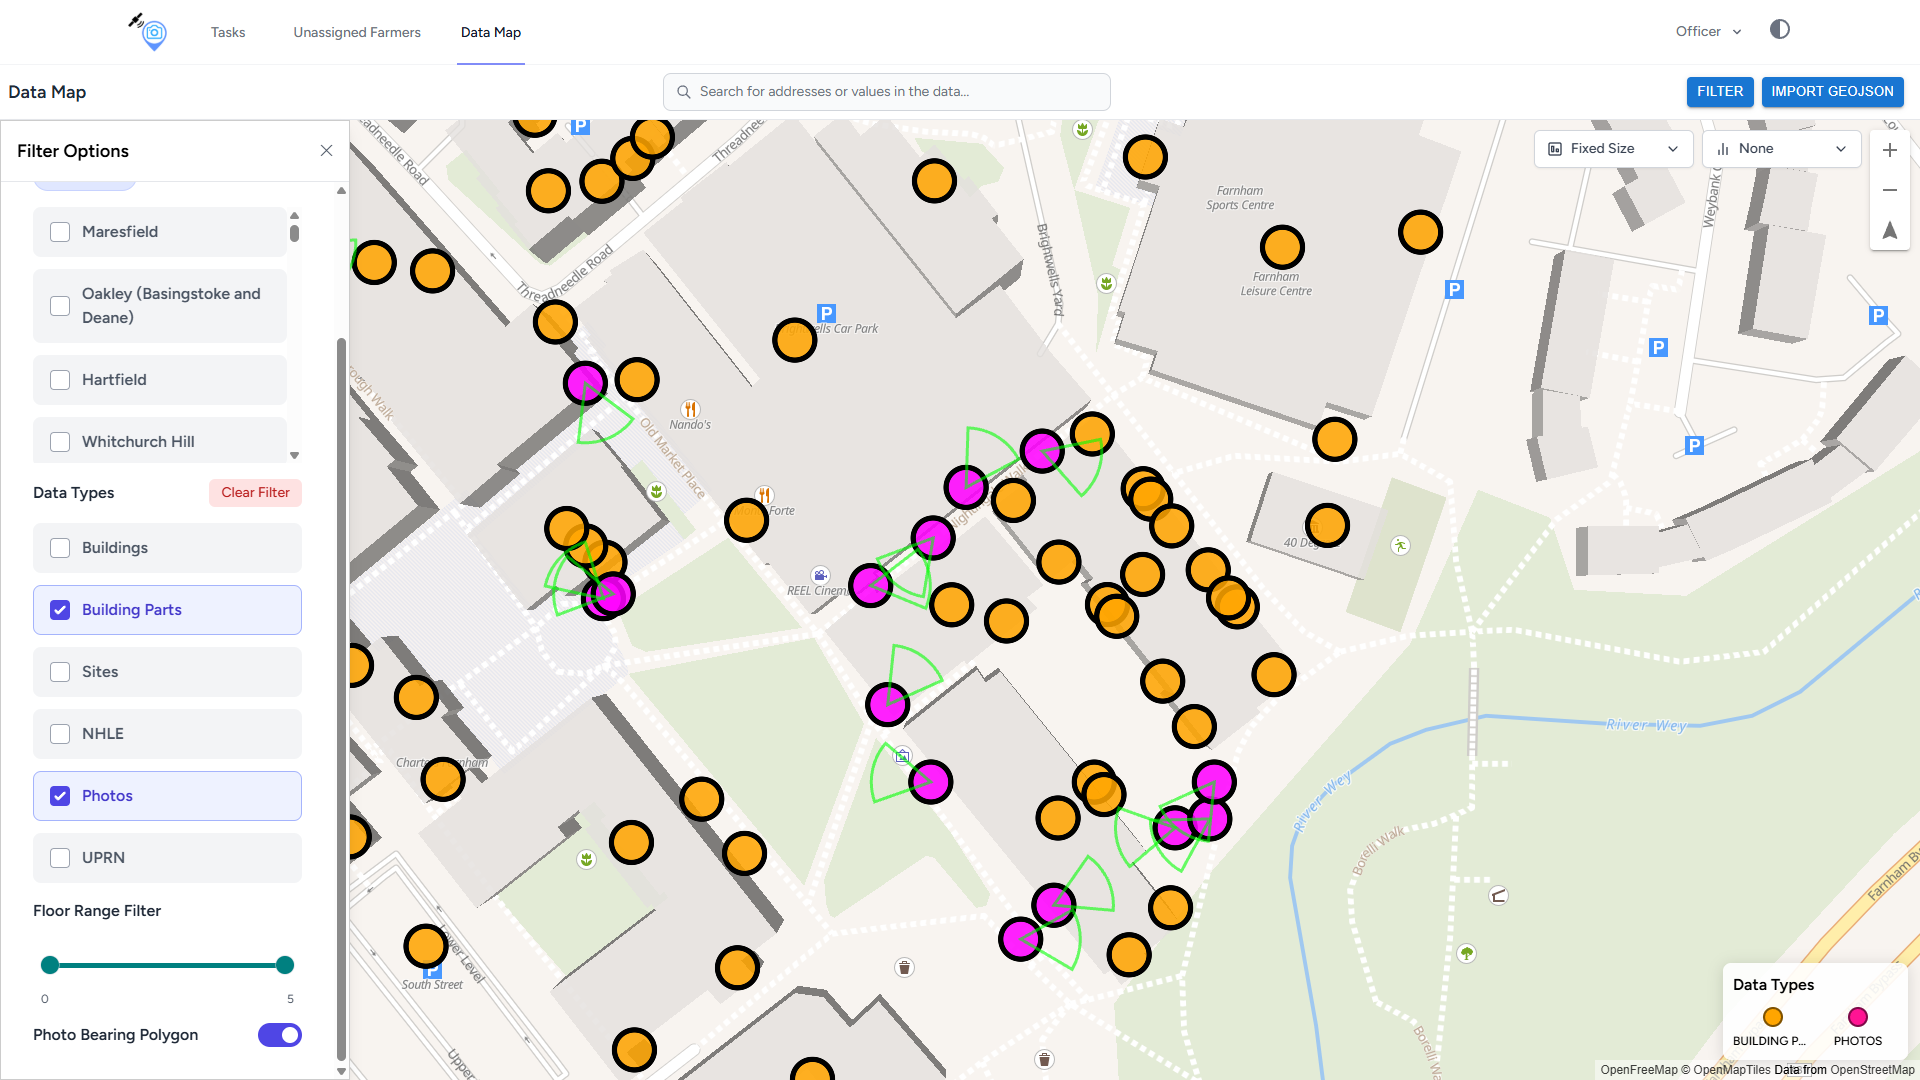
Photo Field of View (FOV)
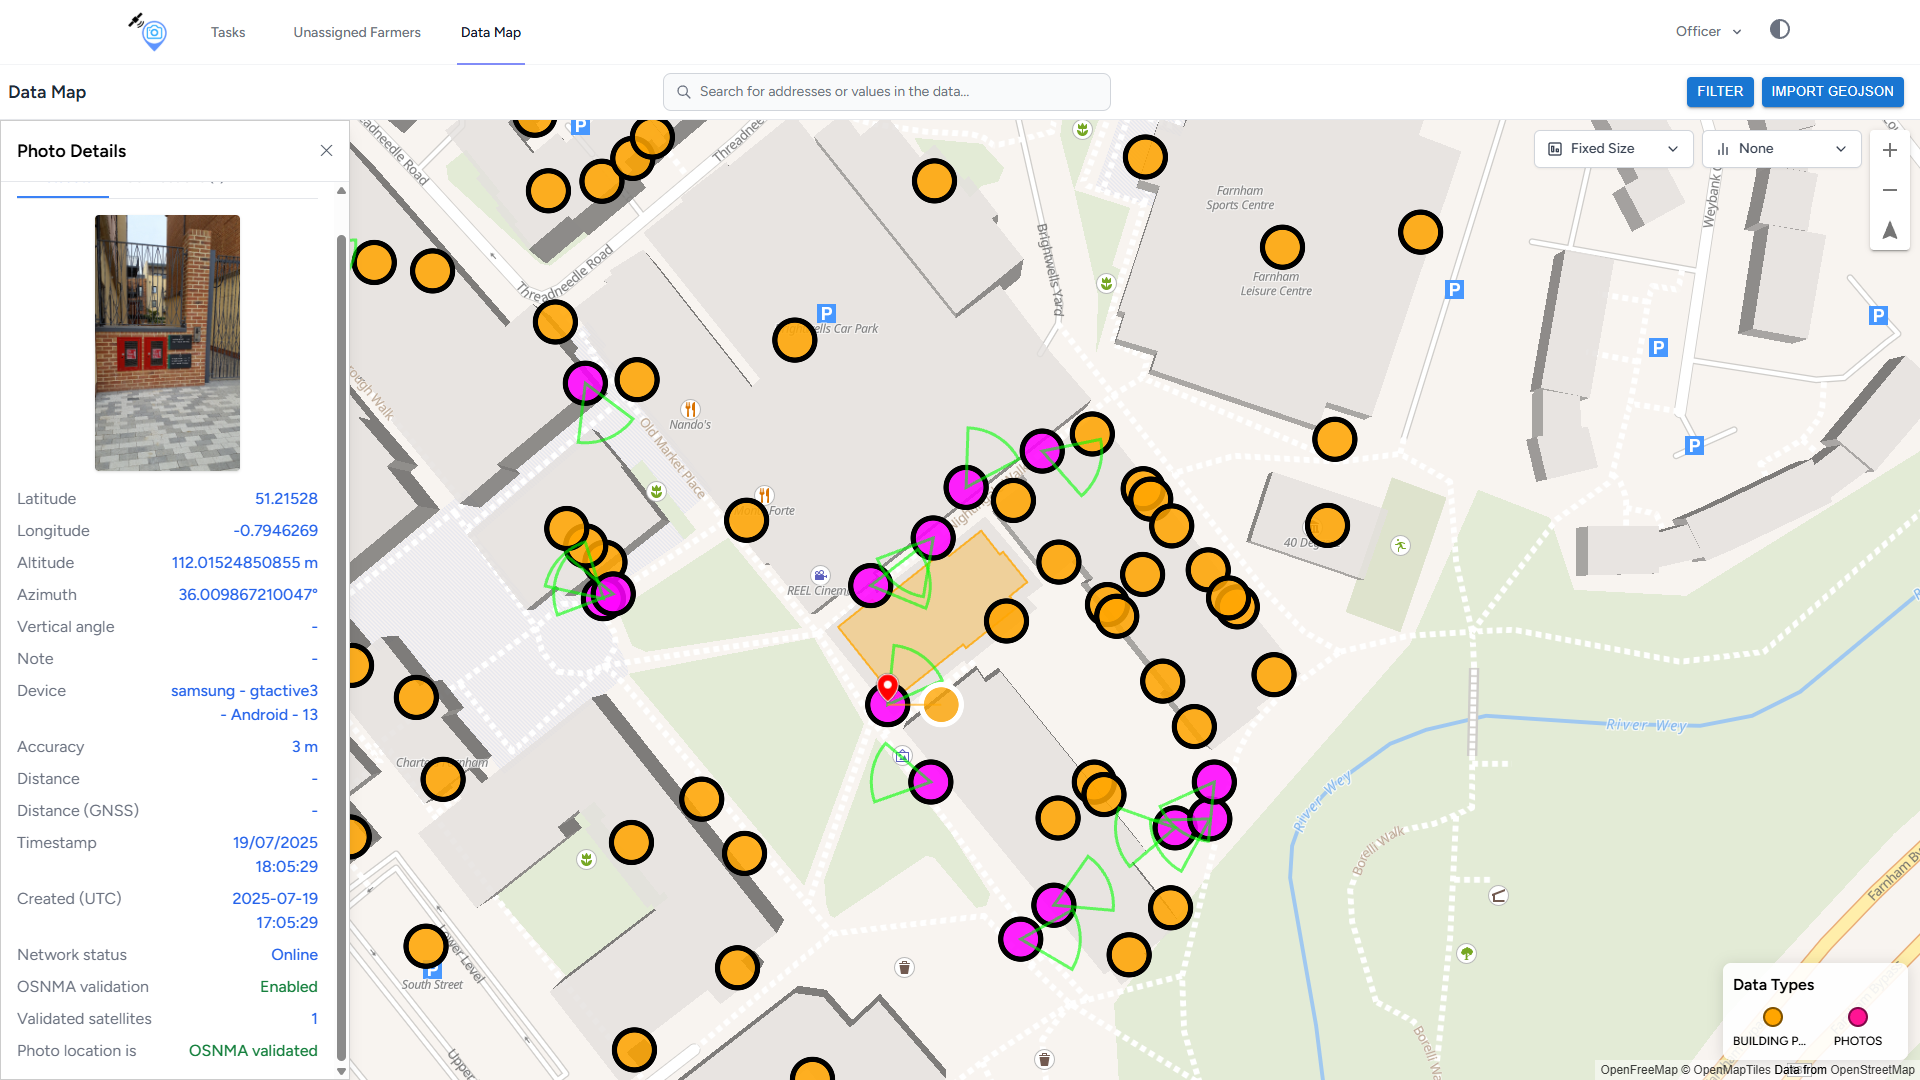
Photo bearing uses polygon to connect → Buildingpart
Views: UPRN Feature#
- Map Views – 22th September,2025 Updates Site Building Building Part UPRN data connections.
Site Label
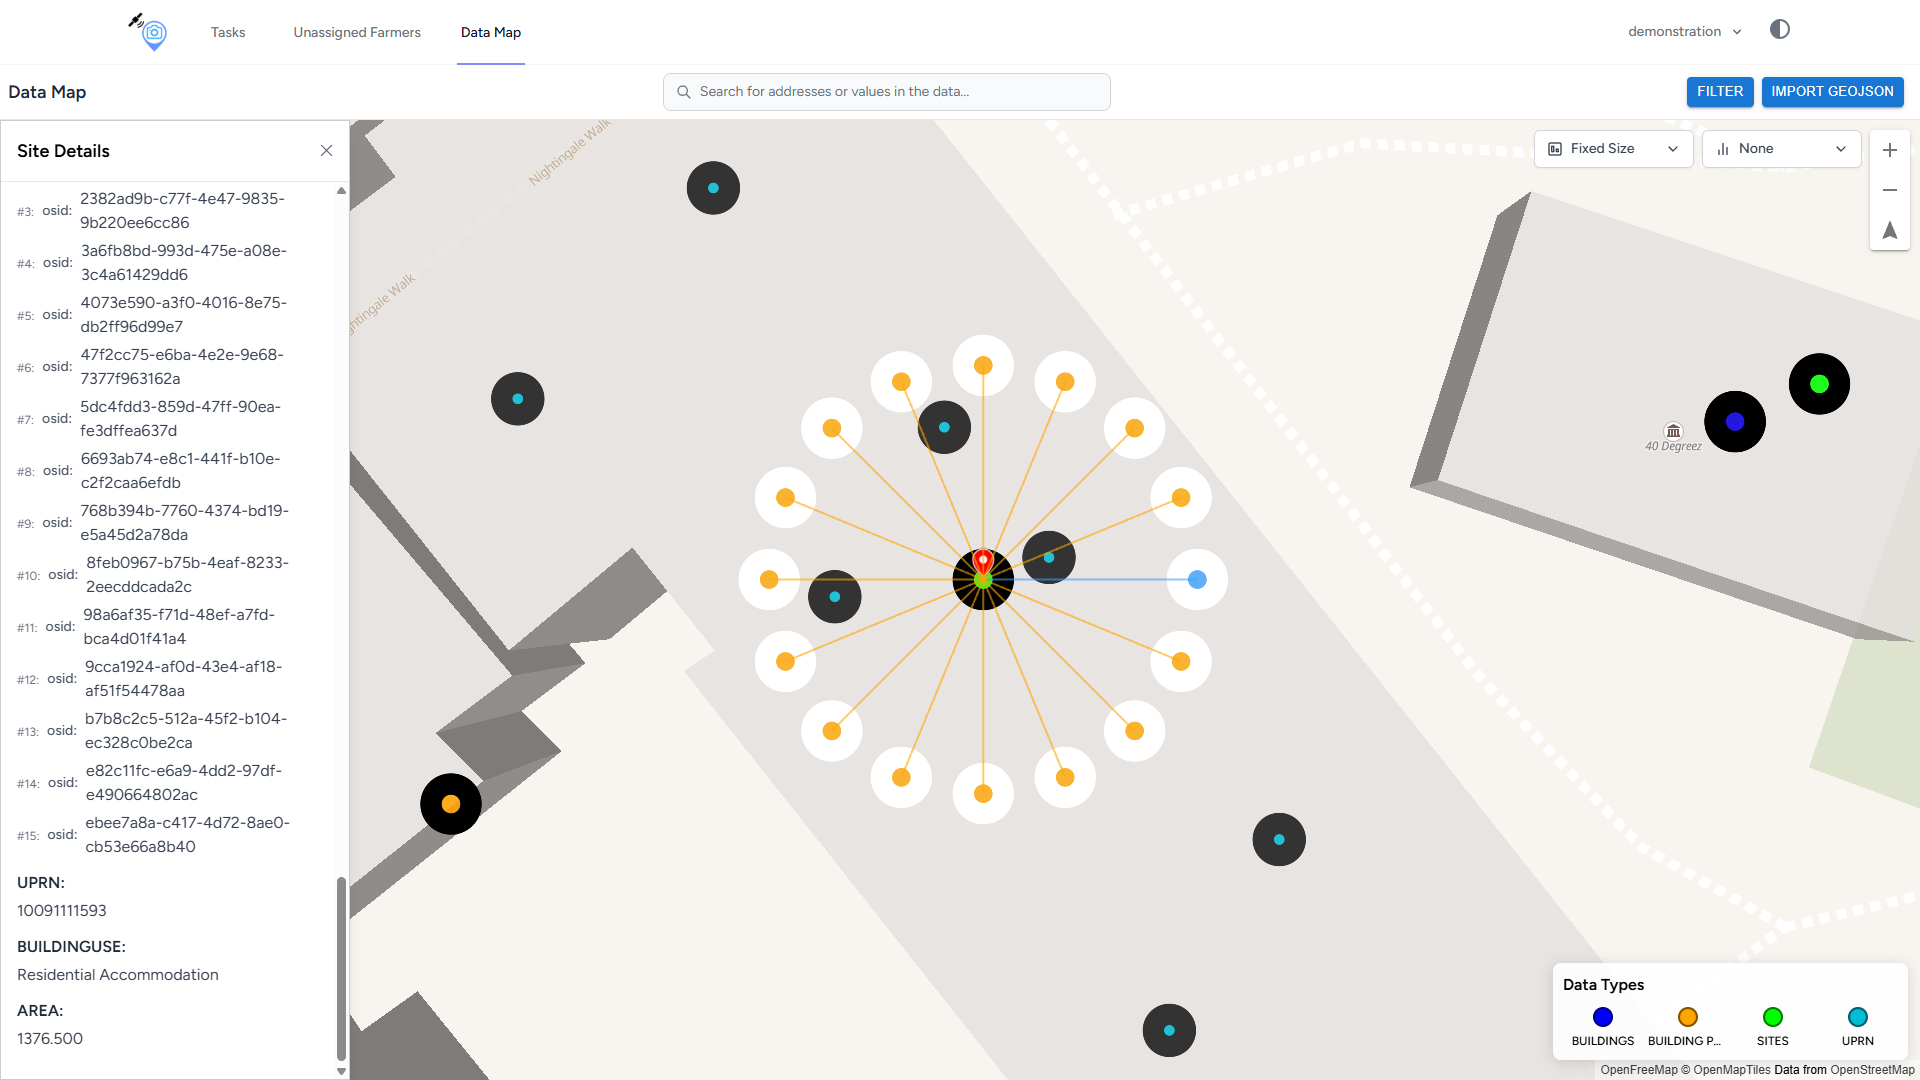
Site → Matched UPRN
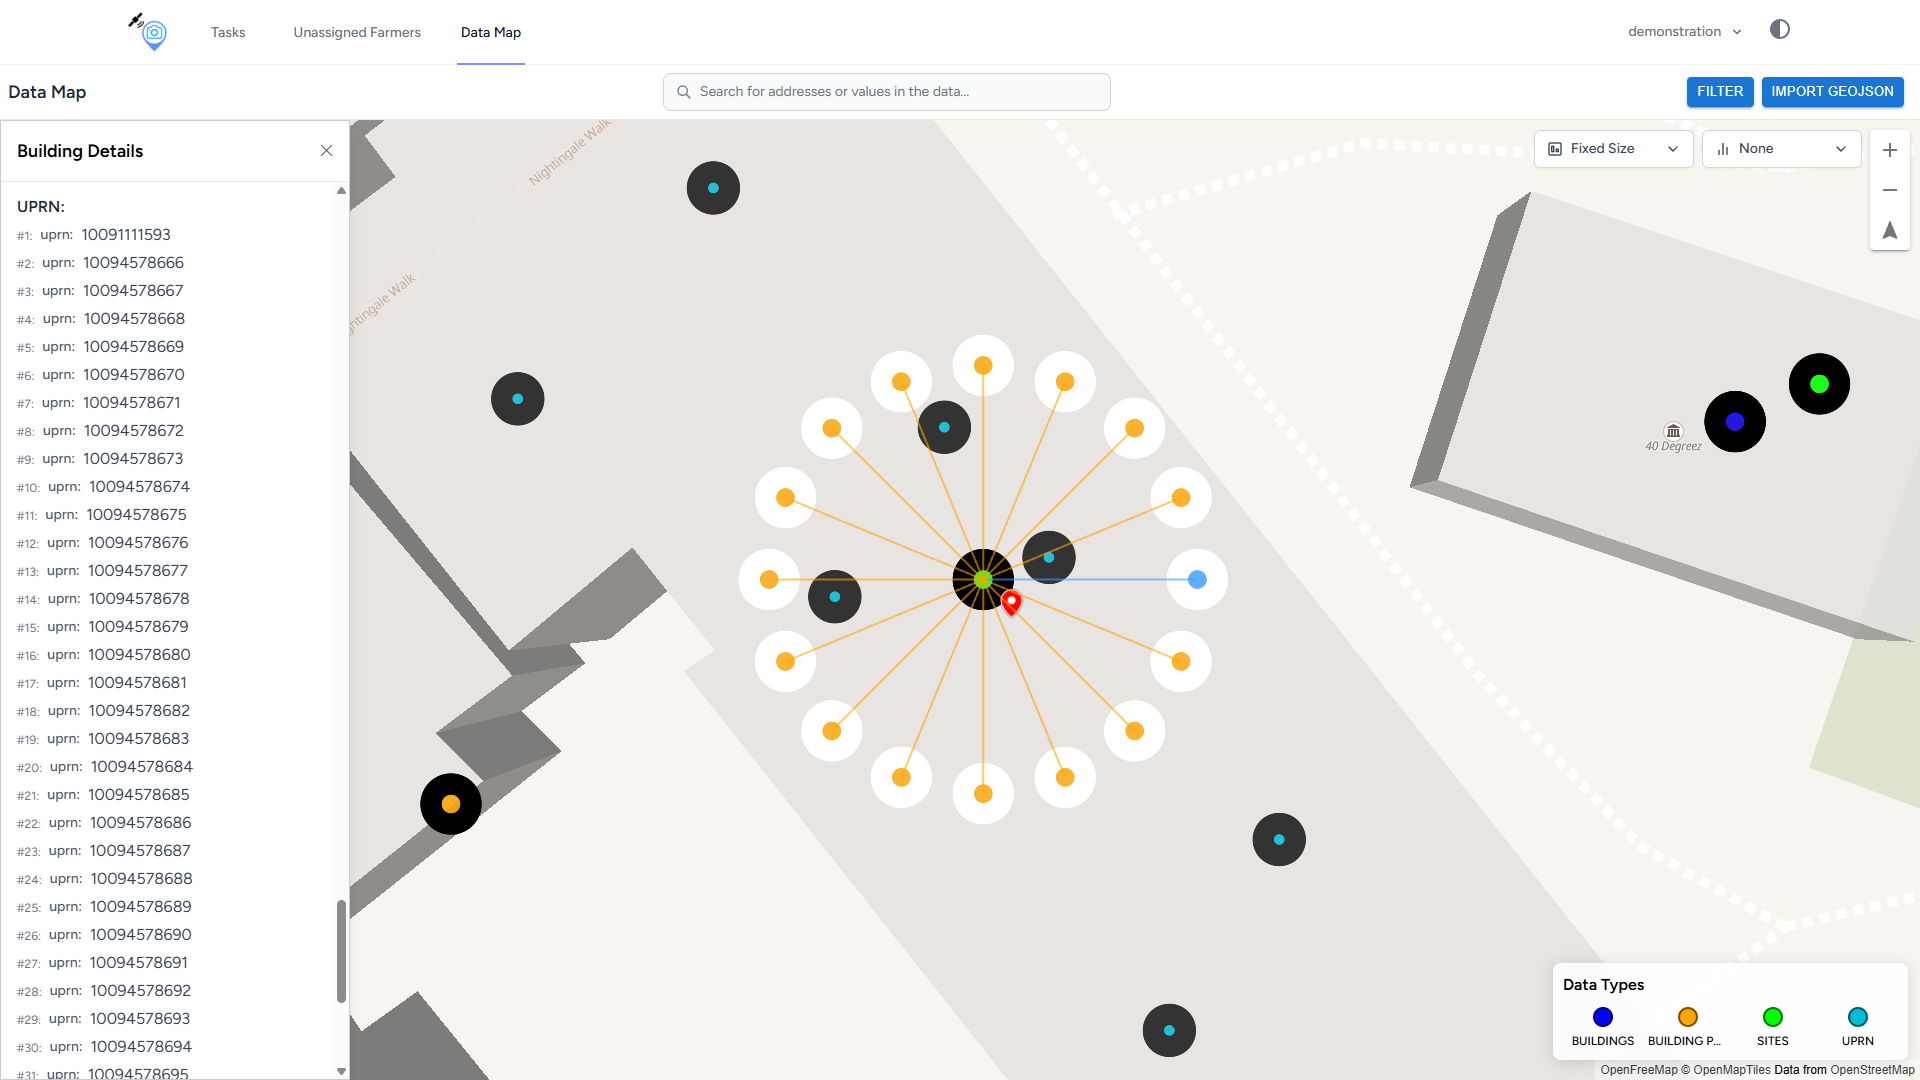
Site → UPRN ← Building
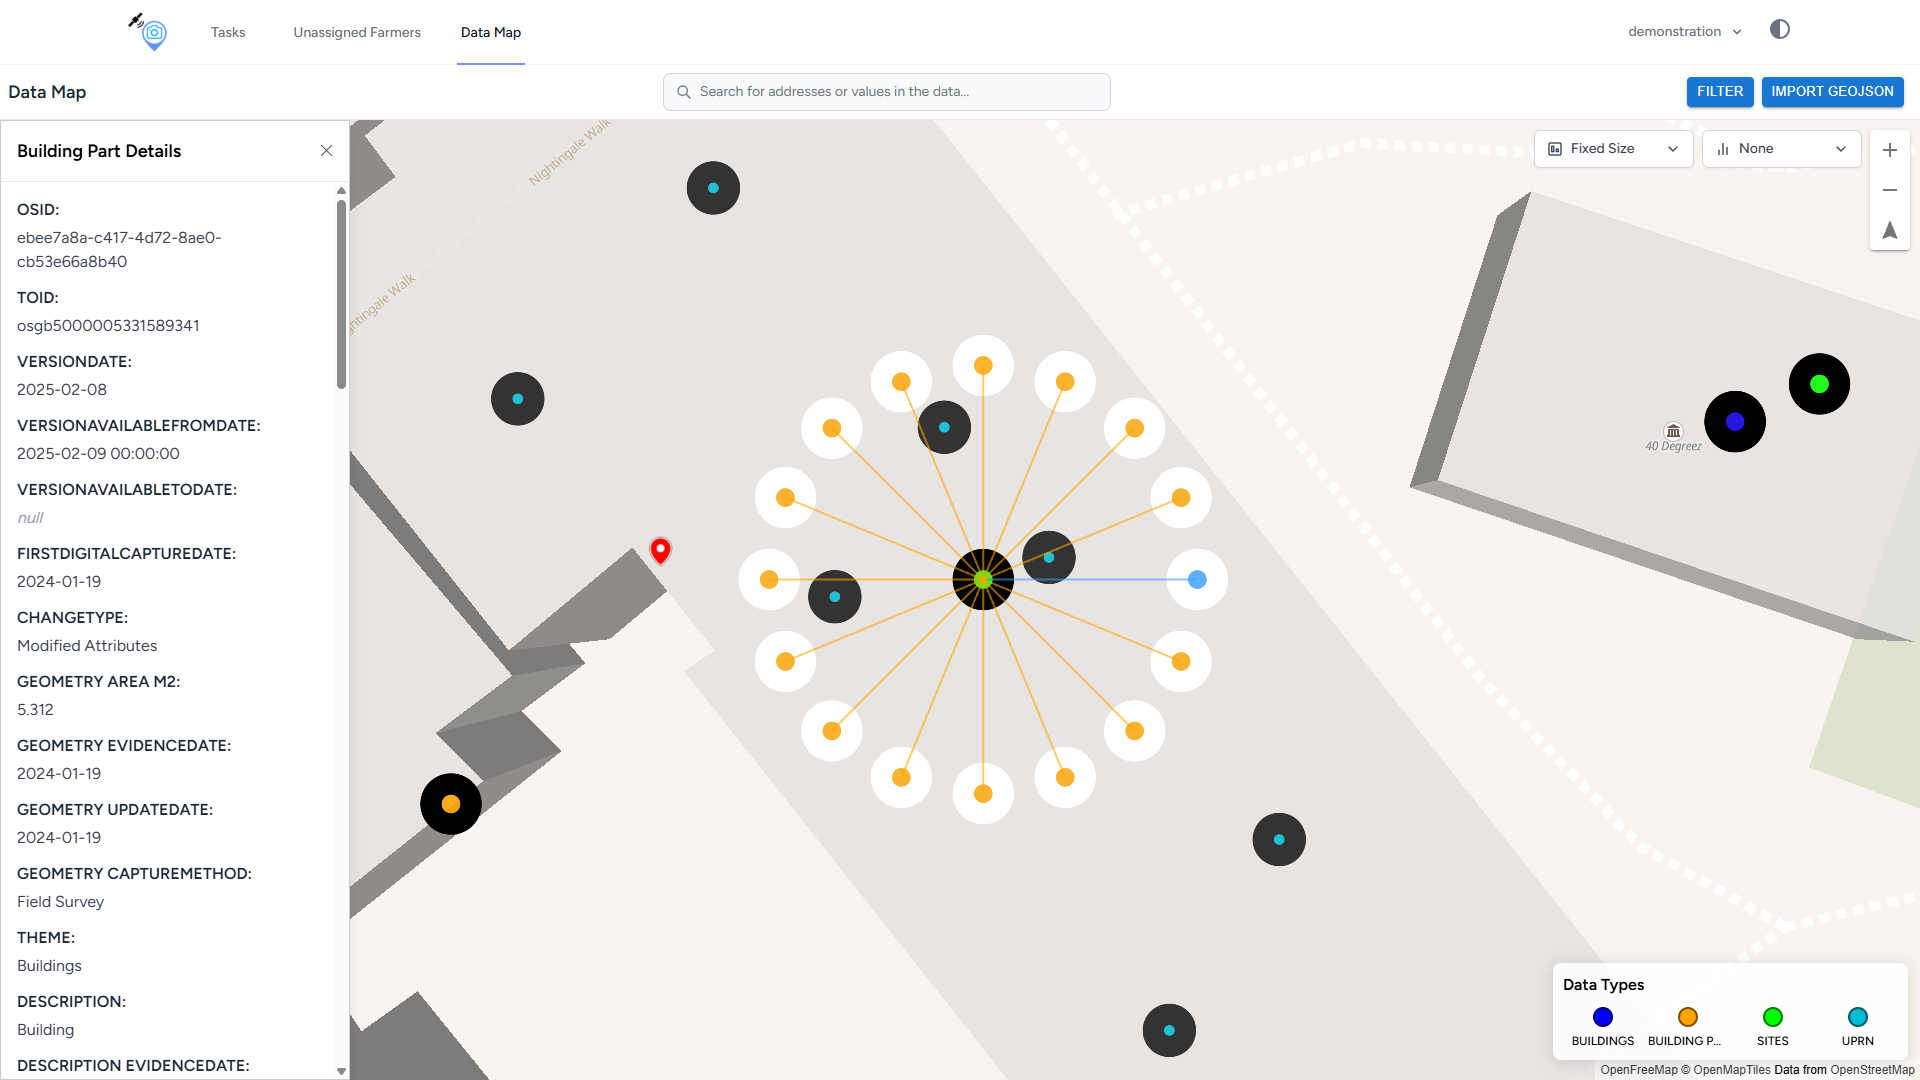
Site → BuildingPart → TOID

Site → UPRN ← Building
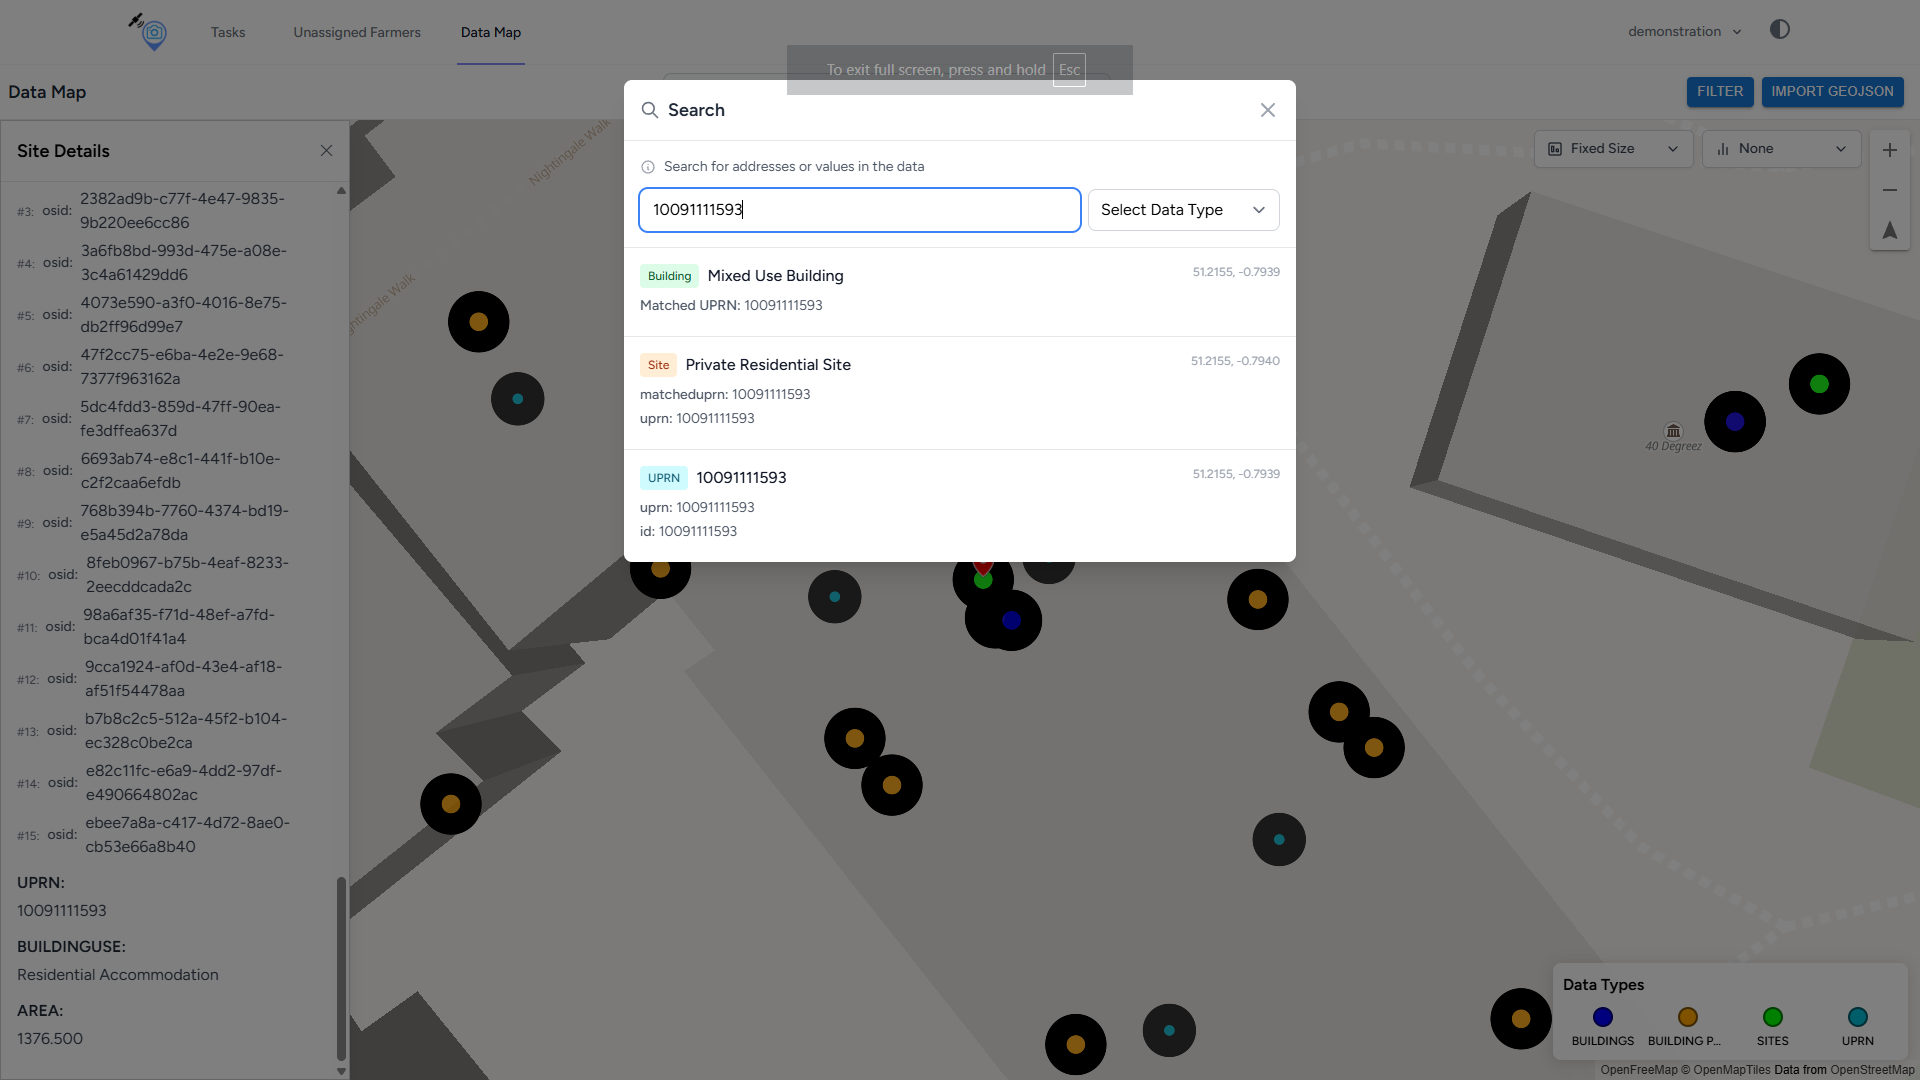
Search → UPRN ← Site ← Building
Views: Data Map Photo#
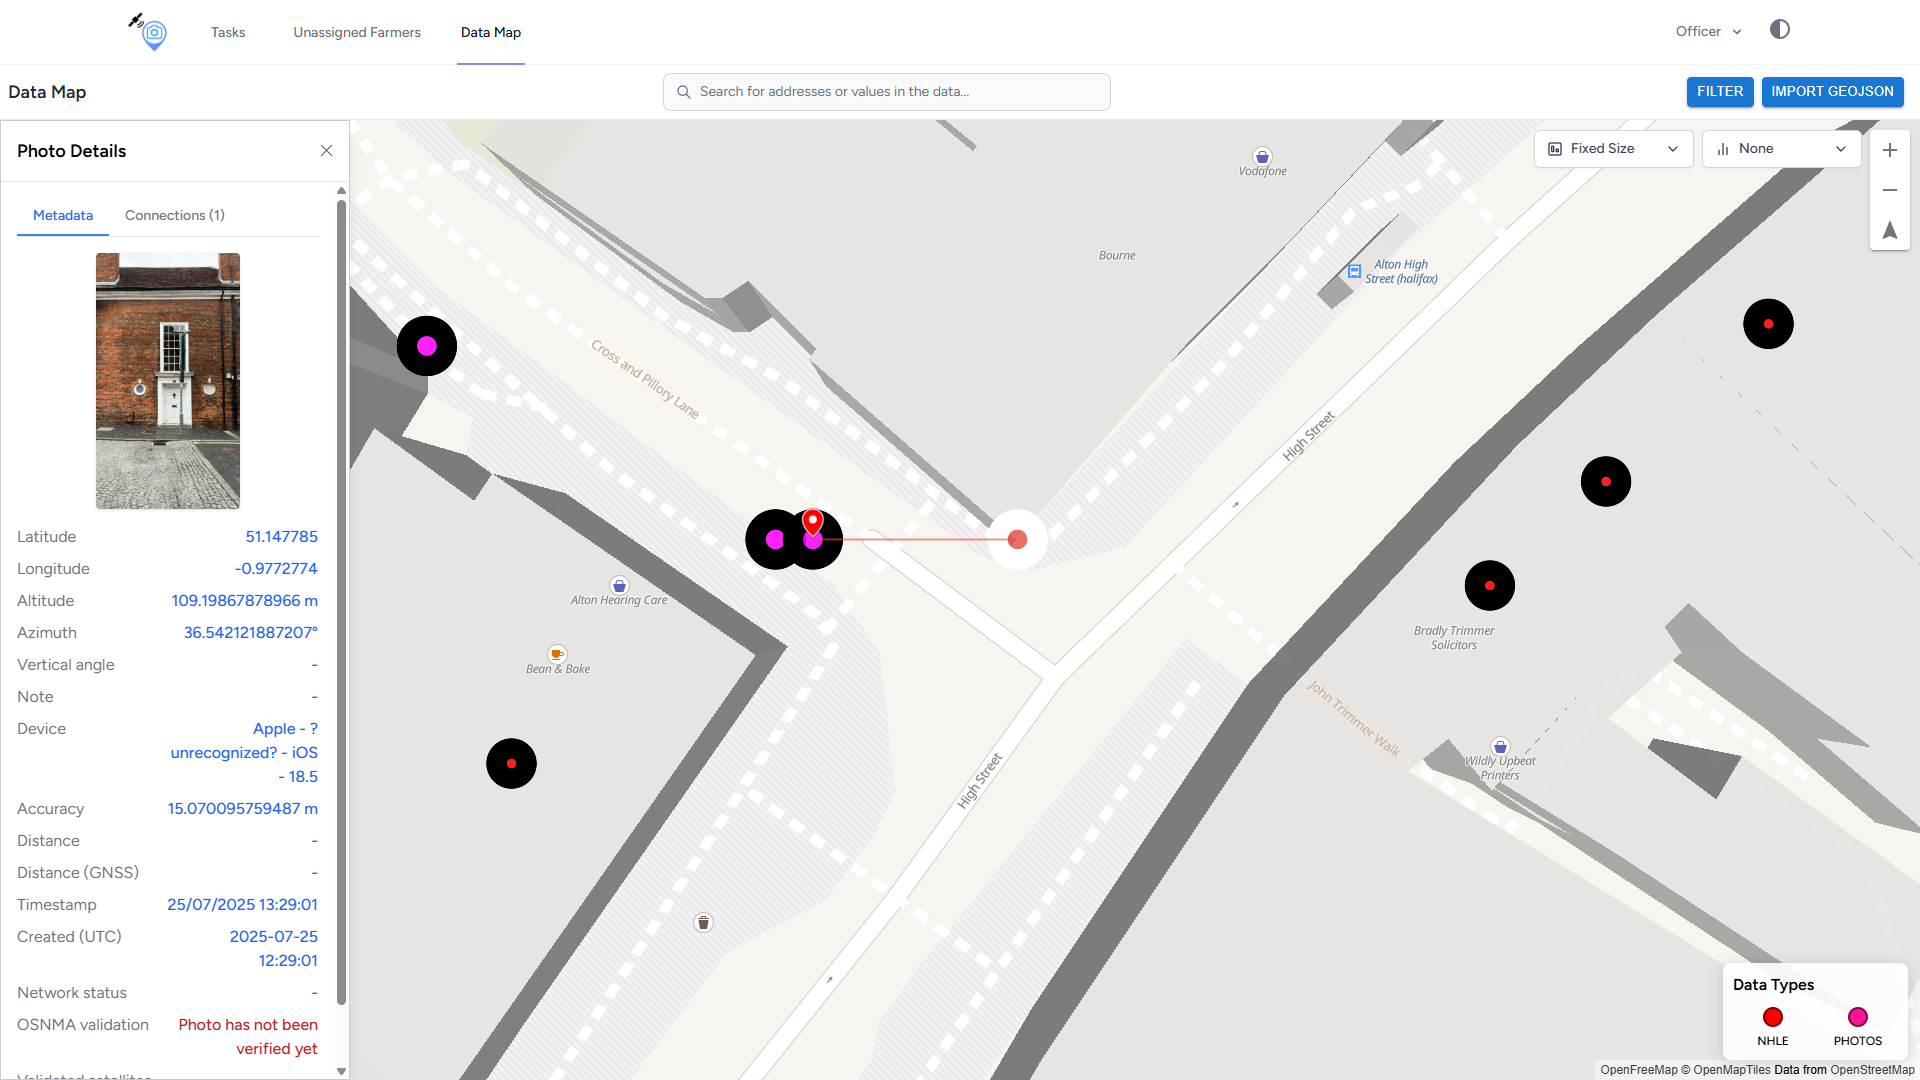
- Map Views – Photo data connections.
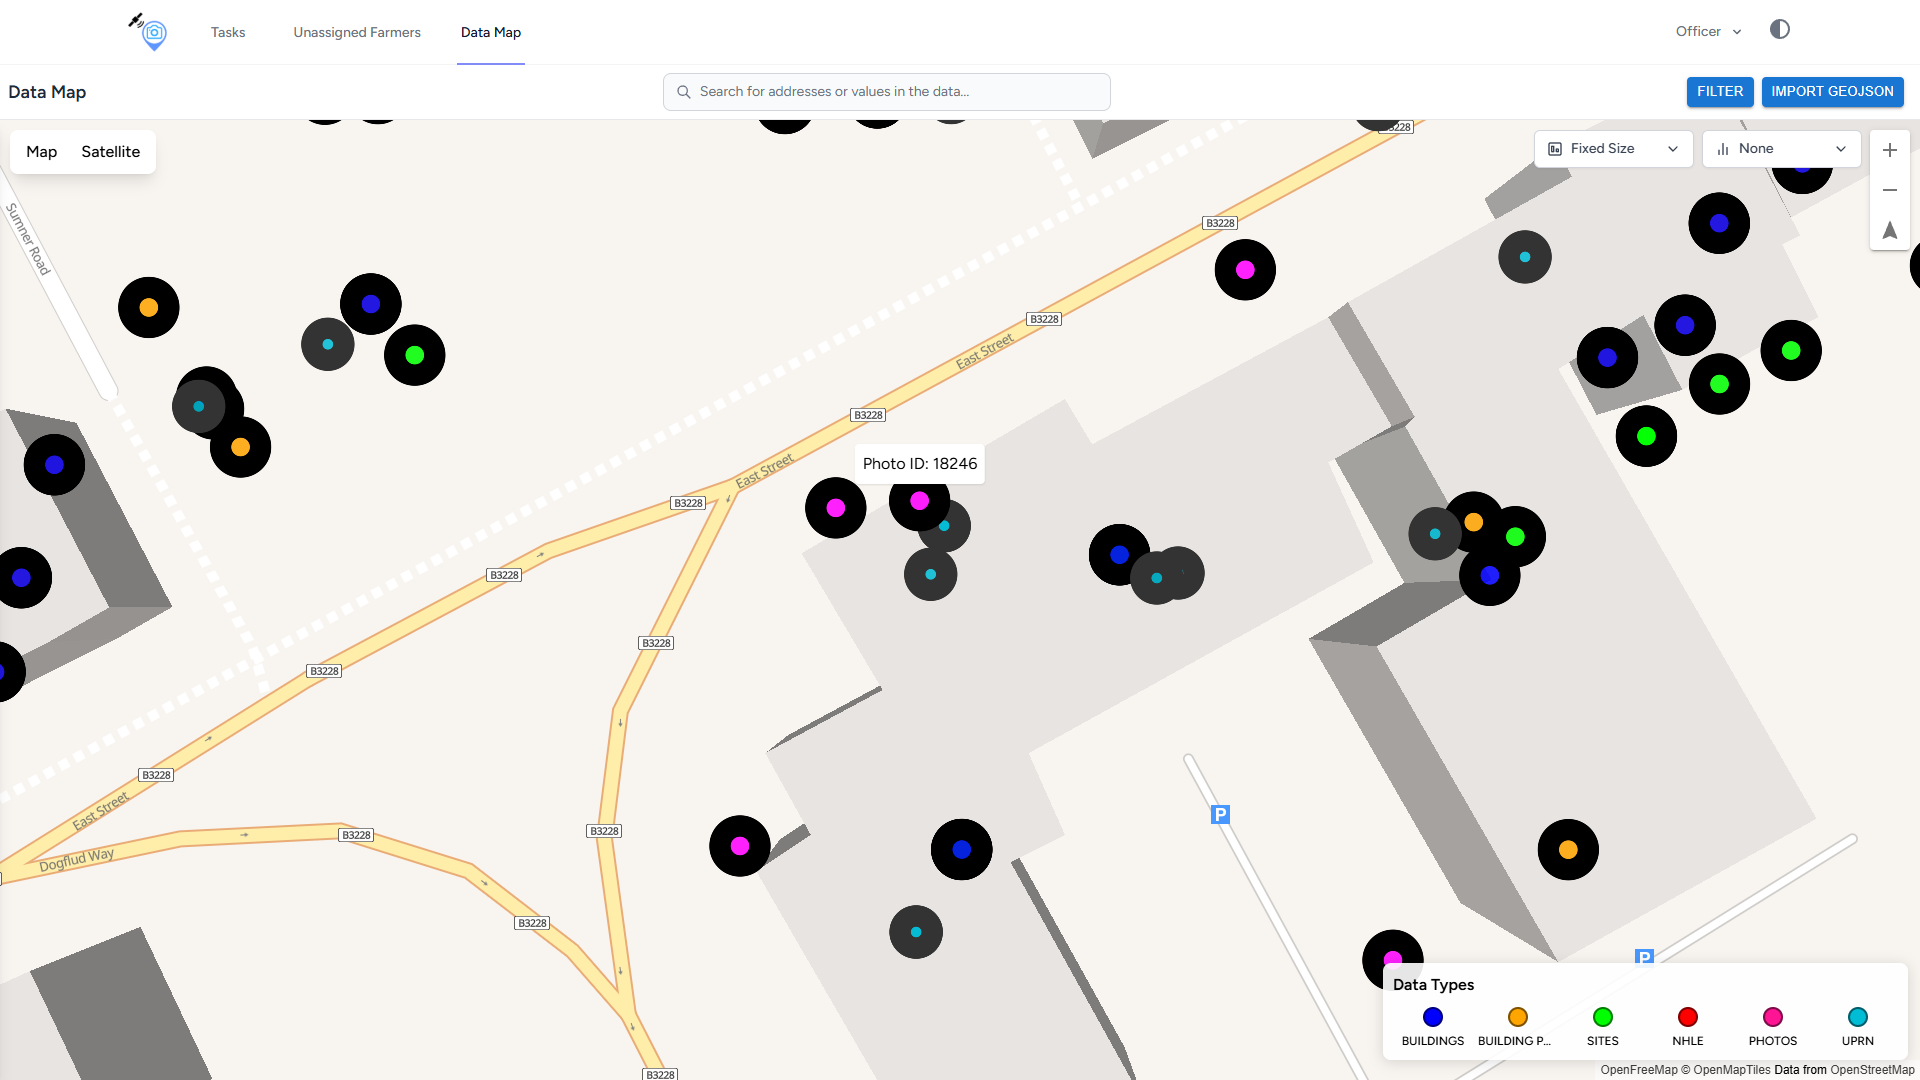
Photo Label
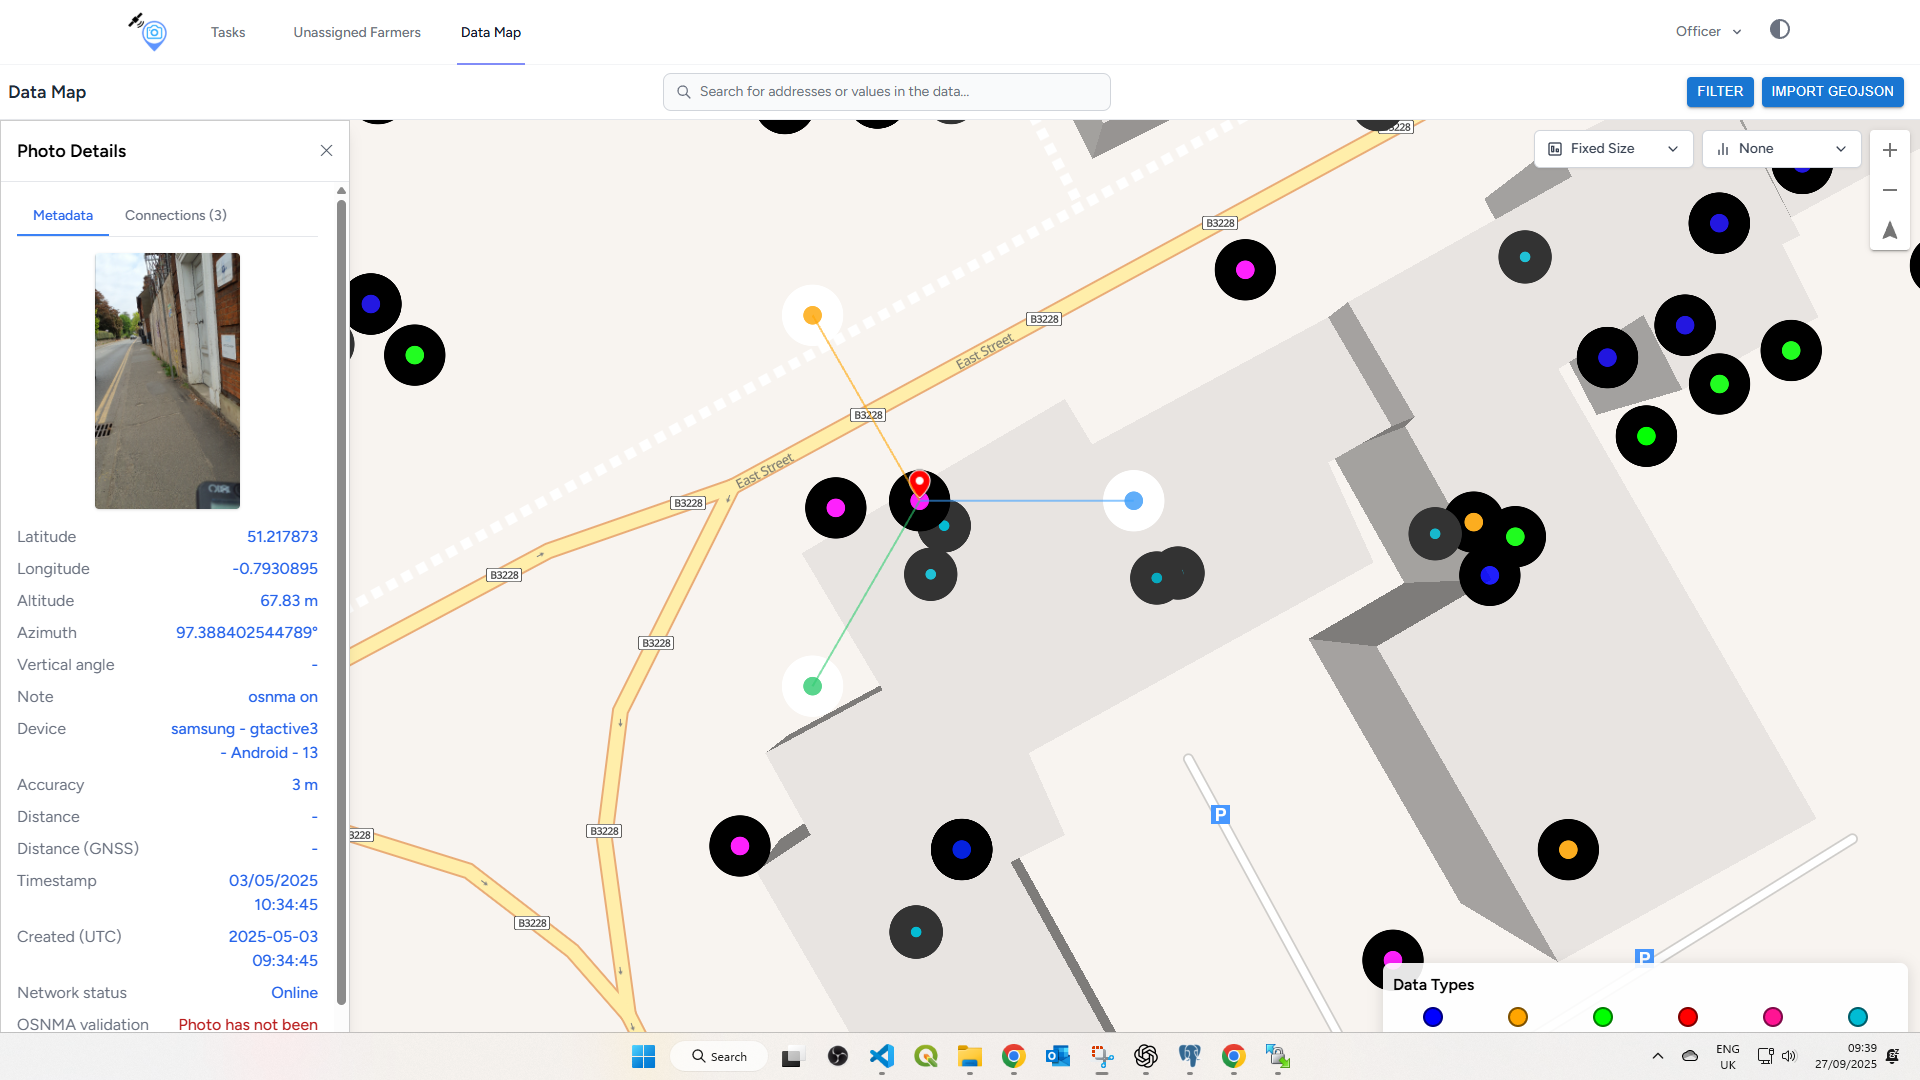
Photo bearing → Site → Building → BuildingPart
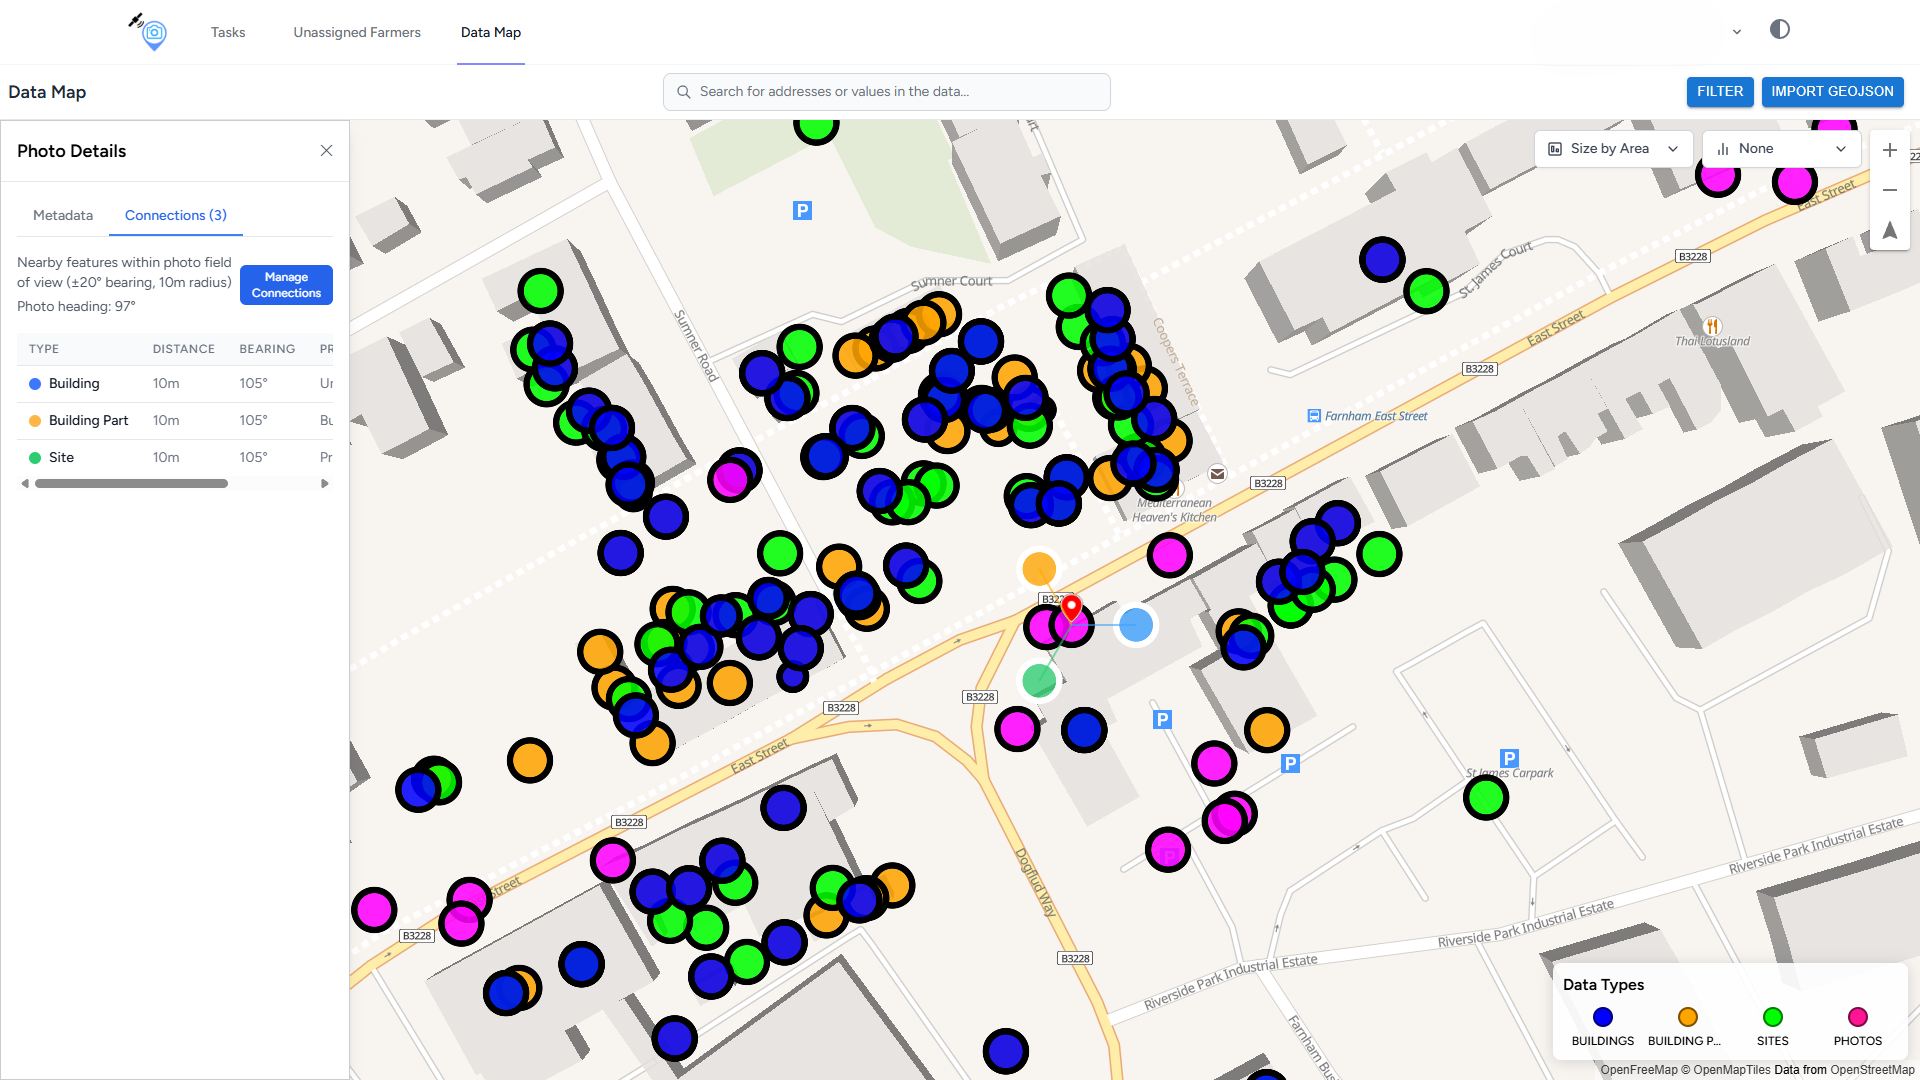
Photo connections Site, Building, Building Part
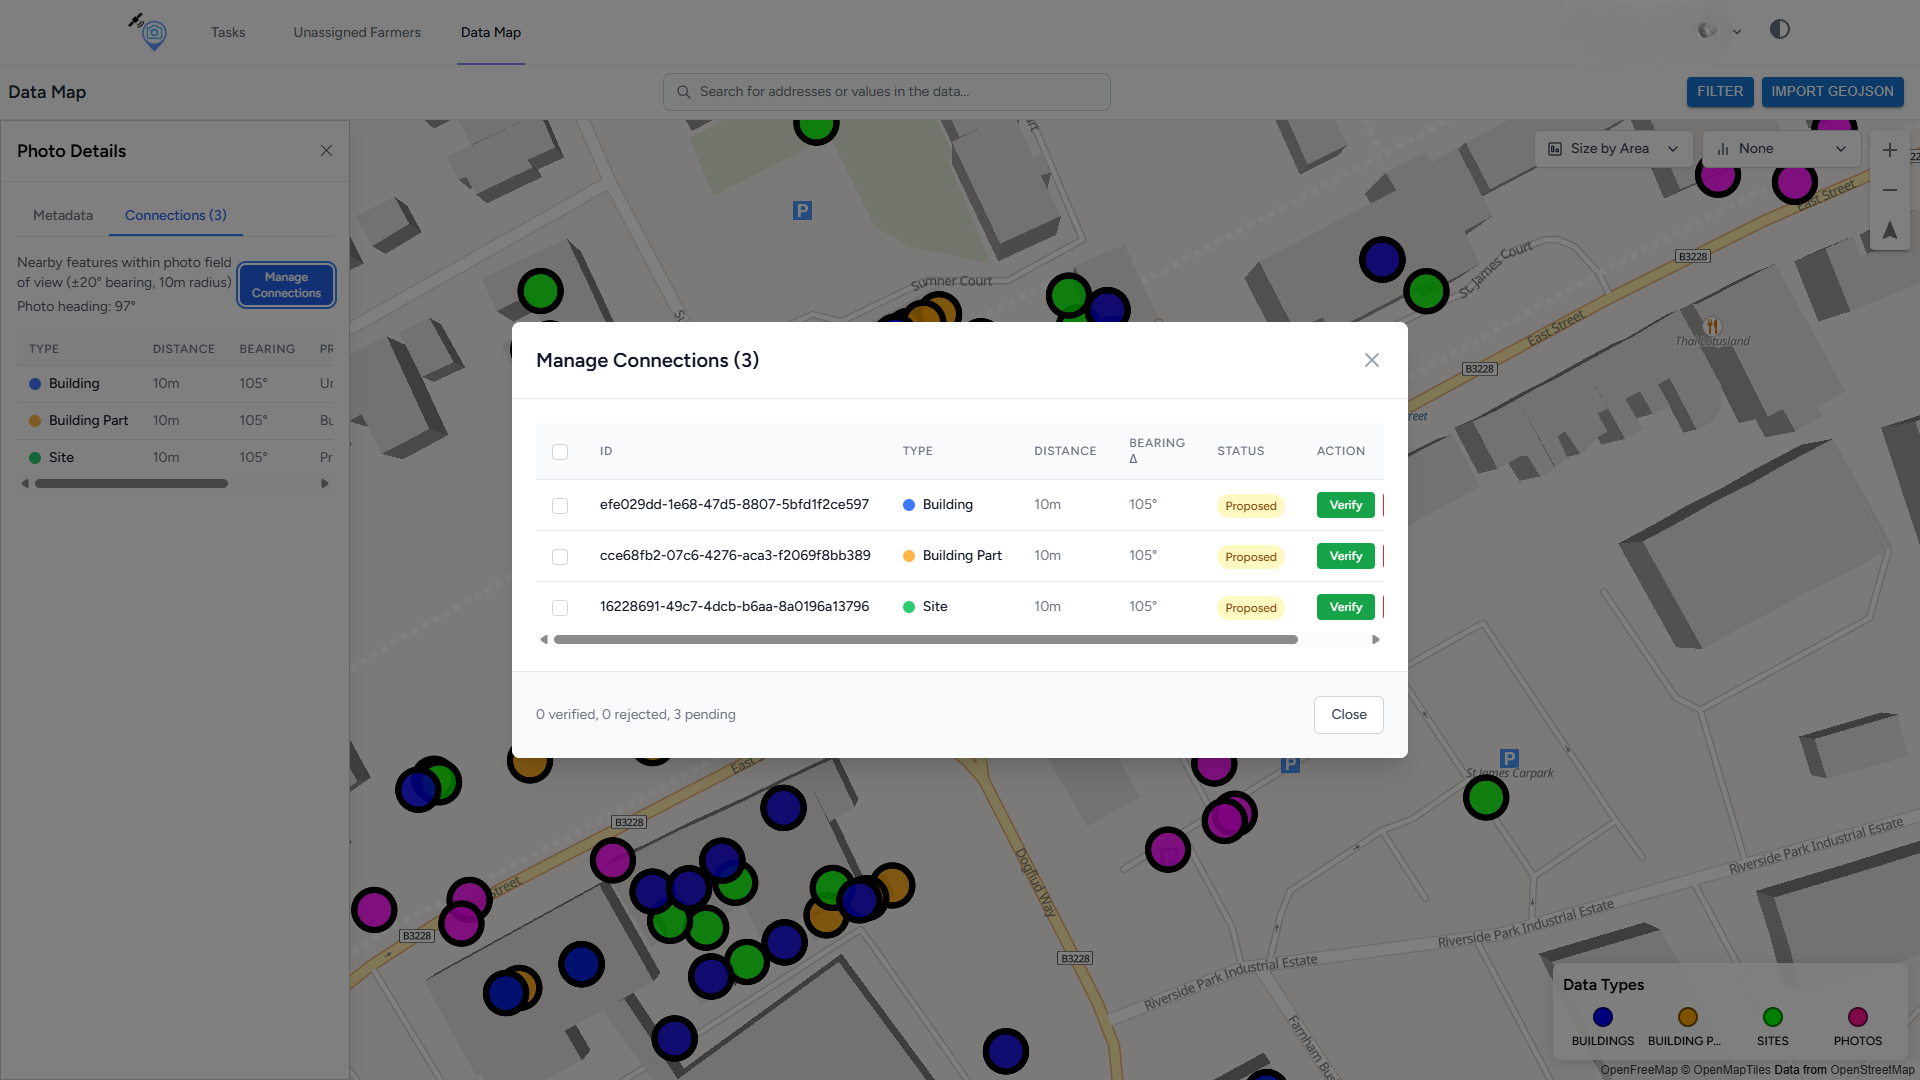
Photo connections confirmation
See also: Introduction · Access and Setup · Trusted Photo Capture · Path and Route Recording · GeoBIM Portal