Task management
Quick Start New Task#
This quickstart guide takes the manager through the process of managing tasks for site inspections.
At a glance:
- Administrator — Task Purpose · Create New Task
- Task List — Web Console · Tasks (Mobile)
- Status & Transitions · Terminology
- As supervisor/site manager, log in to the Web Console.
- Select a user and assign/create a new task.
- During task creation, select a Purpose for the inspection — this is important so later you can filter and sort by Purpose. You can define purposes under Task Purpose.
- The inspector will see the new task in the Android App / iOS App and the Web Console.
- The supervisor/site manager reviews photos taken during inspections.
- Change the Status of the task: approve, or return to the inspector to capture additional photos.
See also: Task Management · Trusted Photo Capture · Data Dictionary
Administrator — Task Purpose#
Create and maintain inspection purposes used when creating tasks.
- Fields: Name (required), Description, Save.
Create New Task#
From the user list or task area, create a task and assign it to an officer.
- Fields: Name (required), Description, Purpose (e.g.,
inspection-superstructure), Due date (dd/mm/yyyy), Officer, Save.
Task List — Web Console#
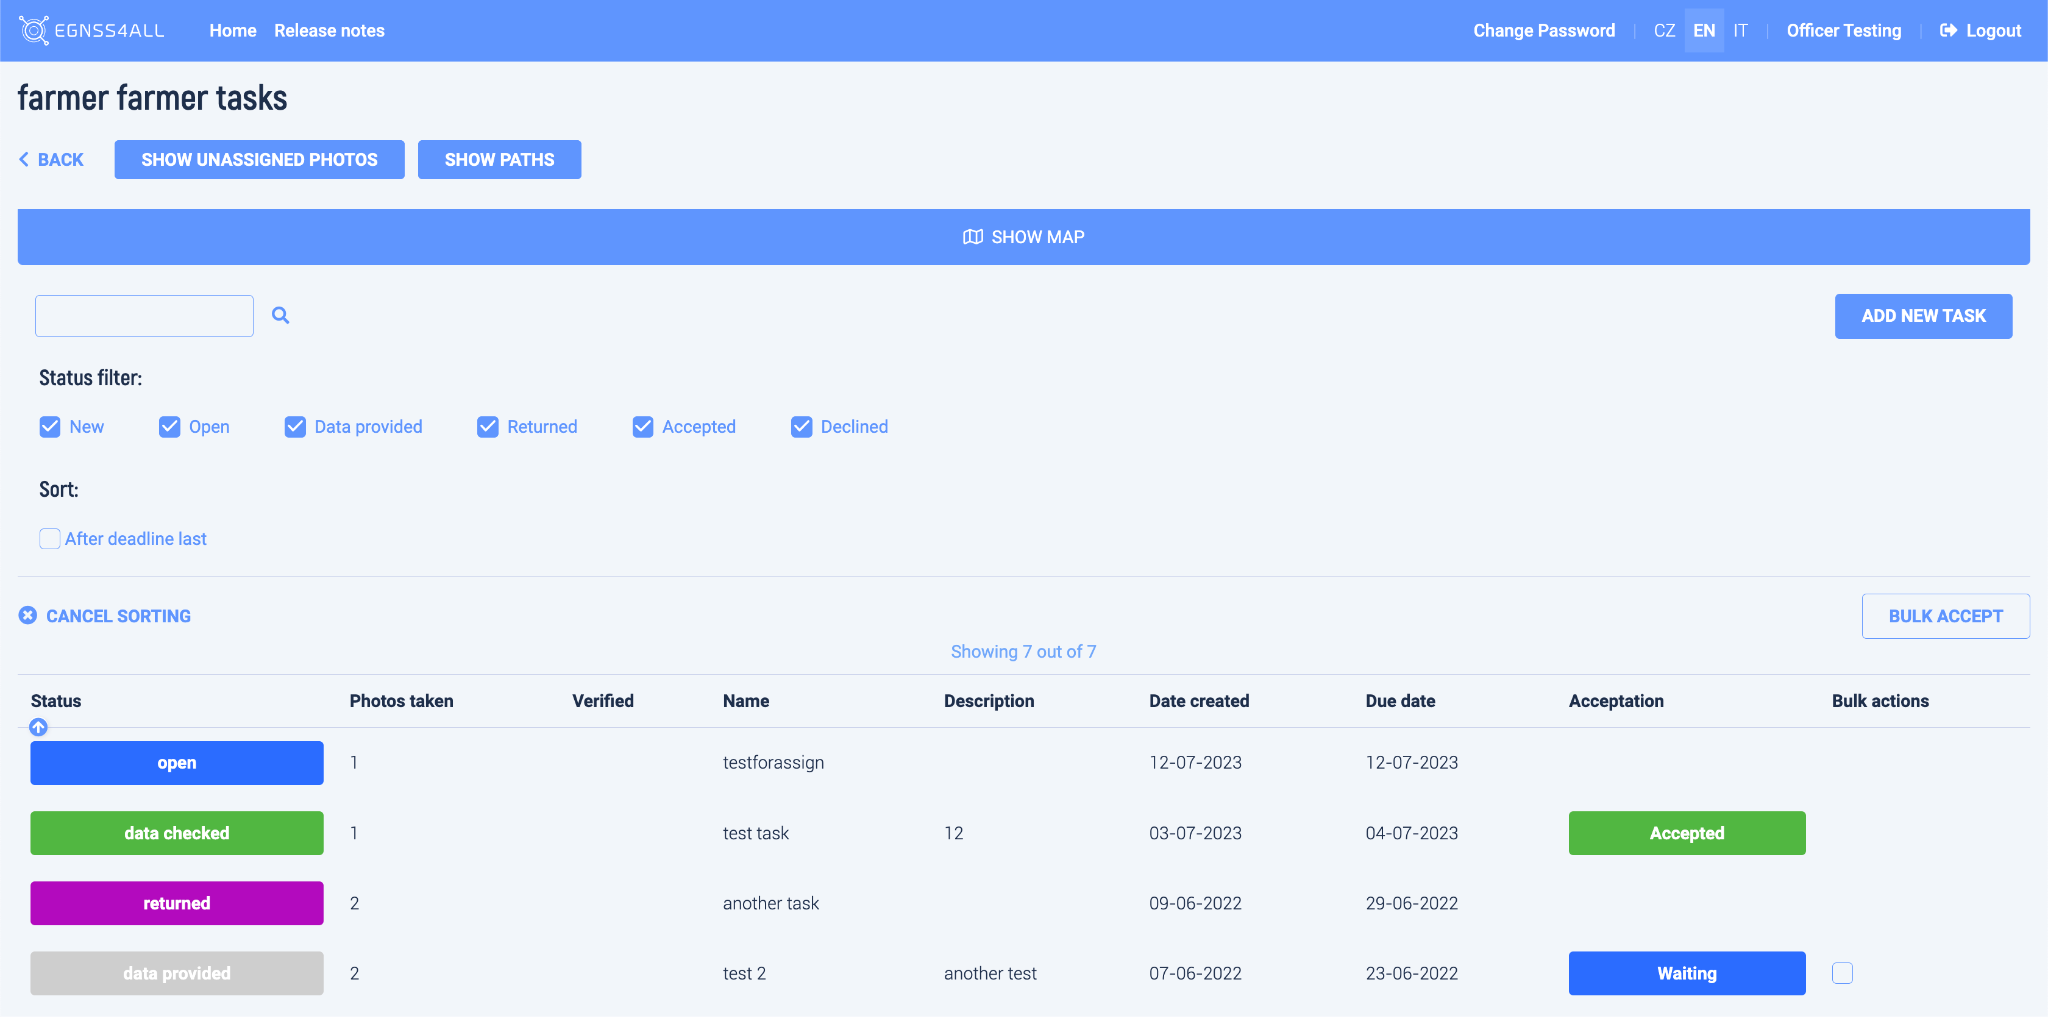
Filters - Status: New · Open · Data provided · Returned - Acceptance: Accepted · Declined
Sort & actions - Sort by: After deadline last - Actions: Cancel sorting · Bulk accept
Columns - Status · Photos Taken · Verified · Name · Description · Date created
Pagination - “Showing N out of Total” with page numbers
Status vs Acceptance
- Status controls the task’s workflow stage (New, Open, Returned, Data provided, …).
- Acceptance records the review outcome (Accepted/Declined) and is filtered independently of Status.
Tasks#
Task List#
The bottom part shows the assigned tasks, which can be sorted, filtered, and searched.
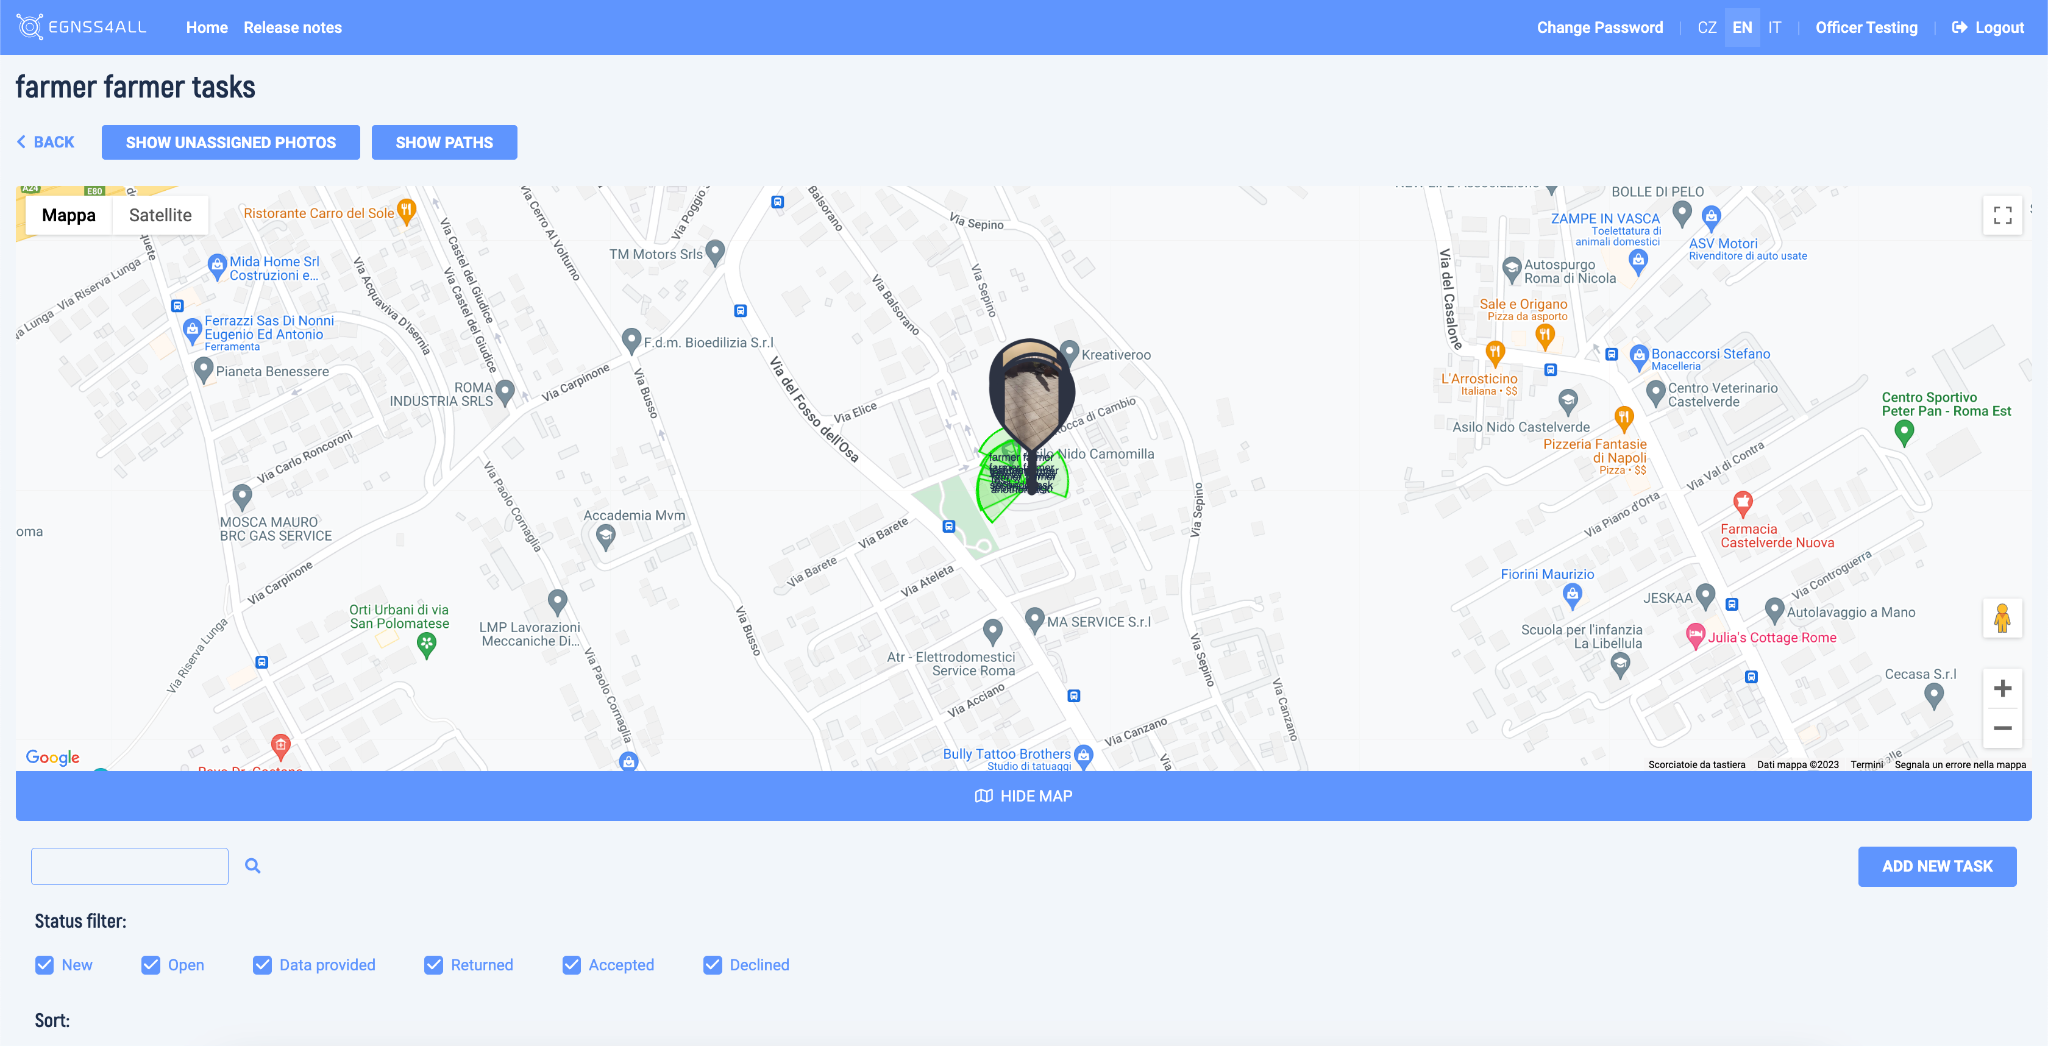
In the top part, points representing individual tasks are displayed on the map.
The map is shown by default.
Task Status#
Tasks can be set in the following states, which also determine their editability:
Open task detail (click a row in the list)
Filter tasks — by status (click a status chip)
Sort tasks — by column header or by completion date (“Passed to the end”)
Unassigned photos
Paths — browse the map and open task detail by clicking a point
Task Detail page#
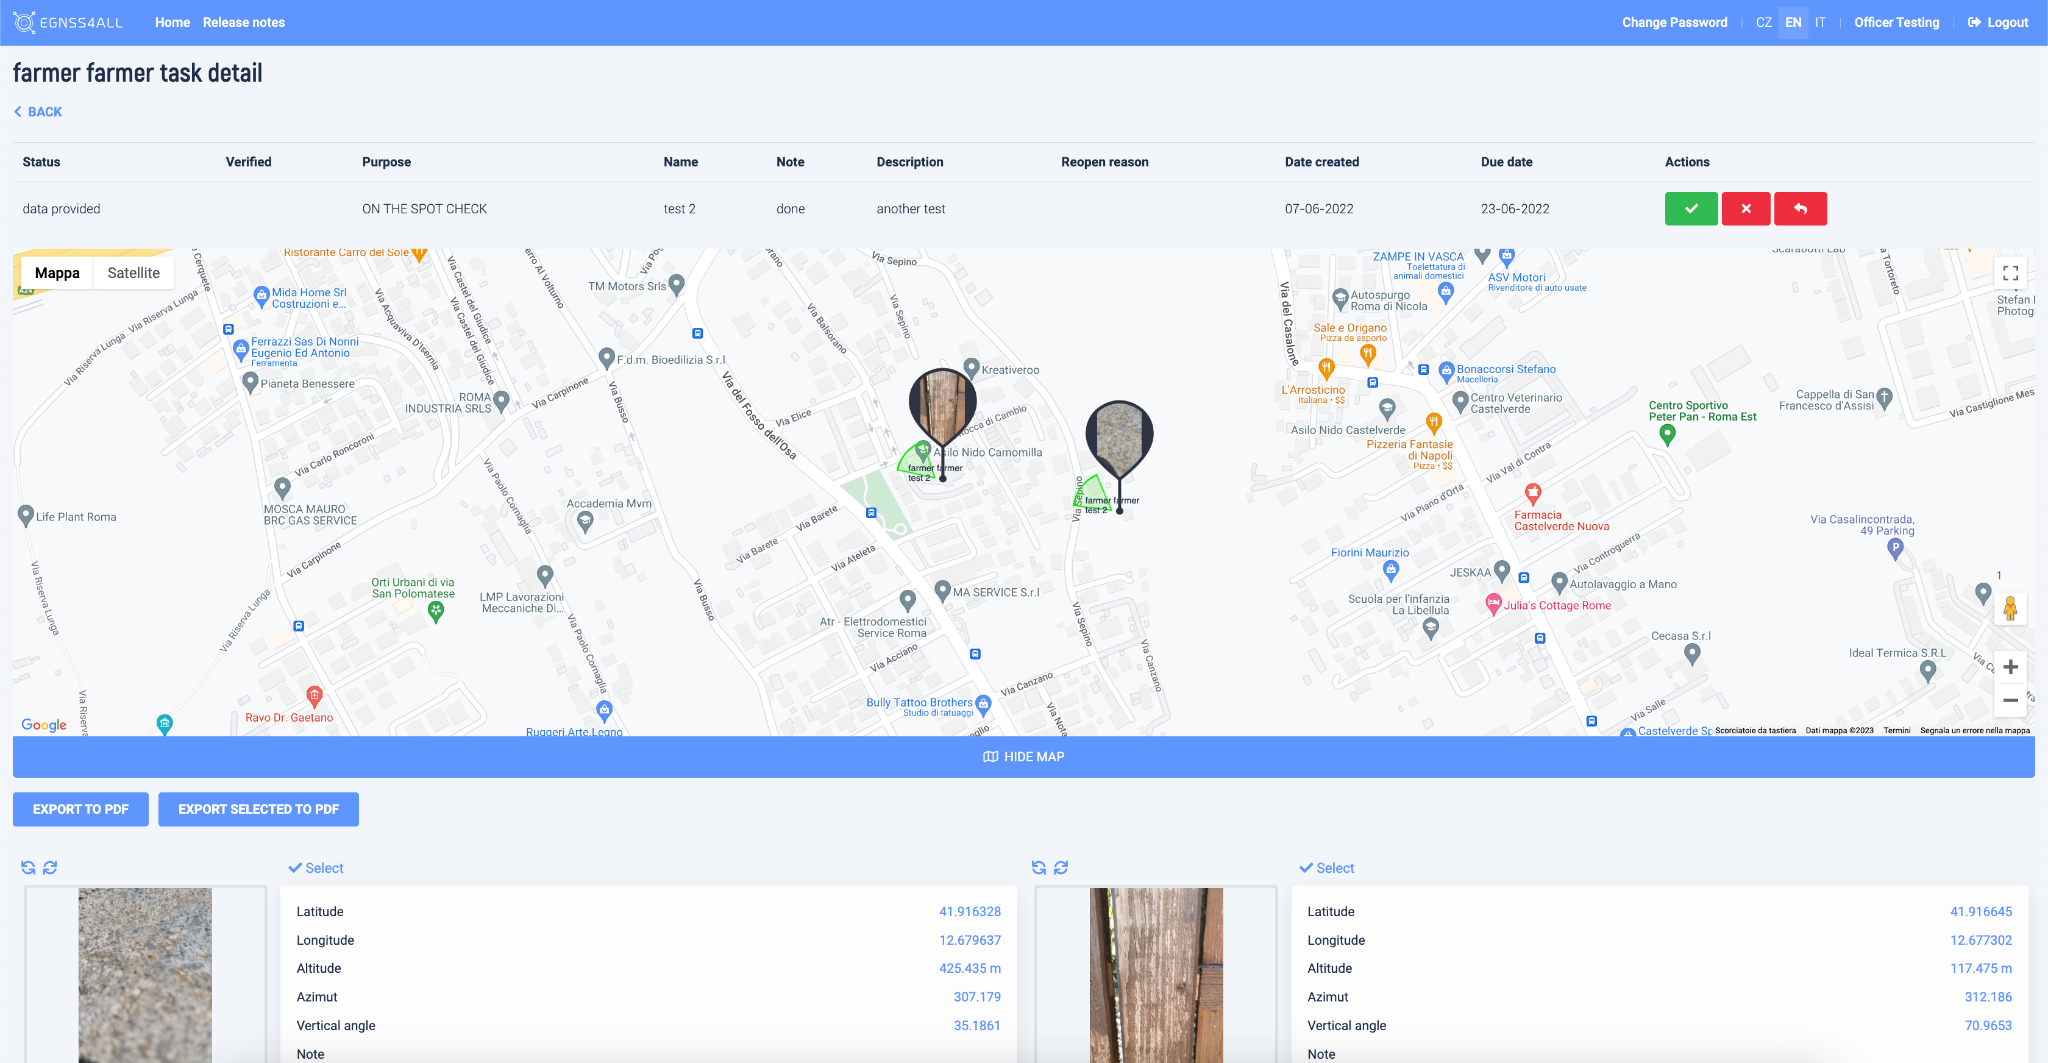
This page contains detailed information about the task, as well as photos that were taken for the task.
The map shows the position of the photos, the viewing radius of the camera, and the direction of the photo.
Rotate photos — use the on-screen rotation buttons
Open the Photo Gallery — click a photo; a table with source data is shown next to each image.
Export to PDF — select photos for export
Task List (Mobile)#
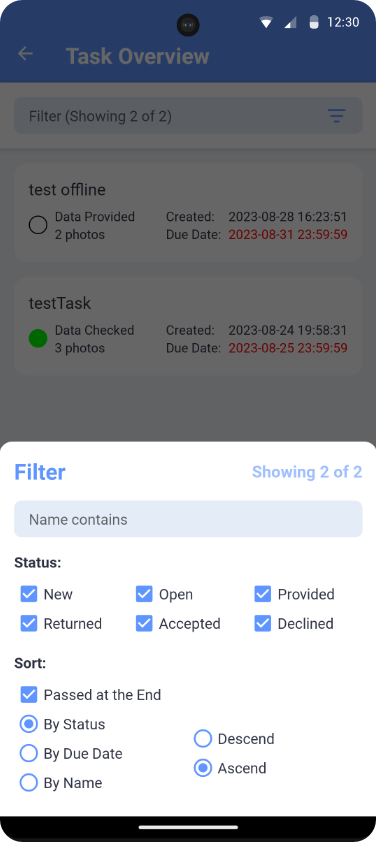
In the mobile task overview, user tasks are listed by name, status, number of captured images, creation date, and due date. Tapping a task opens details with edit options.
The Filter bar (top) restricts by task name and status, and controls sorting.
When Expired is selected, items split into two groups (due date passed or not). The expired group (due date shown in red) appears at the end.
Filter settings are retained after the app is closed. To keep tasks current, start synchronization manually.
Task statuses and editability (mobile)
Status & Transitions#
Actions (web console) and their effects
| Current status | Action | Resulting status | Acceptance | Who |
|---|---|---|---|---|
| data provided | Approve | data confirmed (approved) | Approved | Administrator |
| data provided | Reject | data checked (rejected) | Rejected | Administrator |
| data provided | Return to user | returned | — | Administrator |
| open | Move to “data provided” | data provided | — | Administrator |
| new | Delete | — (task removed) | — | Administrator |
UML state diagram (colors match the mobile status table)
stateDiagram-v2
    %% States and flows
    [*] --> New
    New --> Open: user views task
    Open --> Data_Provided: Move to "data provided"\n(admin)
    Data_Provided --> Data_Confirmed: Approve (admin)
    Data_Provided --> Data_Checked_Rejected: Reject (admin)
    Data_Provided --> Returned: Return to user (admin)
    Returned --> Open: user updates & resubmits
    New --> [*]: Delete (admin)
    Data_Confirmed --> Closed: Close
    Data_Checked_Rejected --> Closed: Close

    %% Friendly labels
    state "New" as New
    state "Open" as Open
    state "Returned" as Returned
    state "Data provided" as Data_Provided
    state "Data confirmed (approved)" as Data_Confirmed
    state "Data checked (rejected)" as Data_Checked_Rejected
    state "Closed" as Closed

    %% Color classes to match mobile status palette
    classDef new fill:#2196F3,stroke:#0D47A1,color:#FFFFFF;        %% blue
    classDef open fill:#42A5F5,stroke:#0D47A1,color:#FFFFFF;       %% lighter blue
    classDef returned fill:#FFB300,stroke:#E65100,color:#111111;   %% amber
    classDef provided fill:#7E57C2,stroke:#4527A0,color:#FFFFFF;   %% purple
    classDef confirmed fill:#43A047,stroke:#1B5E20,color:#FFFFFF;  %% green (approved)
    classDef rejected fill:#E53935,stroke:#B71C1C,color:#FFFFFF;   %% red (rejected)
    classDef closed fill:#9E9E9E,stroke:#616161,color:#111111;     %% grey (closed)

    %% Assign classes
    class New new
    class Open open
    class Returned returned
    class Data_Provided provided
    class Data_Confirmed confirmed
    class Data_Checked_Rejected rejected
    class Closed closed
Terminology & Roles#
- Inspector — Mobile app user capturing photos and completing tasks.
- Administrator (Manager) — Web console user who creates/assigns tasks and performs approvals.
- Super-administrator — Manages agencies and officers (no standard app access).
- Approving Authority (AA) — The body that reviews, approves, returns, or rejects tasks.


